OUR PATIO TRANSFORMATION

Who knew gardens would prove to be so important in the year 2021. They have become our escapism to the turmoil of 2020/21 and a space for us to feel safe away from the chaos of the pandemic. I know we are incredibly lucky to have a garden, and it’s something we never take for granted.

This week we are back on the renovation bus, now focusing on getting our garden transformed ready for some fun in the sun.

When we did the major house renovation works we decided to prep the patio for the future so that the space was safe and usable for our toddler for the forthcoming year, whilst we saved for the next phase.

We built a retaining wall, added two steps up to the newly laid lawn, prepped the drainage channels and put down copious amounts of cement so we weren’t constantly walking mud into the house, whilst also prepping the base for the next phase. THIS PHASE.

BEFORE

PATIO .jpg
PATIO BEFORE .jpg
PATIO BEFORE 2.jpg

We have decided to take the porcelain tiles all the way around the side of the house and up to the side gates which is approx 92 sqm of patio of cover. As you can see from the before pictures, we didn’t quite prep the entire side return and stopped short just before the back door - which means, you guessed it… more concrete!

It’s also given us the nudge to finally change our water pipe which was something we had been meaning to do to increase the water pressure to the house. 20mm Blue poly pipes are the building standard, but as our house was a 1930’s we had the original lead pipe. By changing it now, it means we shouldn’t have to dig up the tiles in the future and ultimately we’re future proofing us.

THE PATIO TILES

Because our house render is painted white and the windows, doors and fascias are all in black at the back of the house, I wanted something monochrome to suit the style of the house. We also have painted black fences down the sides so I chose to opt for a light grey rather than a more neutral looking tile.

I also wanted tiles which were easy to maintain, ie easily jet washed year in and year out and that would last the time and wouldn’t need to be replaced for at least another 10+ years.

I looked at the CTD outdoor tiles as we had used their marble effect tiles in our bathroom renovation, and saw that CTD had a huge range of internal and external tiles which you can see here for inspiration and ideas.

I chose the Burlington Silver Outdoor porcelain Tile from CTD which are 900x600x20mm. I wanted a bigger tile as the patio space to cover is 92sq meters, so it made sense to go for something bigger and have less grout lines to fill with dirt and at almost a meter wide these tiles were just what I was looking for.

I chose the Burlington Silver Outdoor porcelain Tile from CTD which are 900x600x20mm.

I chose the Burlington Silver Outdoor porcelain Tile from CTD which are 900x600x20mm.

These Burlington Silver Outdoor Tile from CTD have the characteristics of aged slate with a riven texture, and are also slip resistant and easy to maintain. As the Burlington Silver Outdoor Tile is inspired by natural looking stones, it has shade variations on each tile for a beautifully realistic slate look, but with having the ease of porcelain to keep them clean.


THE PROCESS

Laying the tiles was pretty straight forward as the concrete base was already prepped in 80% of the patio, and the later could be done once we replaced our water pipe. The tiles were laid on a mixture of sand and cement, and once dried they were grouted with ProPave Grout in colour Storm Grey, which I bought from CTD tiles.

We used ProPave Grout in colour Storm grey which I bought from CTD tiles.

We used ProPave Grout in colour Storm grey which I bought from CTD tiles.

AFTER

We K Rendered the brick retaining wall, then painted it in a Farrow and Ball masonry paint in the colour : Purbeck stone. We also used the same CTD Burlington tiles to make steps up onto our lawn, by cutting them down to size.

We added two types of drains, one larger which leads to our soakaway which is located under our lawn, and the second by the house which is a slot drain which leads to our rain water drainage. It’s important to think about drainage when you’re doing your patio as you ideally want water to drain away from your house- especially if your external flooring is level with your house.

The Burlington Silver Outdoor porcelain Tile from CTD which are 900x600x20mm.

The Burlington Silver Outdoor porcelain Tile from CTD which are 900x600x20mm.

We also bought some external outside wall lights which were from a local lighting shop.

The Burlington Silver Outdoor porcelain Tile from CTD which are 900x600x20mm.

The Burlington Silver Outdoor porcelain Tile from CTD which are 900x600x20mm.

I chose the Burlington Silver Outdoor porcelain Tile from CTD which are 900x600x20mm.

Then to accessorise the new patio we got some planters from Getpotted where I planted some olive trees, ivy and grasses to add texture to our patio.

The Burlington Silver Outdoor porcelain Tile from CTD which are 900x600x20mm.

The Burlington Silver Outdoor porcelain Tile from CTD which are 900x600x20mm.

We wanted to add an outside kitchen, but decided to wait until next year now. But have added the electricity in so we’re ready to add an outside fridge if we want too.

We’ve also added storage units down the side of the house to house all the outside cushions and gardening equipment until we build a bigger shed down the bottom of our garden.

The most commonly asked questions that I get asked on instagram about our tiles are '“ Do they get slippery when wet? “ . I can confirm that they don’t get slippery when wet. Having the textured surface and being R11 rated makes them ideal for external use in wet conditions.

Another question I get asked a lot is “Do they get hot in the sunshine”. I think Porcelain can get hot, So if your surface is in an area that gets a lot of direct sunlight- ie south facing, then choose a lighter colour tile to avoid burnt feet as the the darker tiles absorb the heat more than the lighter. This is why we went for these silver grey porcelain tiles.

Overall we’re delighted with our new patio, it’s made a huge difference to how we use this outside space as a family and it happened just in time for the summer which was an even bigger win in our eyes.

For more information or help with choosing your outside tiles, you can visit CTD Outdoor tile guide for more helpful hints and tips.

AD/ PR GIFT : This post is sponsored by CTD tiles. They have supplied me with gifted porcelain tiles in exchange for content. However, I wouldn’t write about anything that I didn’t love and wouldn’t want to recommend. I have paid for all works to be done including labour and extra materials such as drainage, sharps sand and cement and concrete.

HOW WE ADDED A REAL WORKING MARBLE FIREPLACE TO OUR 30'S HOME

AD/PR gift This blog post contains a fireplace which was kindly gifted by Stovax.

There’s something pretty special about marble. It’s timeless beauty makes it a design classic and it’s durable material means it will stand the test of time forever.

I’ve always dreamt of having a marble fireplace in our next home, no matter what period the house was, I was pretty certain I could make it work in any style as marble is so versatile.

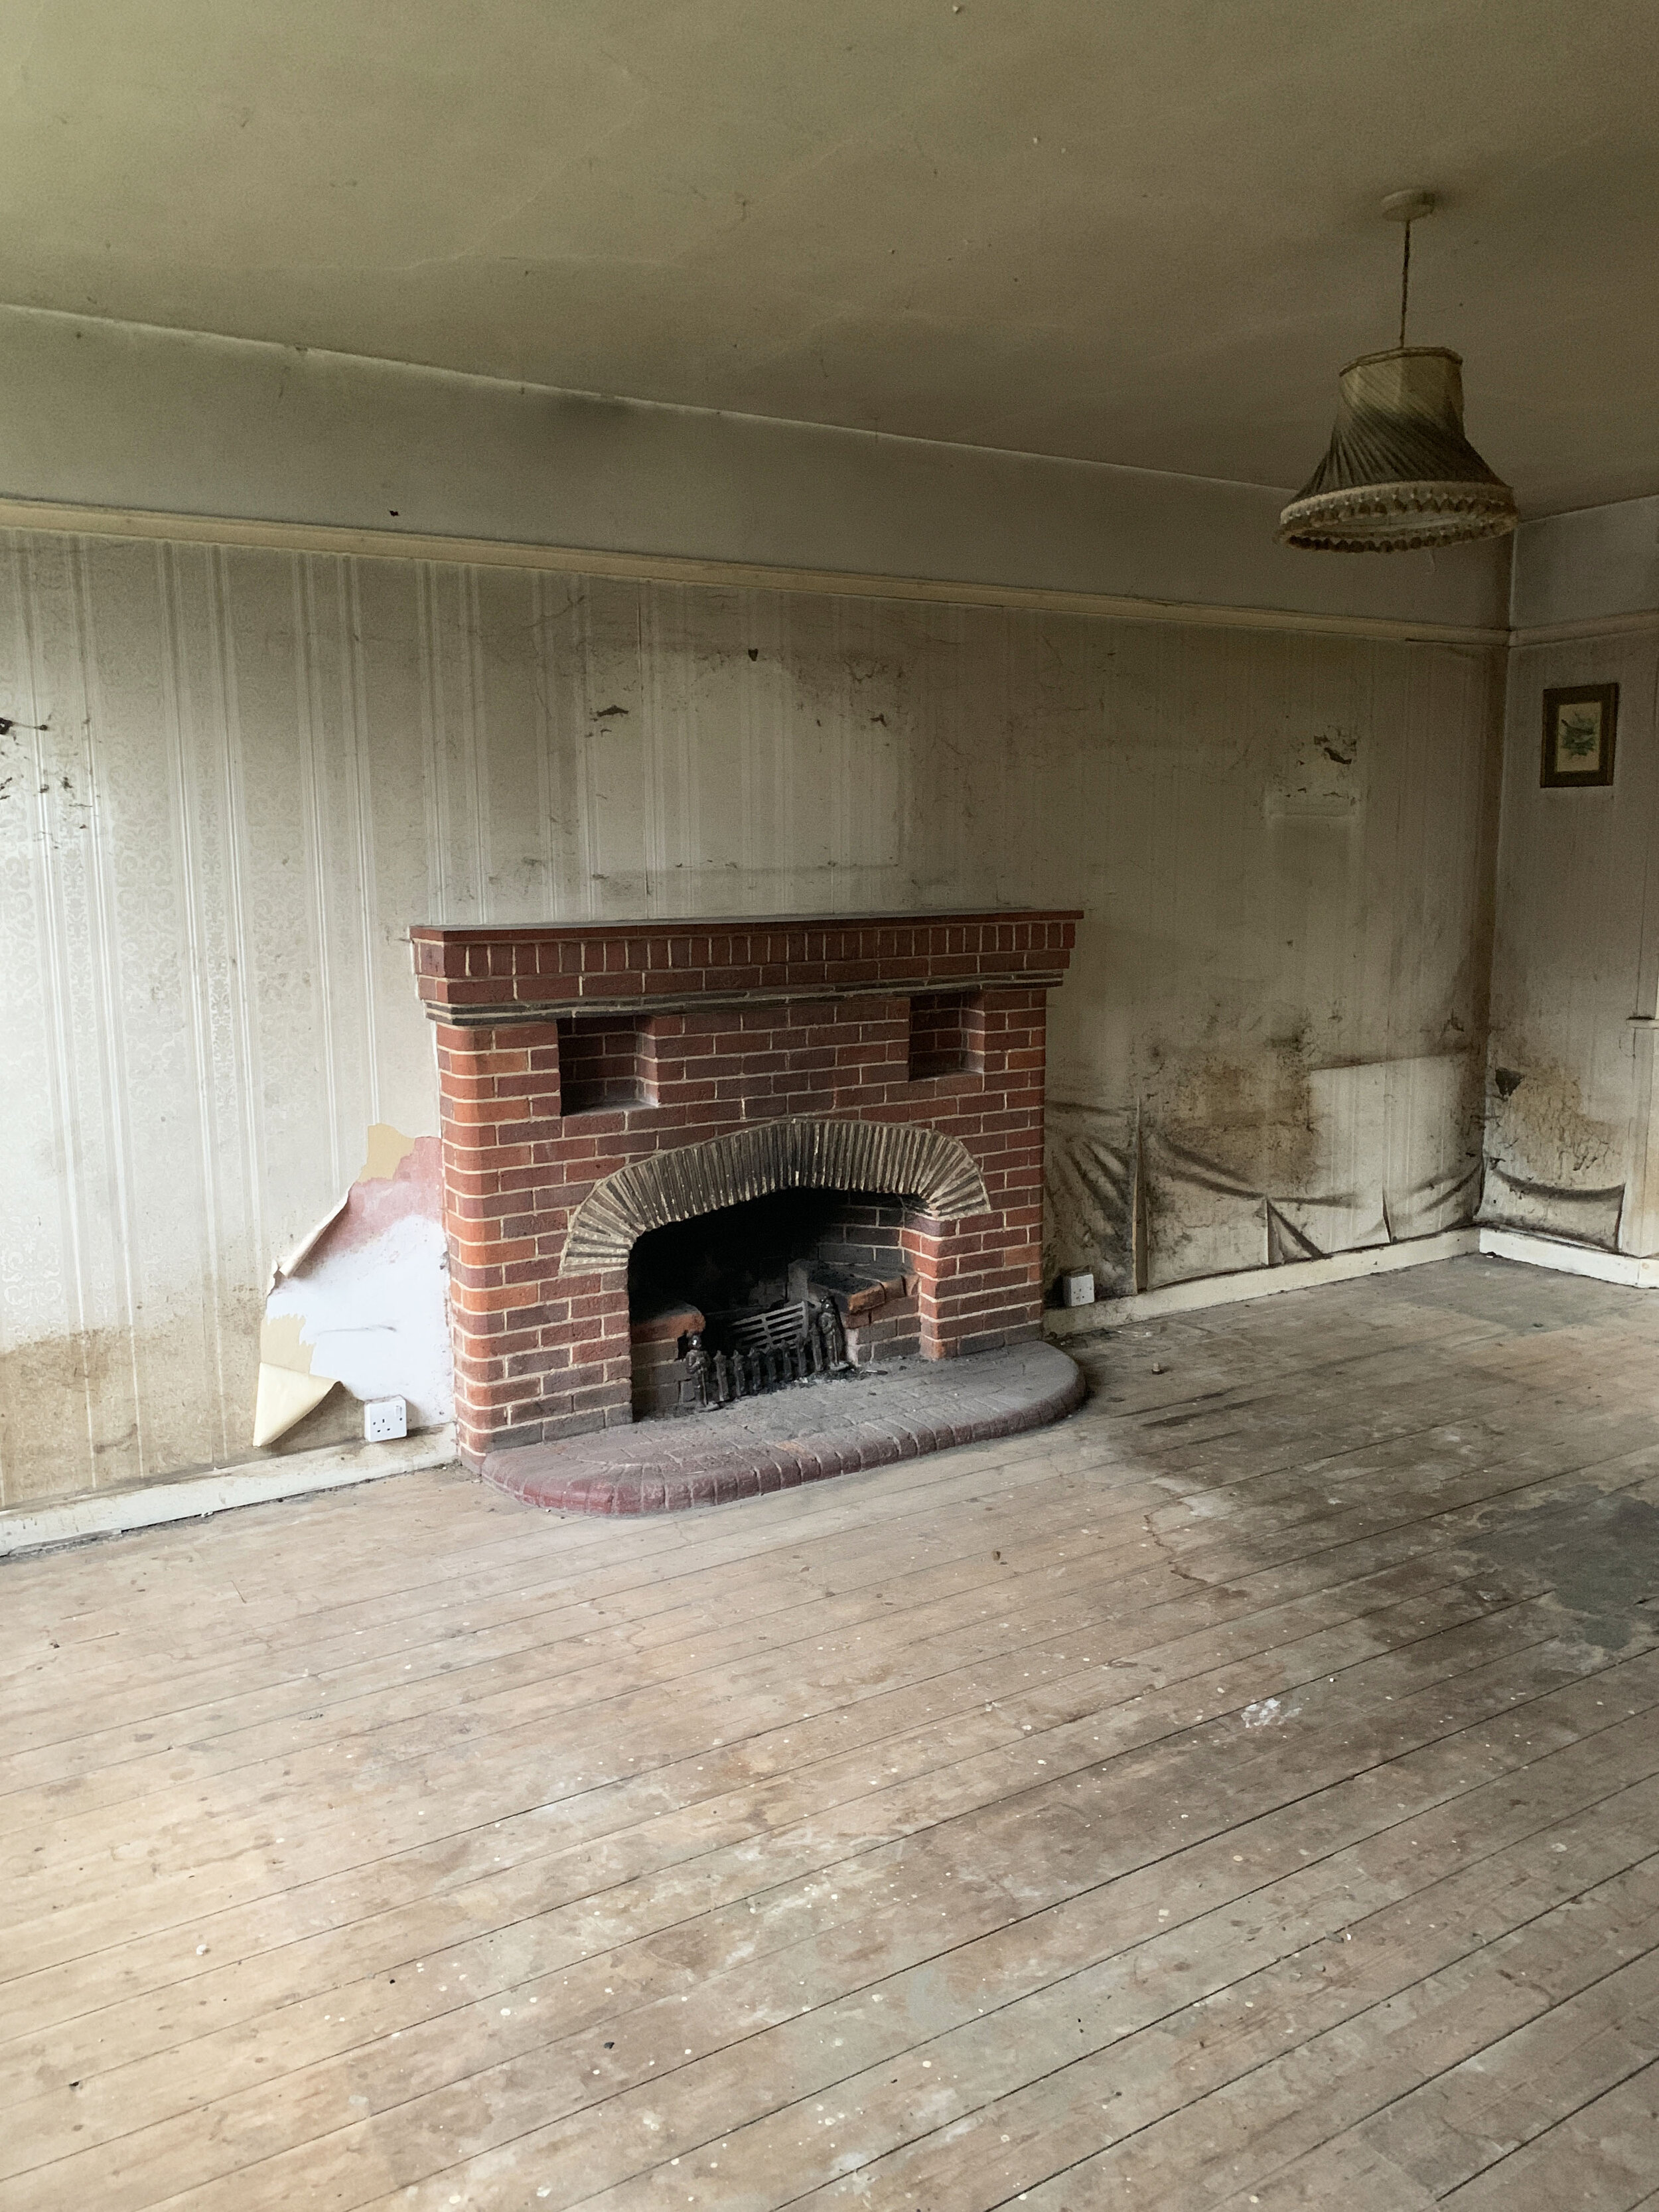
It turns out that the next house (which is our forever house) is a 1930’s and the original fireplaces were not as desirable and certainly needed an update. There was no marble, no beautiful cast iron, not even wooden mantles. Instead we bought a house with brick fireplaces which would look more at home in my local Red Lion pub. Yes, they were original but they were not to my taste. I’m all for retaining original character, but not if it jeopardises creating the home you want, and at the end of the day it’s you who has to live there and be happy.

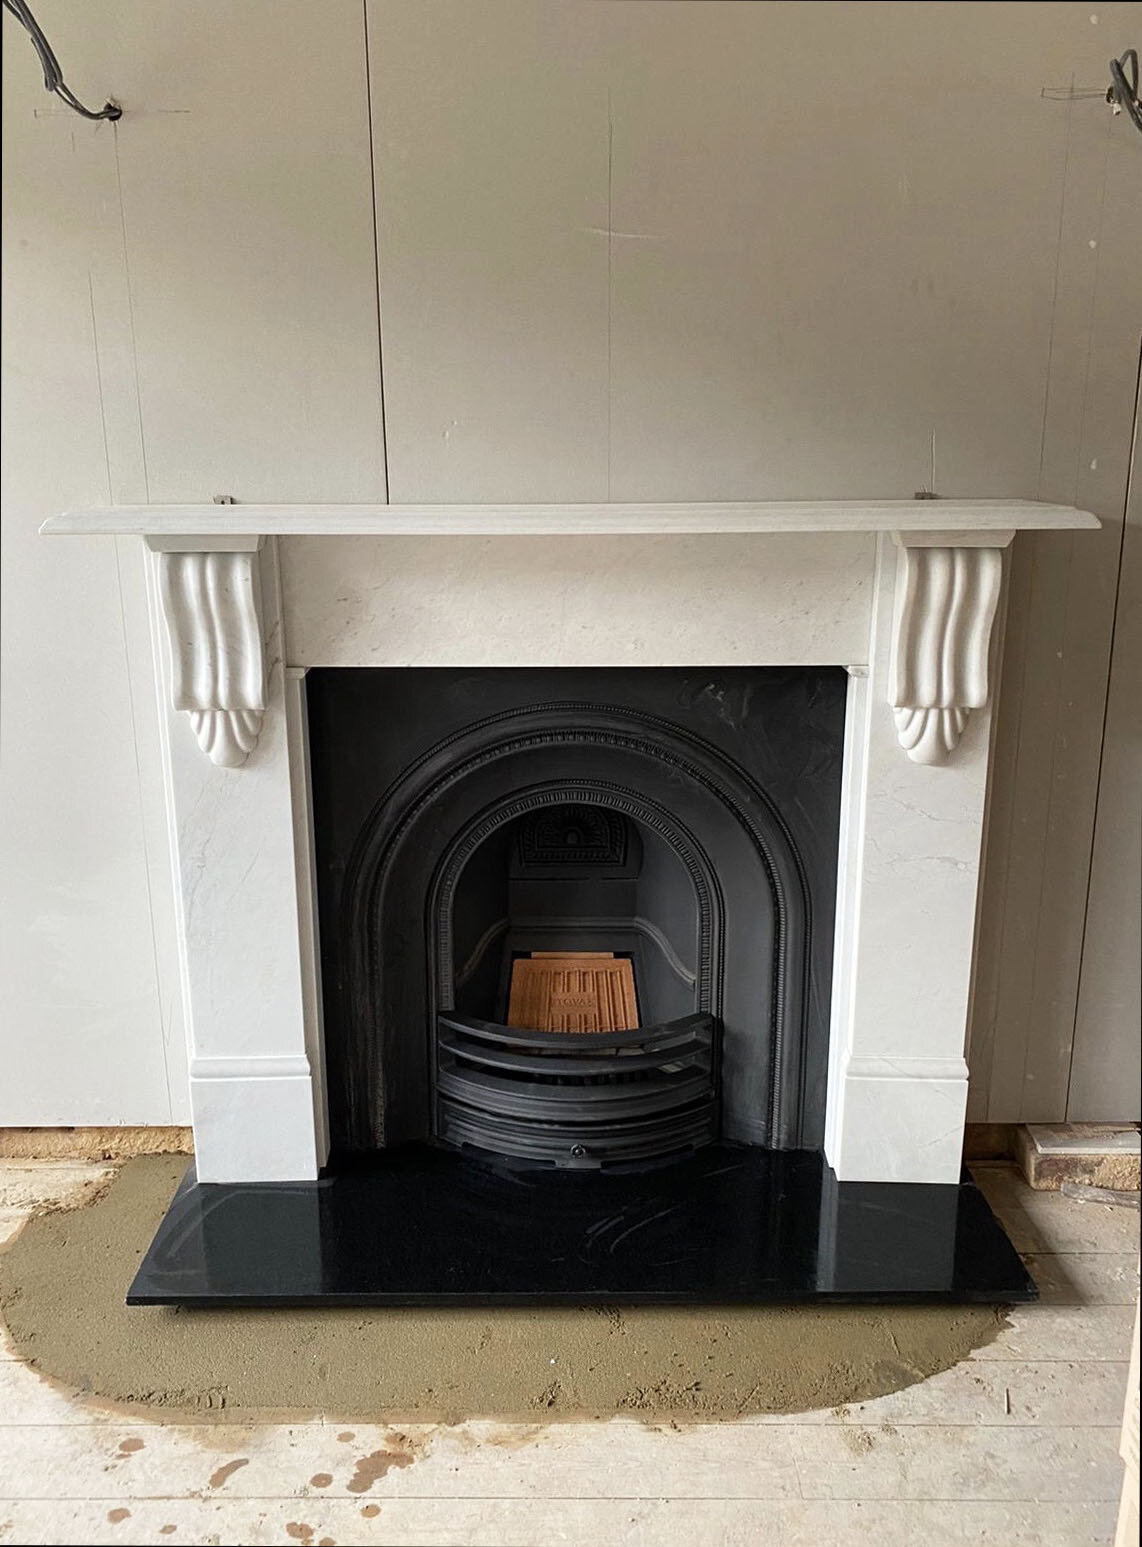
So, we made the decision that the main one in our lounge had to go. I had fallen in love with a Stovax Corbel Stone Mantel which I know should be more suited to a victorian property, but I don’t tend to stick to the rules when designing my home.

The veining and the corbel detail of the Stovax stone mantle was everything I had dreamt of. I opted for the Antique white marble, however it also came in a beautiful Natural Limestone which looked equally as beautiful.

I then chose a curved decorative cast iron fireplace which was also from Stovax to sit inside. It’s great that you can mix and match your cast iron inserts if buying from Stovax, or likewise choose to add a wood burner or gas fireplace instead of a working fire if you desire.

THE ORIGINAL FIREPLACE

The good thing about this fireplace was that it was a working fireplace with a perfectly good working chimney, which meant removing and replacing the old one wasn’t too much trouble. It was a 1930’s brick fireplace, but other than that I didn’t know much else about it other than the fact it looked like it had eyes and a mouth and was looking at me every-time I walked past which I couldn’t unsee.

The house was in a pretty disrepair state when we bought it, and the original fireplaces altho they were original gave me the heebie-jeebies.

The original brick 1930’s fireplace

The original brick 1930’s fireplace

The original brick 1930’s fireplace

The original brick 1930’s fireplace

THE FITTING

All the original plaster was due to be stripped back to the brick, so we set to work on doing this and removing all the bricks of the fireplace. We then added a new lintel to the wall to support the new height of the chimney as this insert was taller than the previous fireplace.

We also had the chimney swept which is really important to make sure theres nothing blocking the chimneys when firing them up. I’d always recommend getting an expert in to do this.

We then fitted new plaster board and laid the new hearth which was was laid on cement so it was firmly fixed to the floor where the existing hearth was.

The cast iron arched insert was then fitted on top of the hearth, and then the marble stone mantle was built around it.

The walls were then fully skimmed in plaster for a smooth finish, later adding wooden trim to create wall panels.

We decided to make a feature out of the new stone fireplace even more so by adding lights above the fireplace from Pooky lighting. We chose some ’Firefly’ Alabaster wall lights with brass trim to finish the look off and painted the walls in Bobbi from Graham and Brown.

Stovax Corbel Stone marble Mantel with the Stovax curved decorative cast iron fireplace as a new feature in our pink lounge.

Stovax Corbel Stone marble Mantel with the Stovax curved decorative cast iron fireplace as a new feature in our pink lounge.

THE HEARTH

fireplace .jpg

We wanted something simple in black, so we went to our local stone yard and asked if they had any off cuts. Luckily they had a piece of black engineered quartz similar size to what we wanted, so it cost us less than £50.

I’d always recommend checking with your local stone yards if they have any off cuts first as you might get a bargain.

Stovax Corbel Stone marble Mantel with the Stovax curved decorative cast iron fireplace as a new feature in our pink lounge.

Stovax Corbel Stone marble Mantel with the Stovax curved decorative cast iron fireplace as a new feature in our pink lounge.

And it was as simple as that. The fireplace is very heavy, so I would recommend having 2-3 people on hand to help move the stone pieces of the mantle.

We also added in skirting which looked like the original 1930’s. We got ours from Skirting World.

We absolutely love our new Stovax stone fireplace and it makes our lounge feel all pretty and cosy and was exactly how I had envisaged this room looking.

Now, roll on winter when we can fire it up.

If you have any questions or would like to see more of it in work then please leave a comment below, or contact me on my instagram Houselust.

OUR RENO JOURNEY: HOW WE'RE USING OUR TREX DECK

AD/ PR GIFT - * This post is sponsored by Trex who are very kindly collaborating with me on the transformation of my garden deck space by providing all materials and labour in exchange for promotional activity.

TREX ENHANCE DECKING IN CALM WATER

TREX ENHANCE DECKING IN CALM WATER

It’s only been almost a year since our gorgeous Trex decking was installed and a lot has changed since then.

We now have grass, more painted fences and some actual plants to dress our deck, not to mention a timber pergola over the top.

It feels like we’ve been waiting an eternity for this moment, but in fact it’s only been 372 days.. ha! It was exactly one year ago that this Trex deck started to be built and this kicked off the beginning of our garden renovation. You can see more of the beginning stage of the deck being built here.

TREX ENHANCE DECKING IN CALM WATER

TREX ENHANCE DECKING IN CALM WATER

There’s still a lot to do in terms of building a garden office, and laying a patio, not to mention the one row of fences which we still need to replace which are cleverly out of shot, but it’s getting there and when we look back a year ago its changed so much.

I still can’t believe it is ours if I’m honest, I’m having a real pinch me moment whilst sitting on our Trex deck , whilst looking back at the house.

One thing I’m super proud of is not just the house, but the fact that we actually got the garden sorted before moving in.

This decking has given us a calm space to come, sit and relax - albeit it keeps raining and we’re yet to have much of a summer but it still feels wonderful to be out here and know that it’s ours. It’s also created a safe space for our little boy to come outside and play and for us to watch him. Having the trees at the back, it feels lovely to feel like we’re surrounded by nature, and the Trex Deck blends in perfectly back here.

TREX ENHANCE DECKING IN CALM WATER

TREX ENHANCE DECKING IN CALM WATER

Let’s recap on what and who we used to do achieve it all…

Back in the summer of 2020 we reached out to Steve from Living Landscapes Design to come build us a Trex deck at the end of our garden.

First Steve created a timber substructure base which he applied Trex® Protect™ Beam and Joist Tape . The butyl tape protects the wooden substructure from moisture that can cause rot and loosen the screws – extending the life of our deck.

TREX ENHANCE DECKING IN CALM WATER

TREX ENHANCE DECKING IN CALM WATER

Because of the size of the deck, Steve laid it in a half sections, with boards going horizontal, with a central board laid in portrait to finish the cut edges.

You can read all about the fitting of the deck here in a previous blog post.

Because the fences are painted black, I absolutely love how the ‘Calm Water’ decking blends with our dark fences, and pops against the green grass and couldn’t be happier with how its all turned out!

Bring on the next phase of bbq’s and having people round to enjoy it, as life just seems to be opening up a little.

TREX ENHANCE DECKING IN CALM WATER

TREX ENHANCE DECKING IN CALM WATER

We chose the Trex colour ‘Calm Water’ from the Trex Enhance Naturals collection as it’s a beautiful grey textured composite decking which looks dark, sleek and modern and requires very little maintenance. Arbor deck stocks it here.

We absolutely love our composite deck and it’s super easy to clean and maintain. And the best thing about it, is it doesn’t require painting or staining year in. Just a quick wash and a bit of soap and water each year will bring the deck back up to its beautiful grey shade.

Have you considered a composite deck? I’d go for composite each time, now that we’ve had it.

COOKING ON INDUCTION

AD This post was sponsored by AEG. All thoughts and opinions are 100% my own. I would never recommend anything that I don’t love.

My name's Amanda and I’m an Induction convert. My background of cooking on gas came from my childhood influences of watching my Dad cook a curry on the hob or cook up a stir fry in a wok. It was only when I began planning my own kitchen design that I started researching the pros of induction cooking. The pros being that it’s so much easier to clean, it’s neater on top of the worktop, and that it’s eco-friendly being A+ Energy rated. It’s also safer with our toddler around as the heat touch never gets as hot as a gas hob would, and most importantly cooking on it is a dream.

Amanda Cotton at Houselust

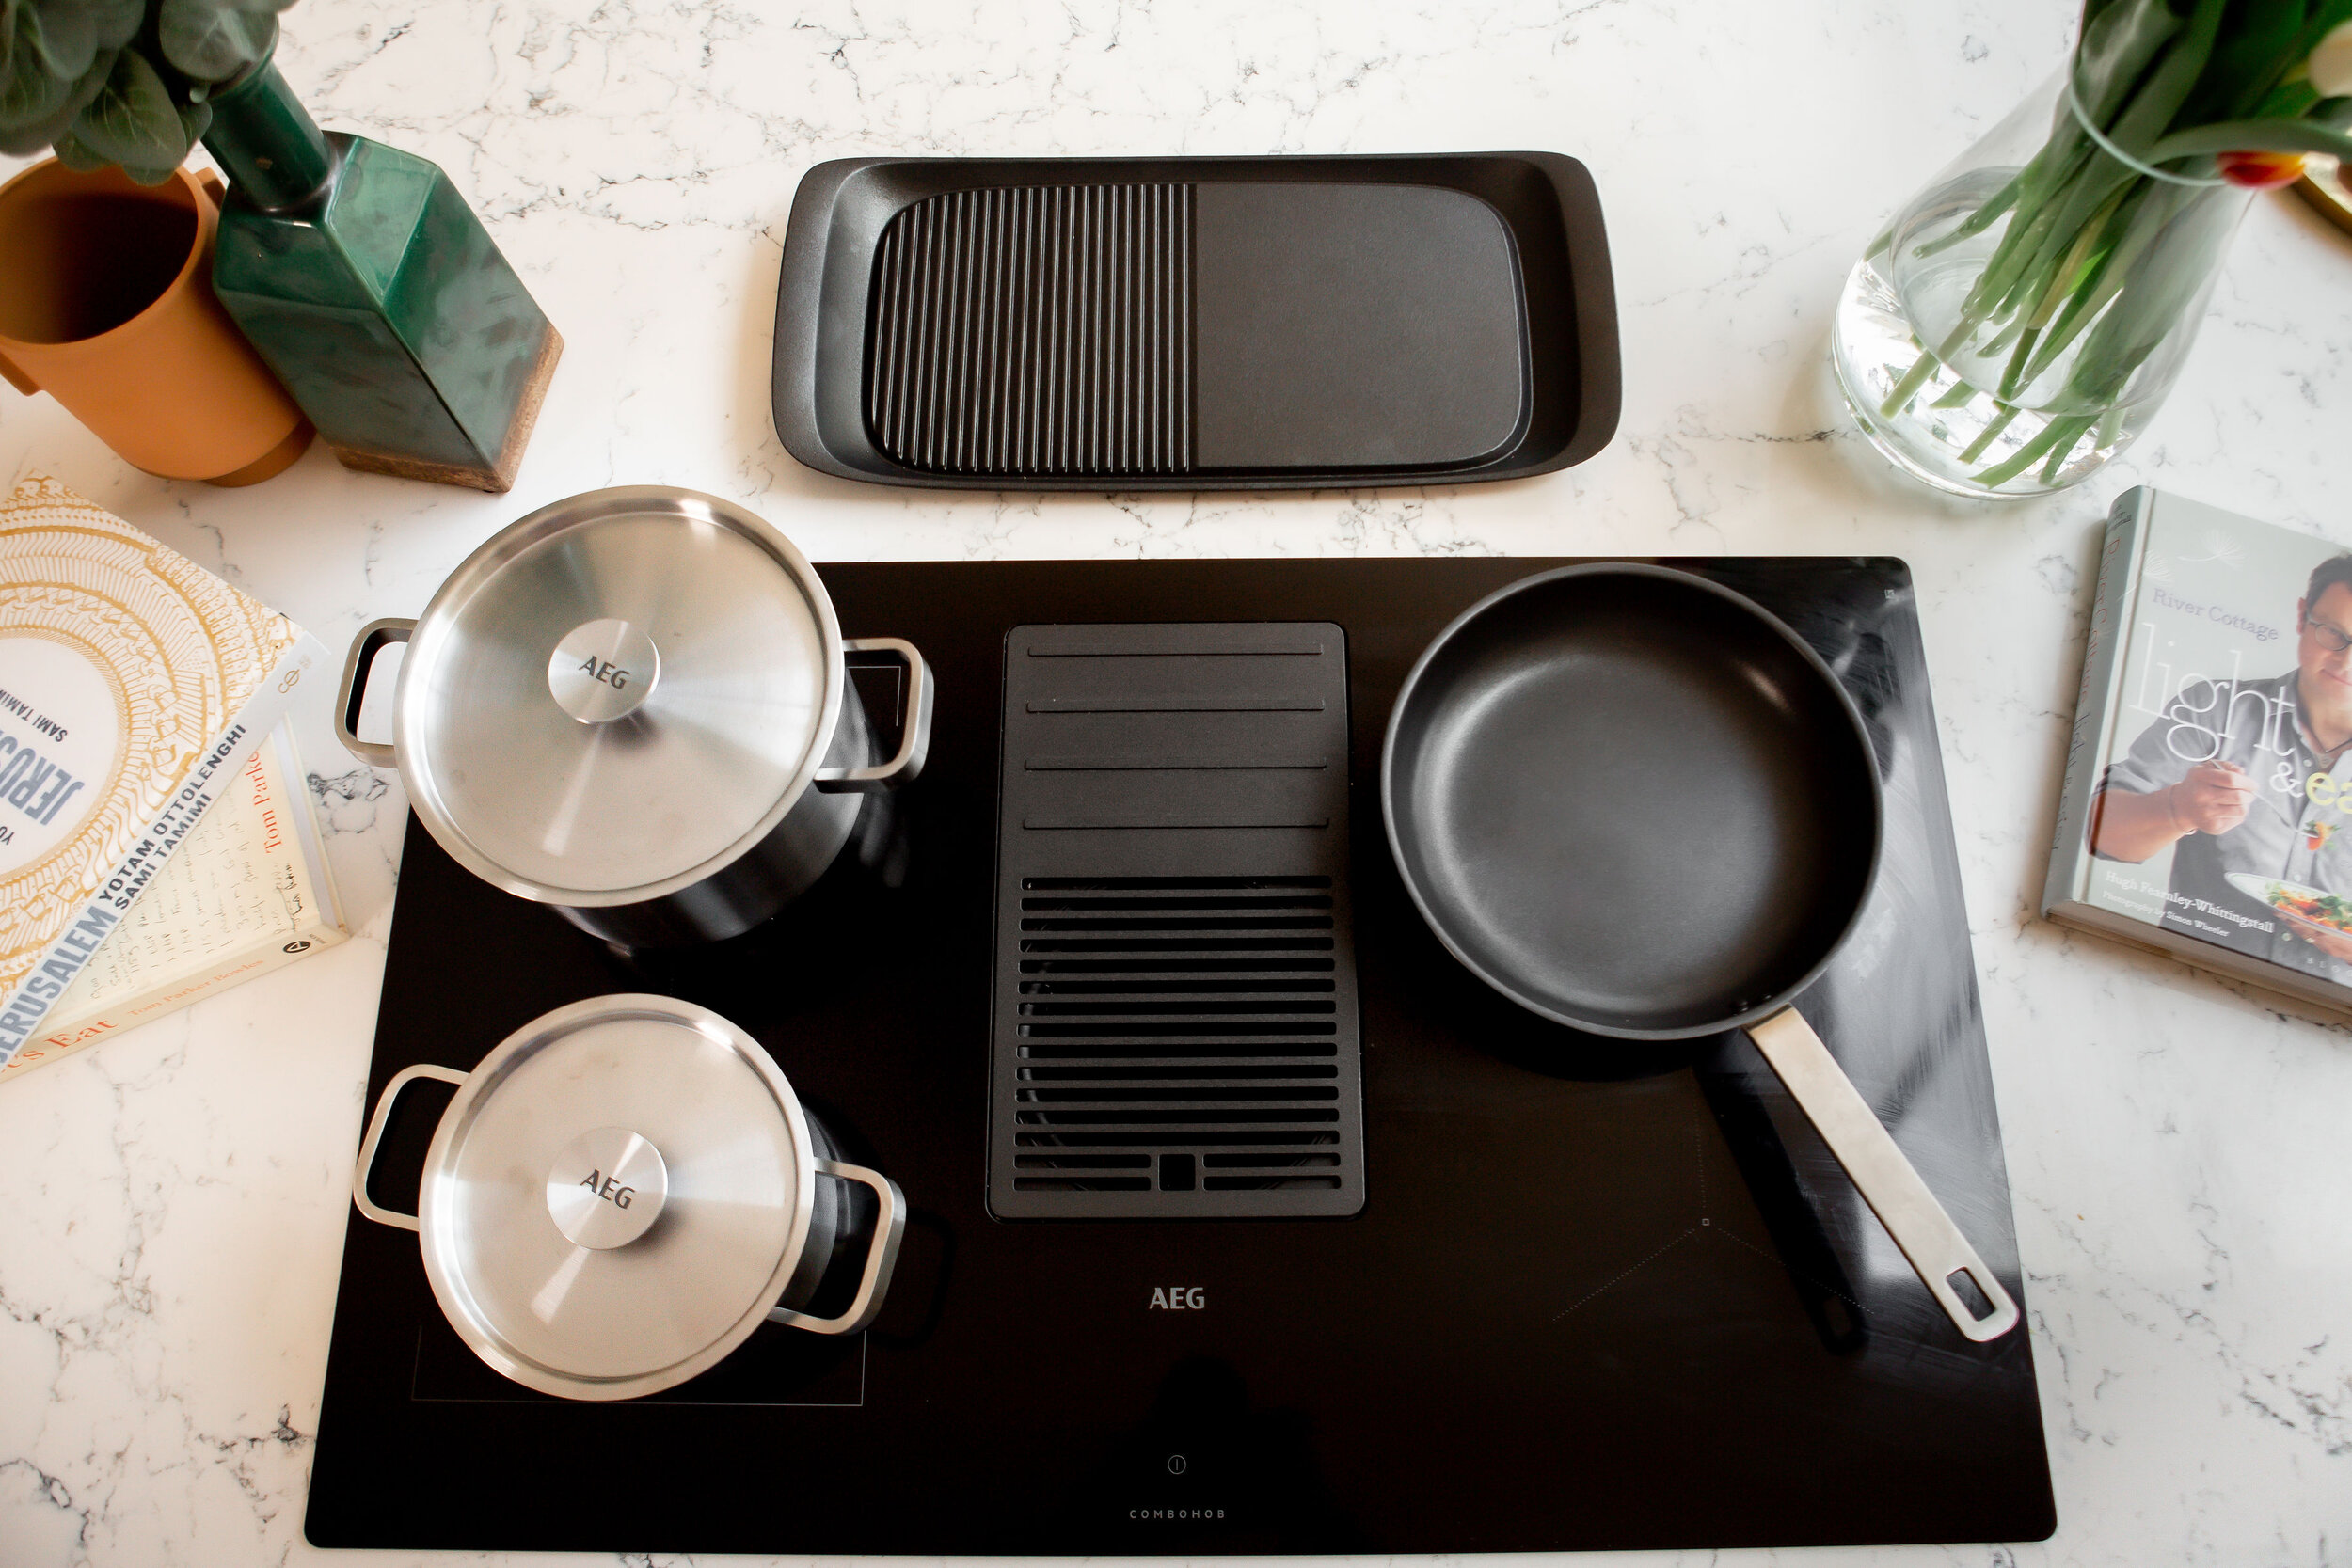
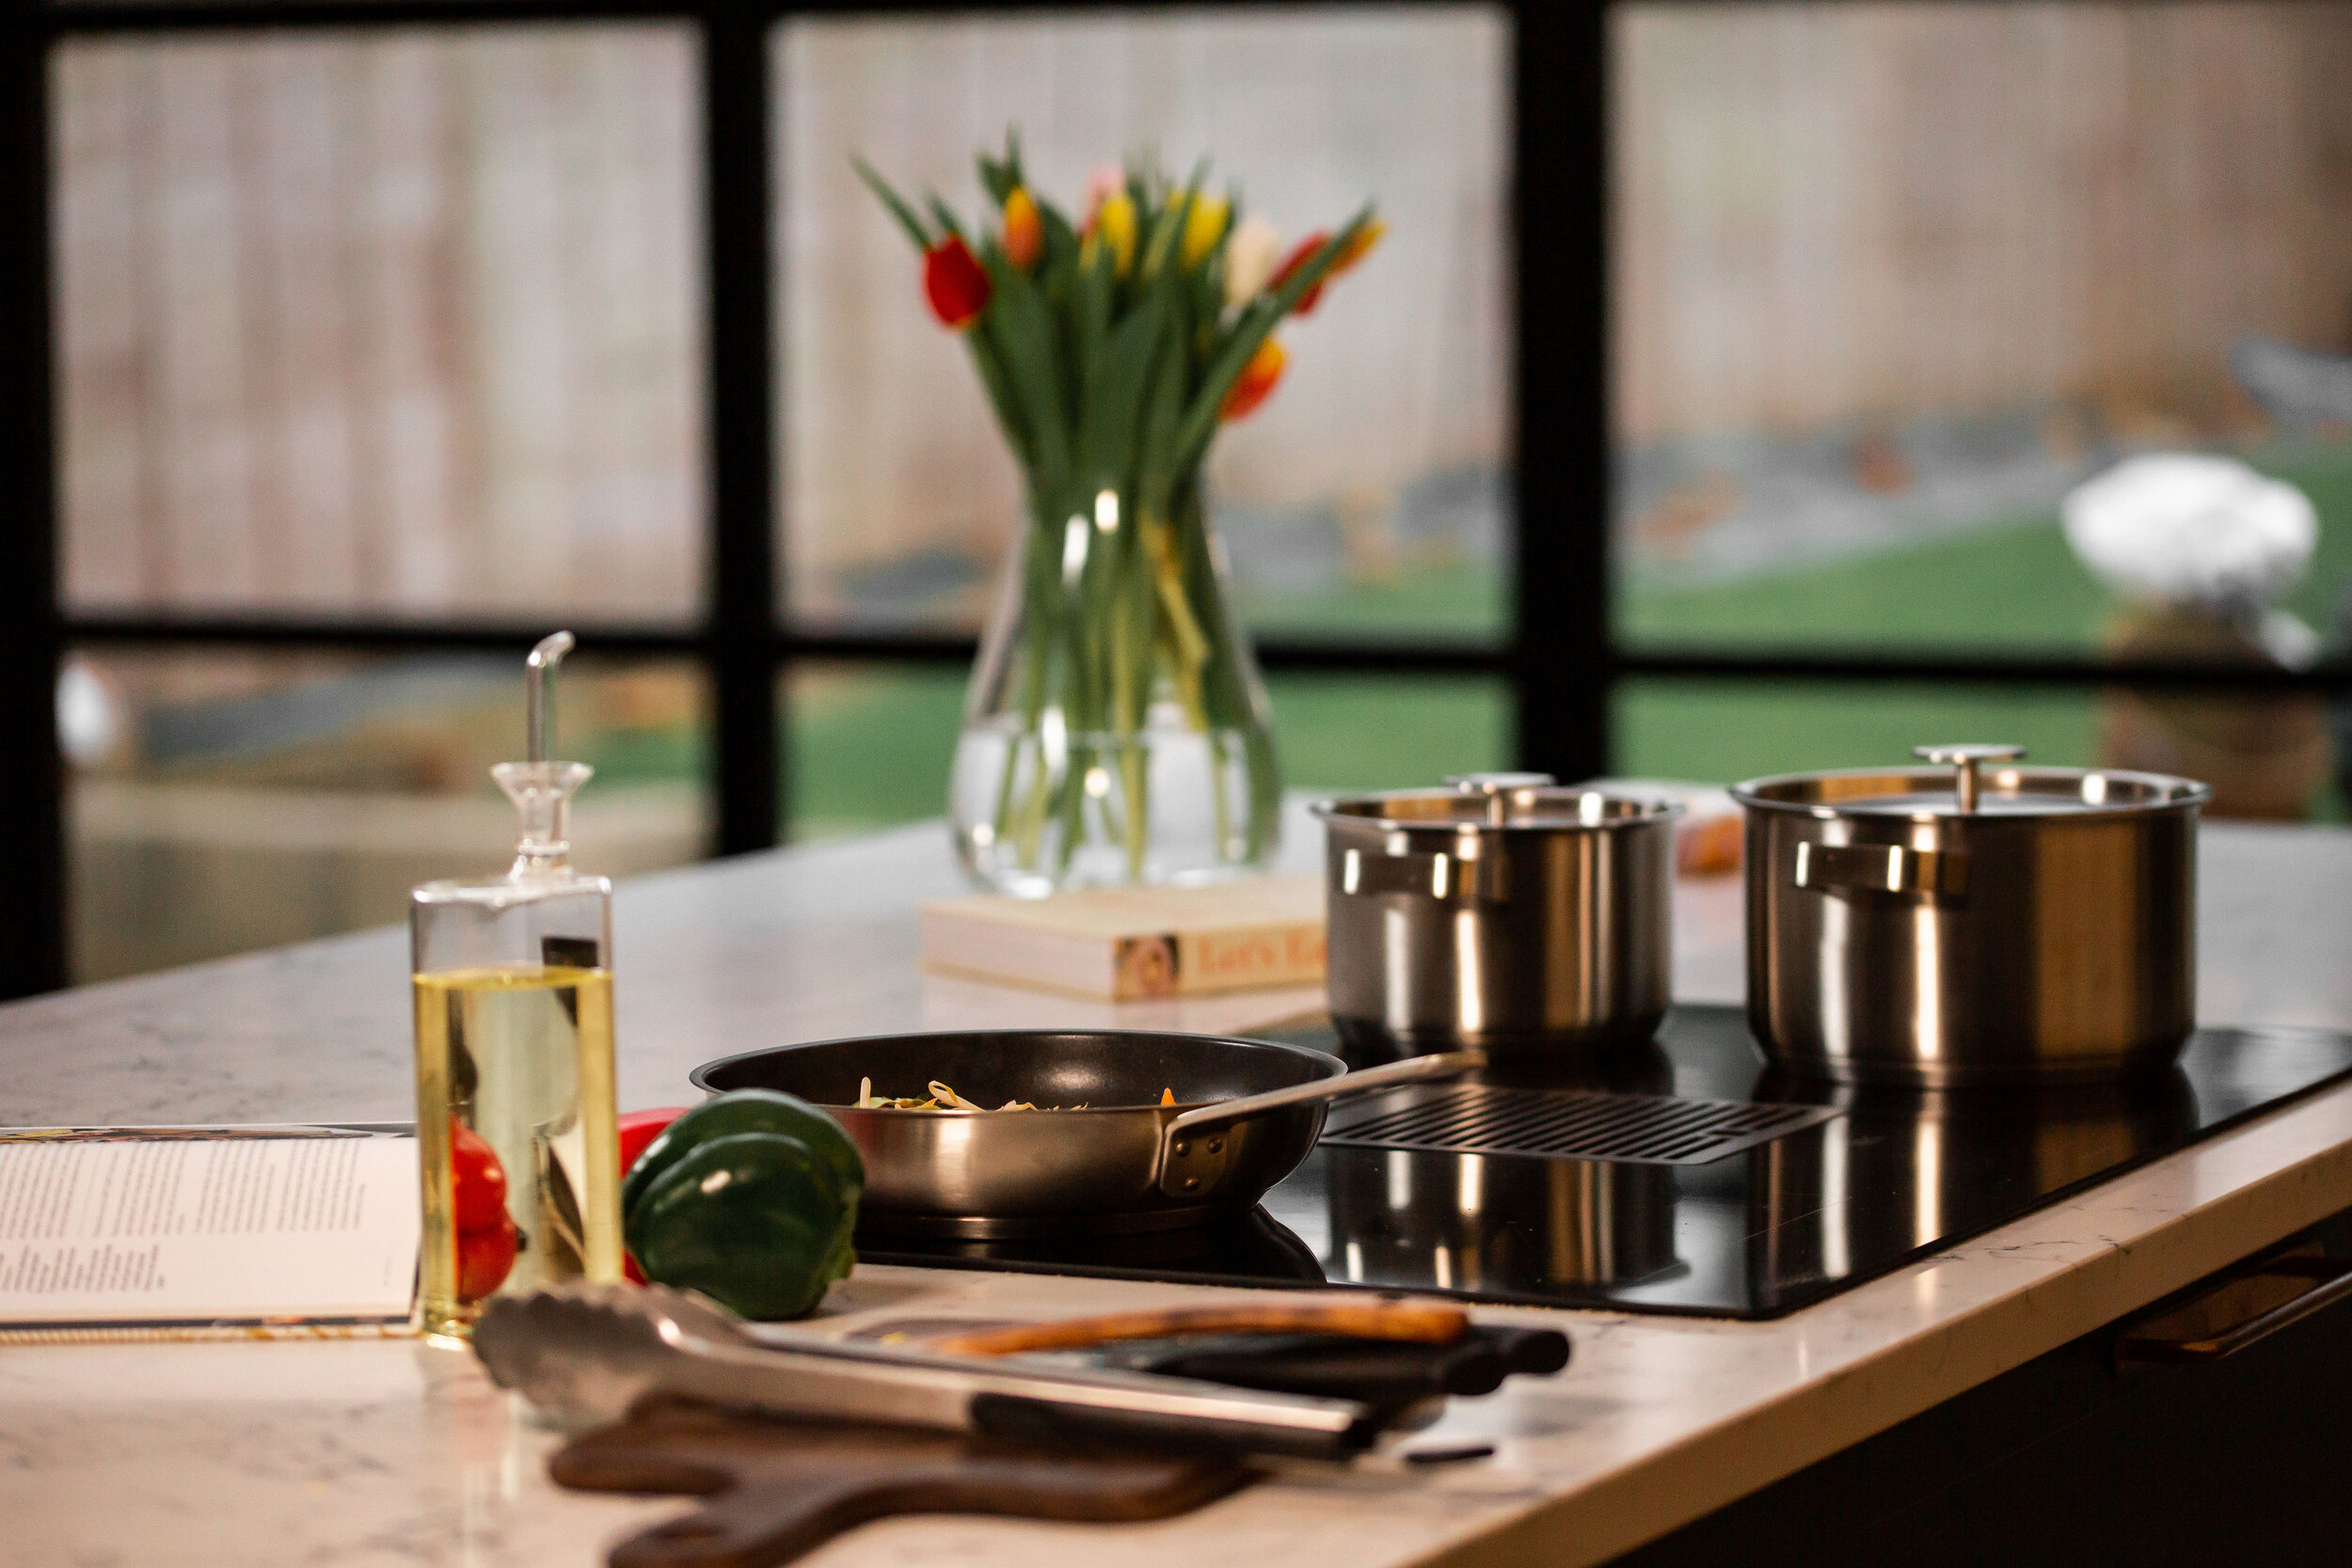
I opted for the AEG ComboHob (product ref IDE84243IB), which has a built in extractor fan. It’s practical and looks great as I don’t have to have an ugly extractor above it. This meant I could have it sitting pride of place on my kitchen island, which is where I wanted to have it as its more sociable to be able to cook and chat to my husband who’s usually on the other side of the island.

I think there’s a misconception with induction cooking that you can’t cook your favourite foods as you would on gas, but there’s a whole world of induction cooking accessories that can bring the Michelin star cooking experience to your home. In today’s post I’m going to talk you through a few of my favourites.

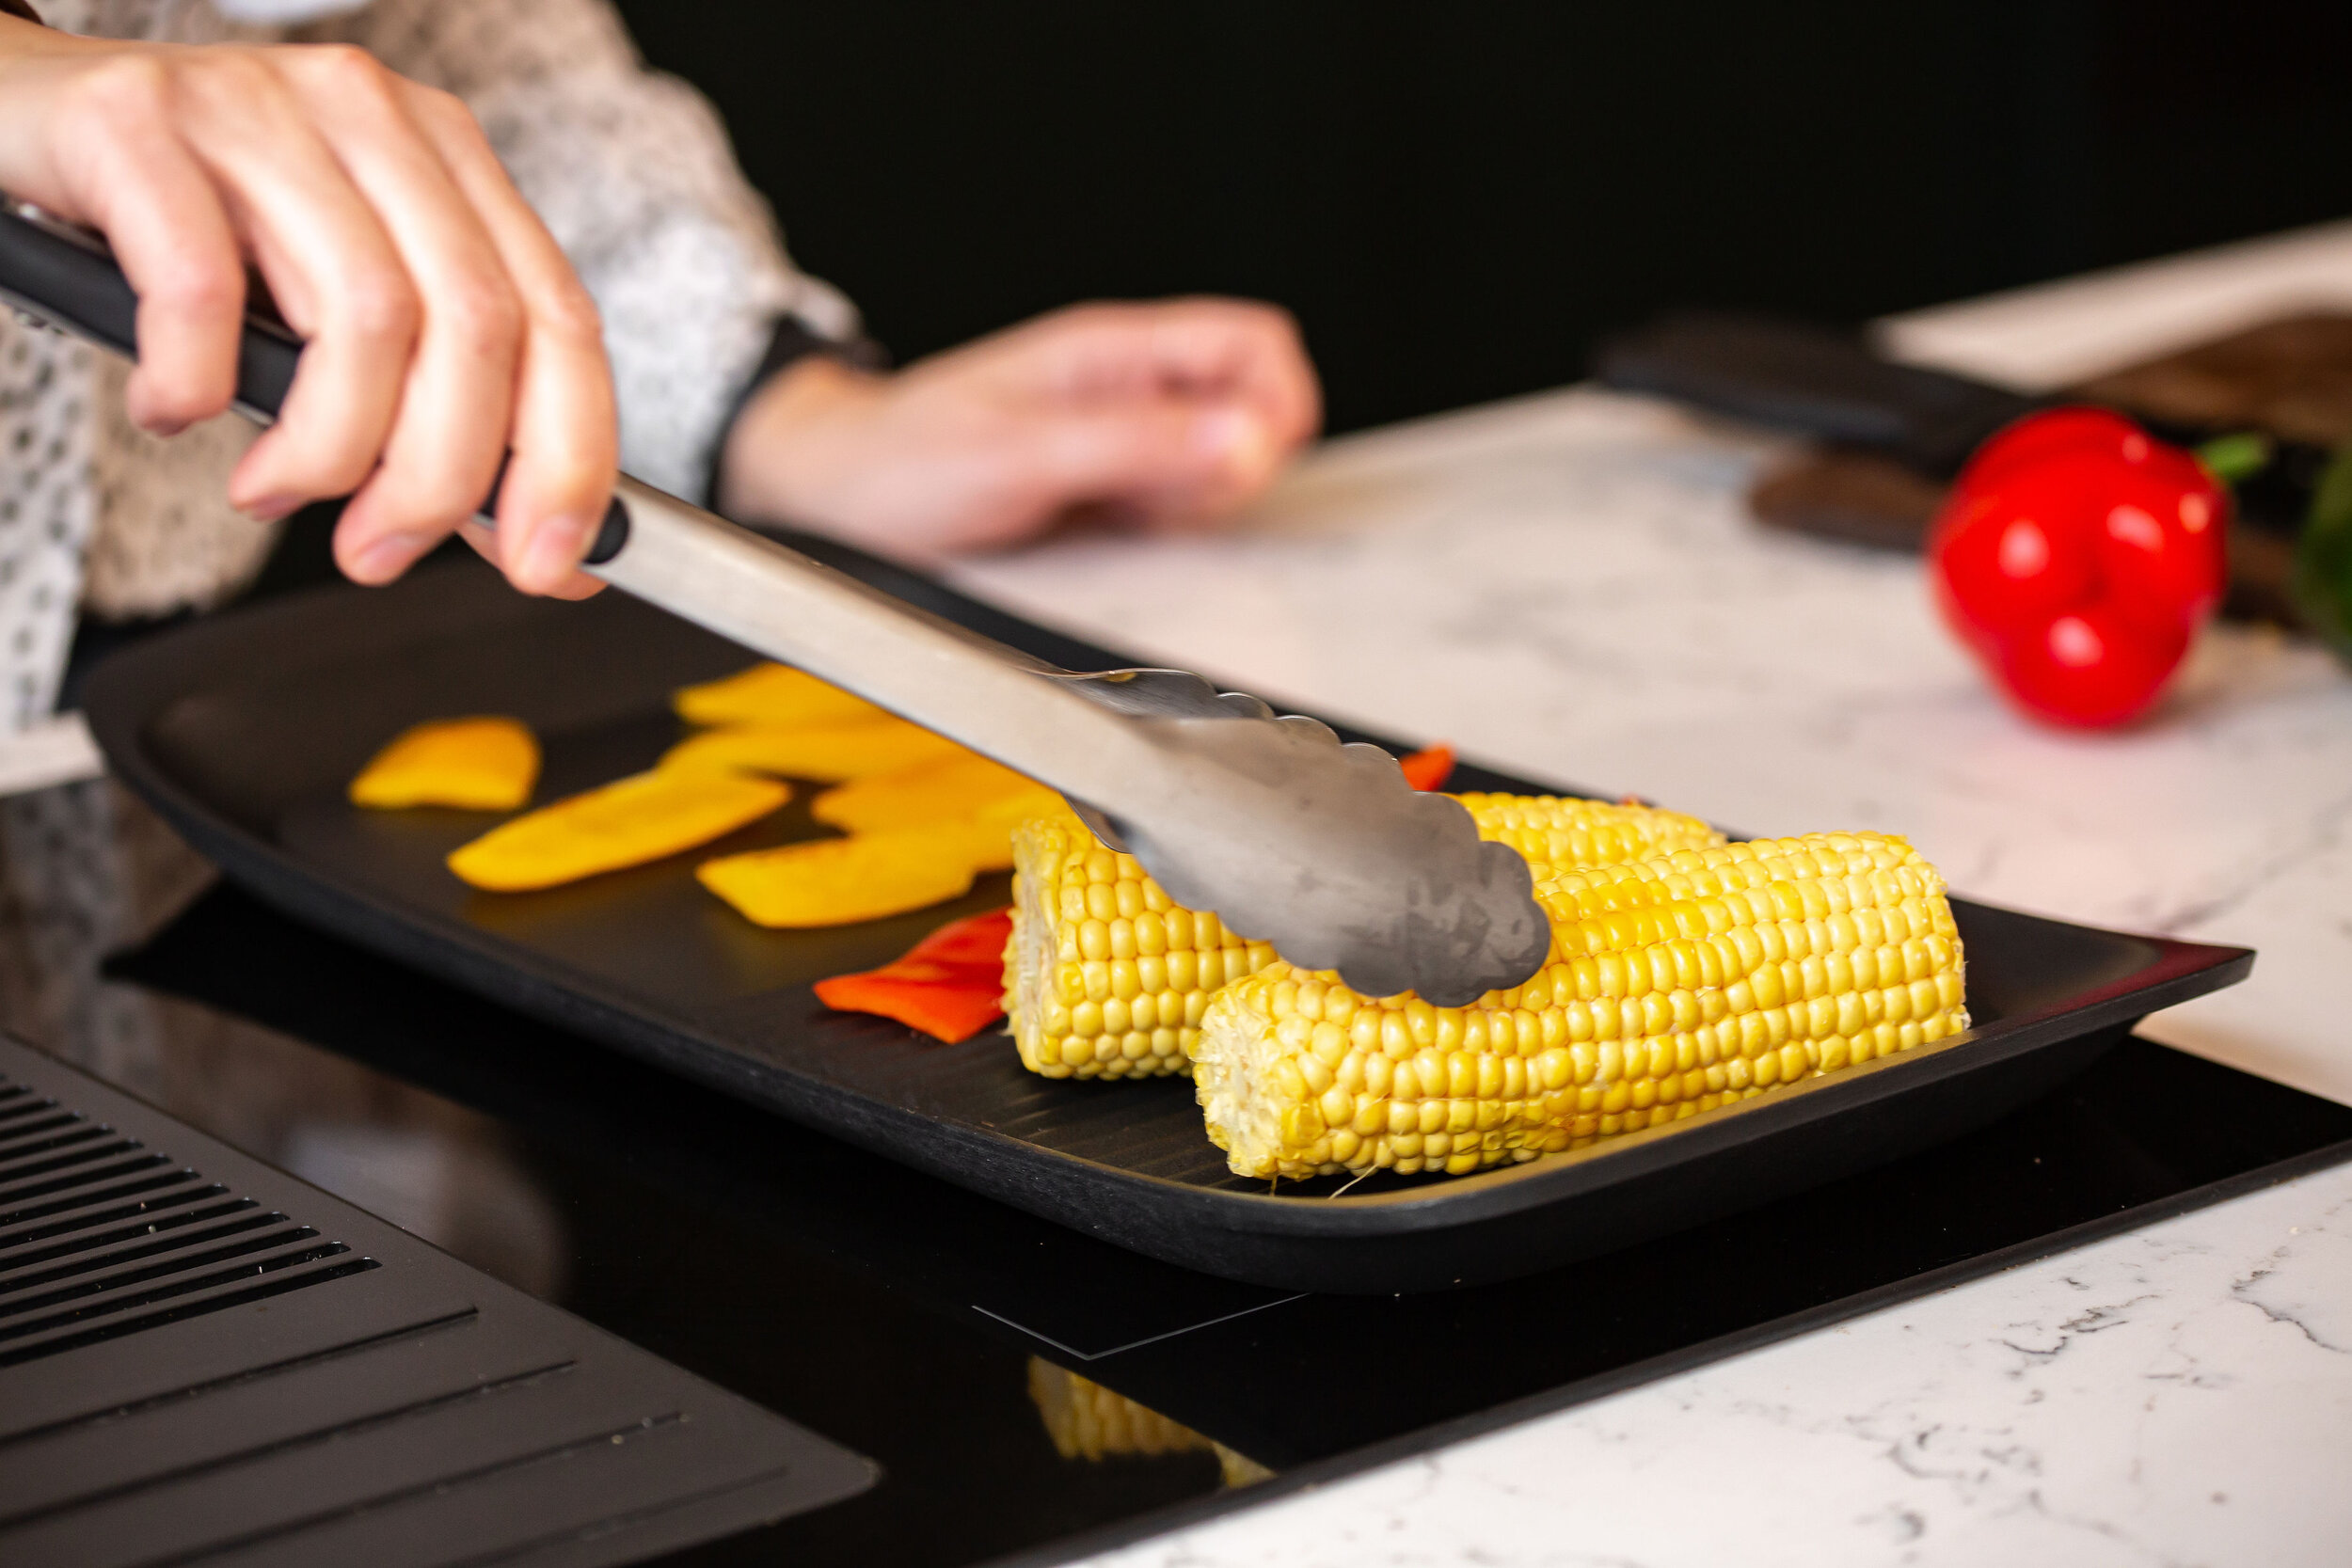
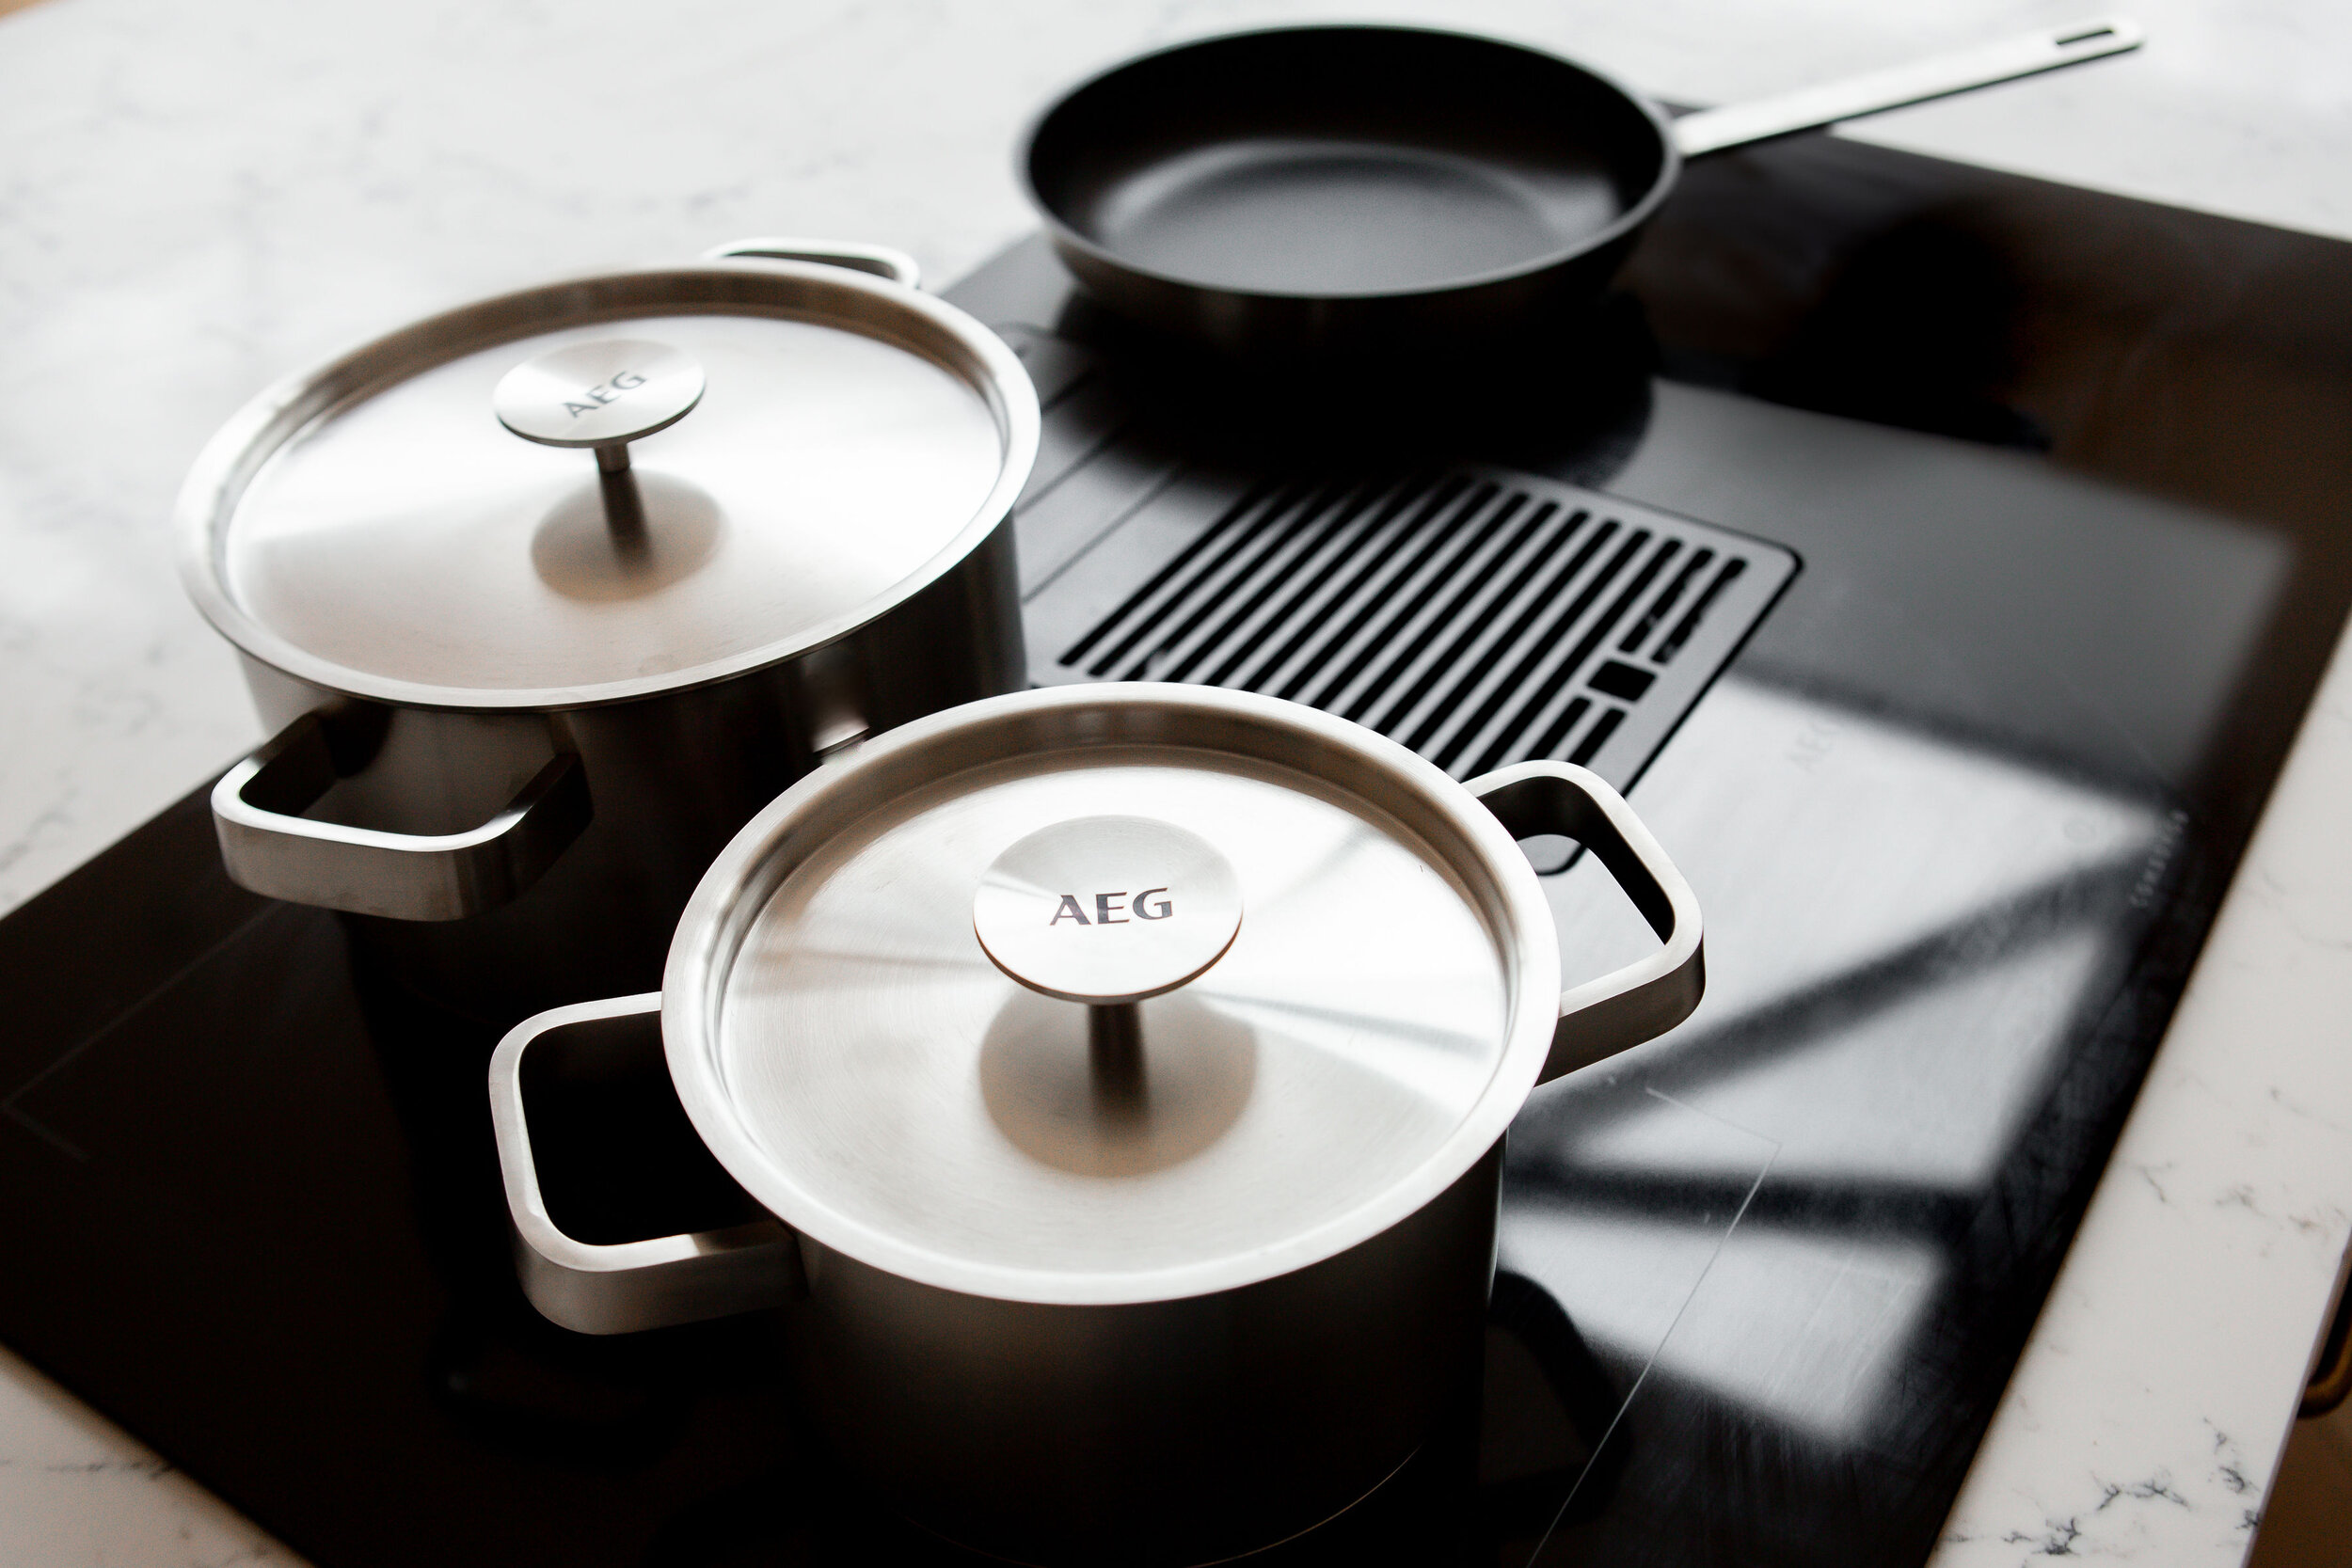
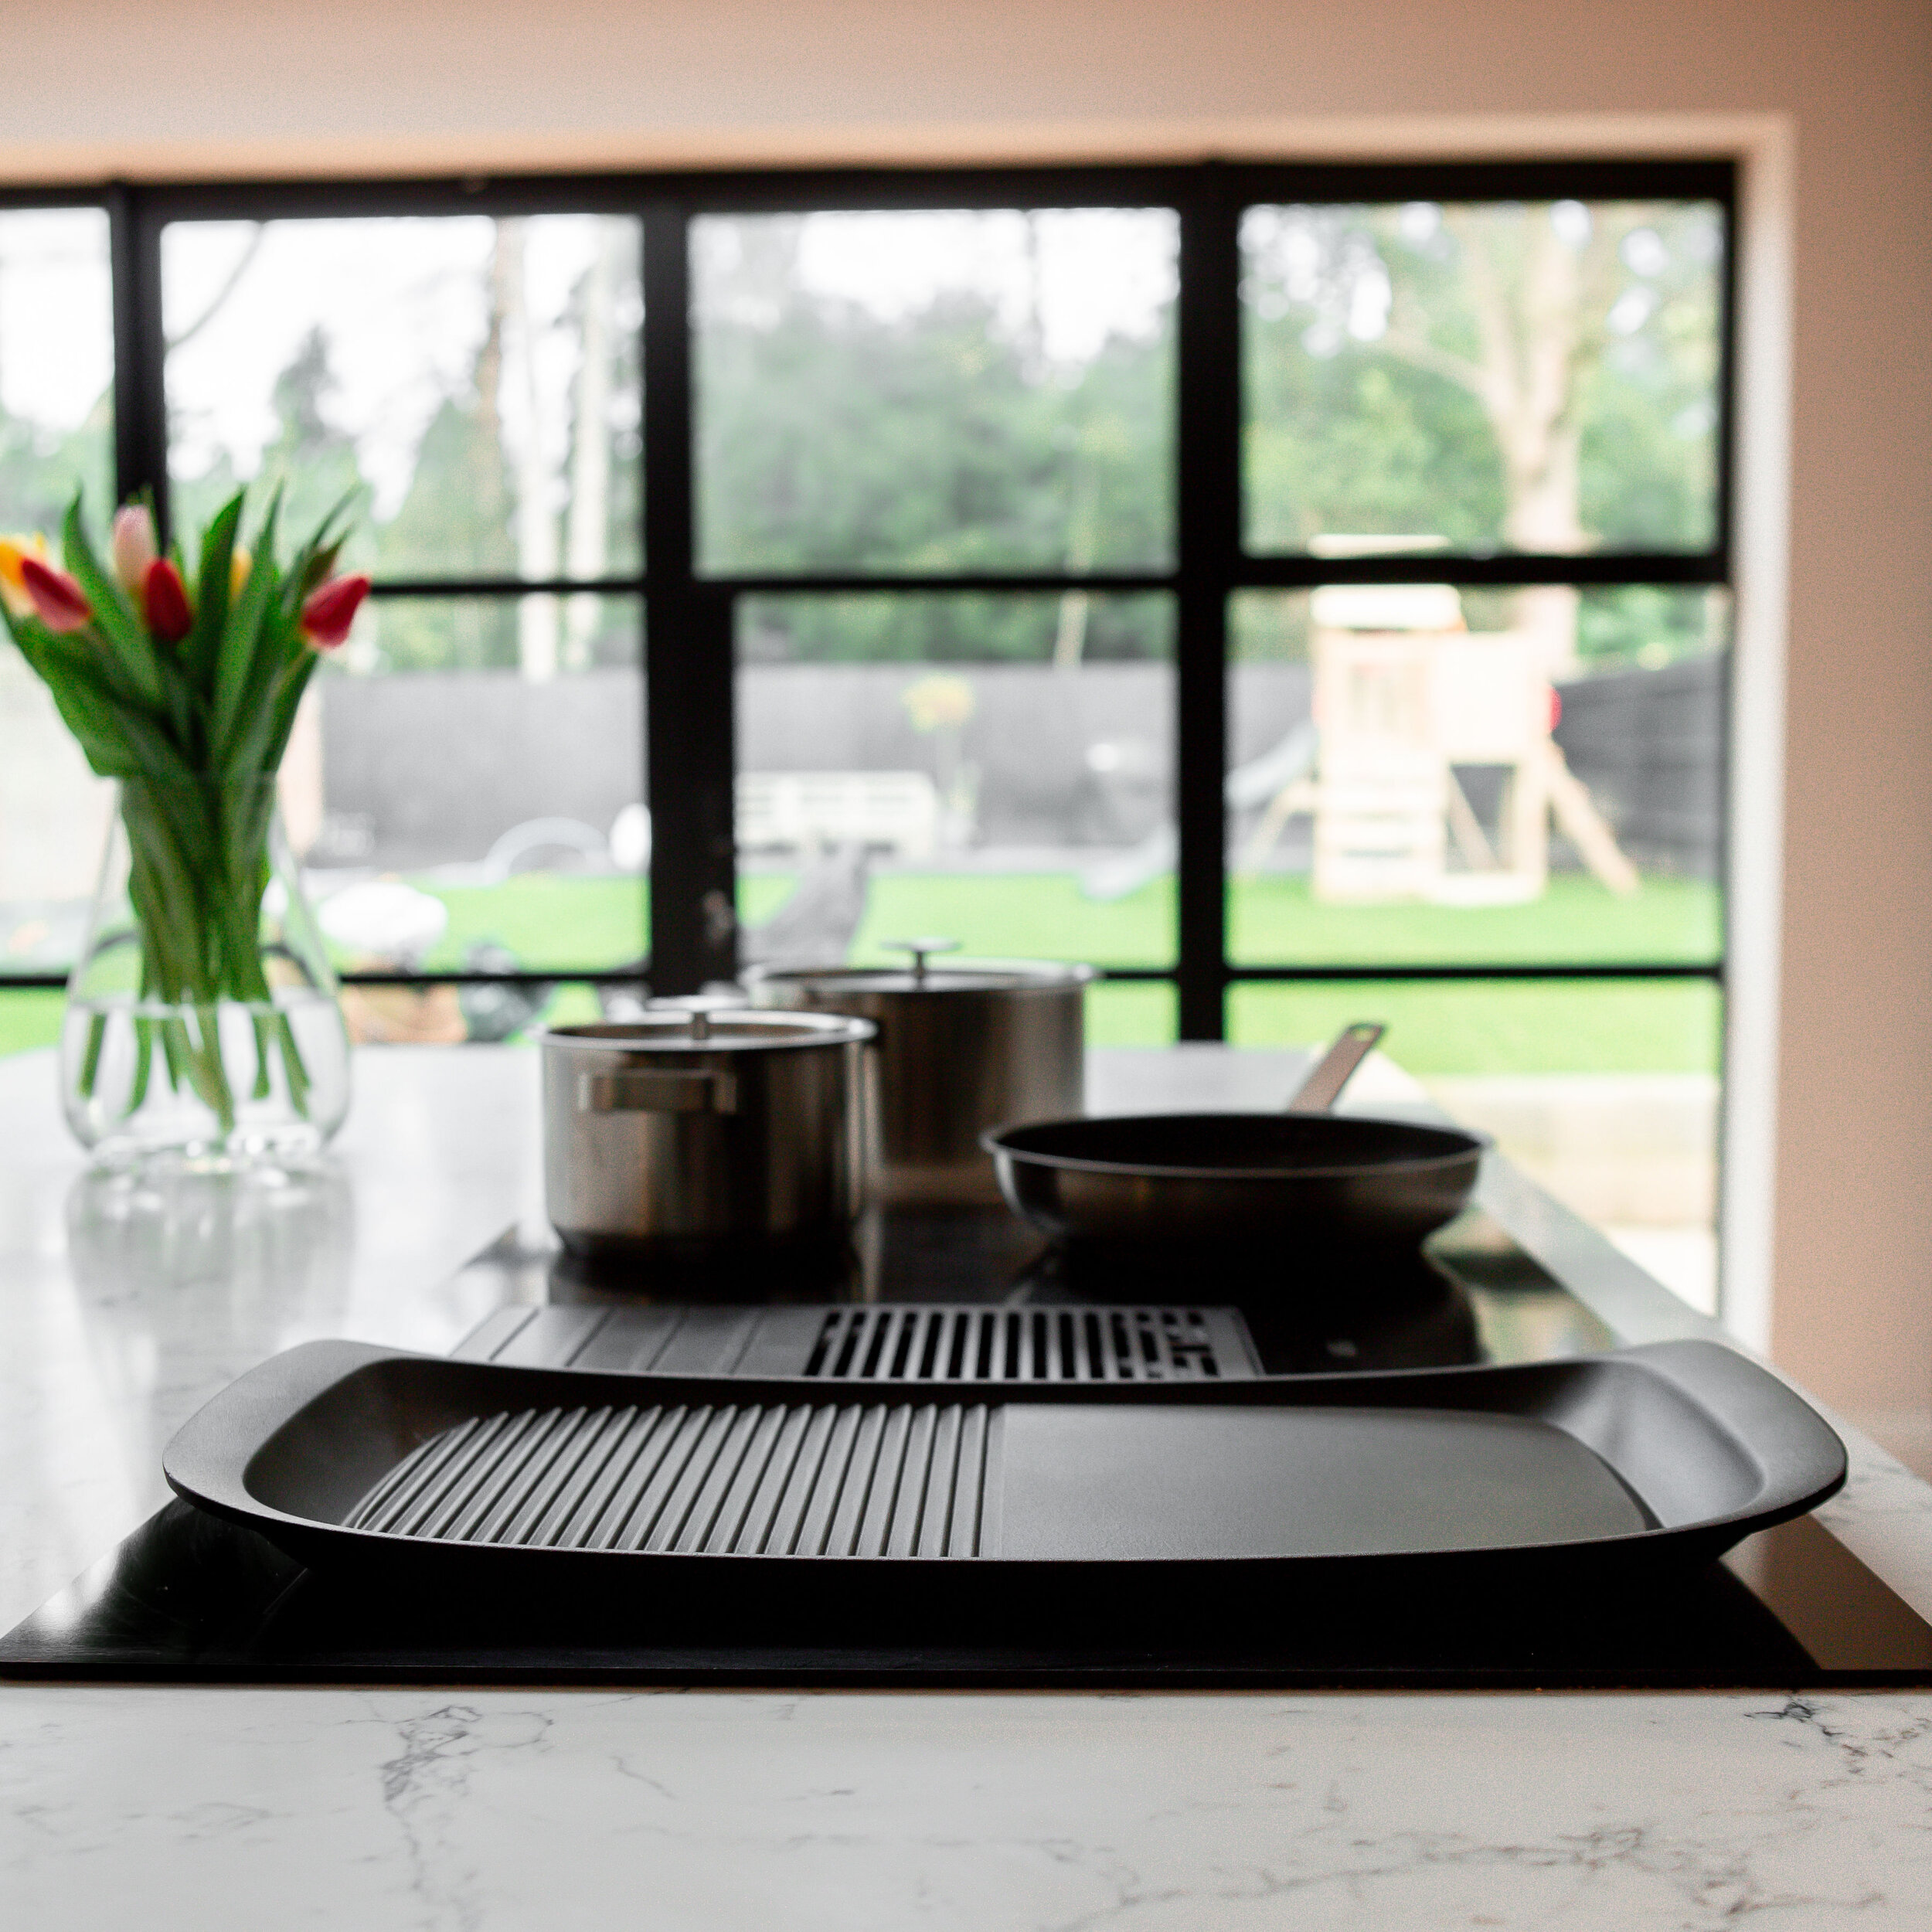
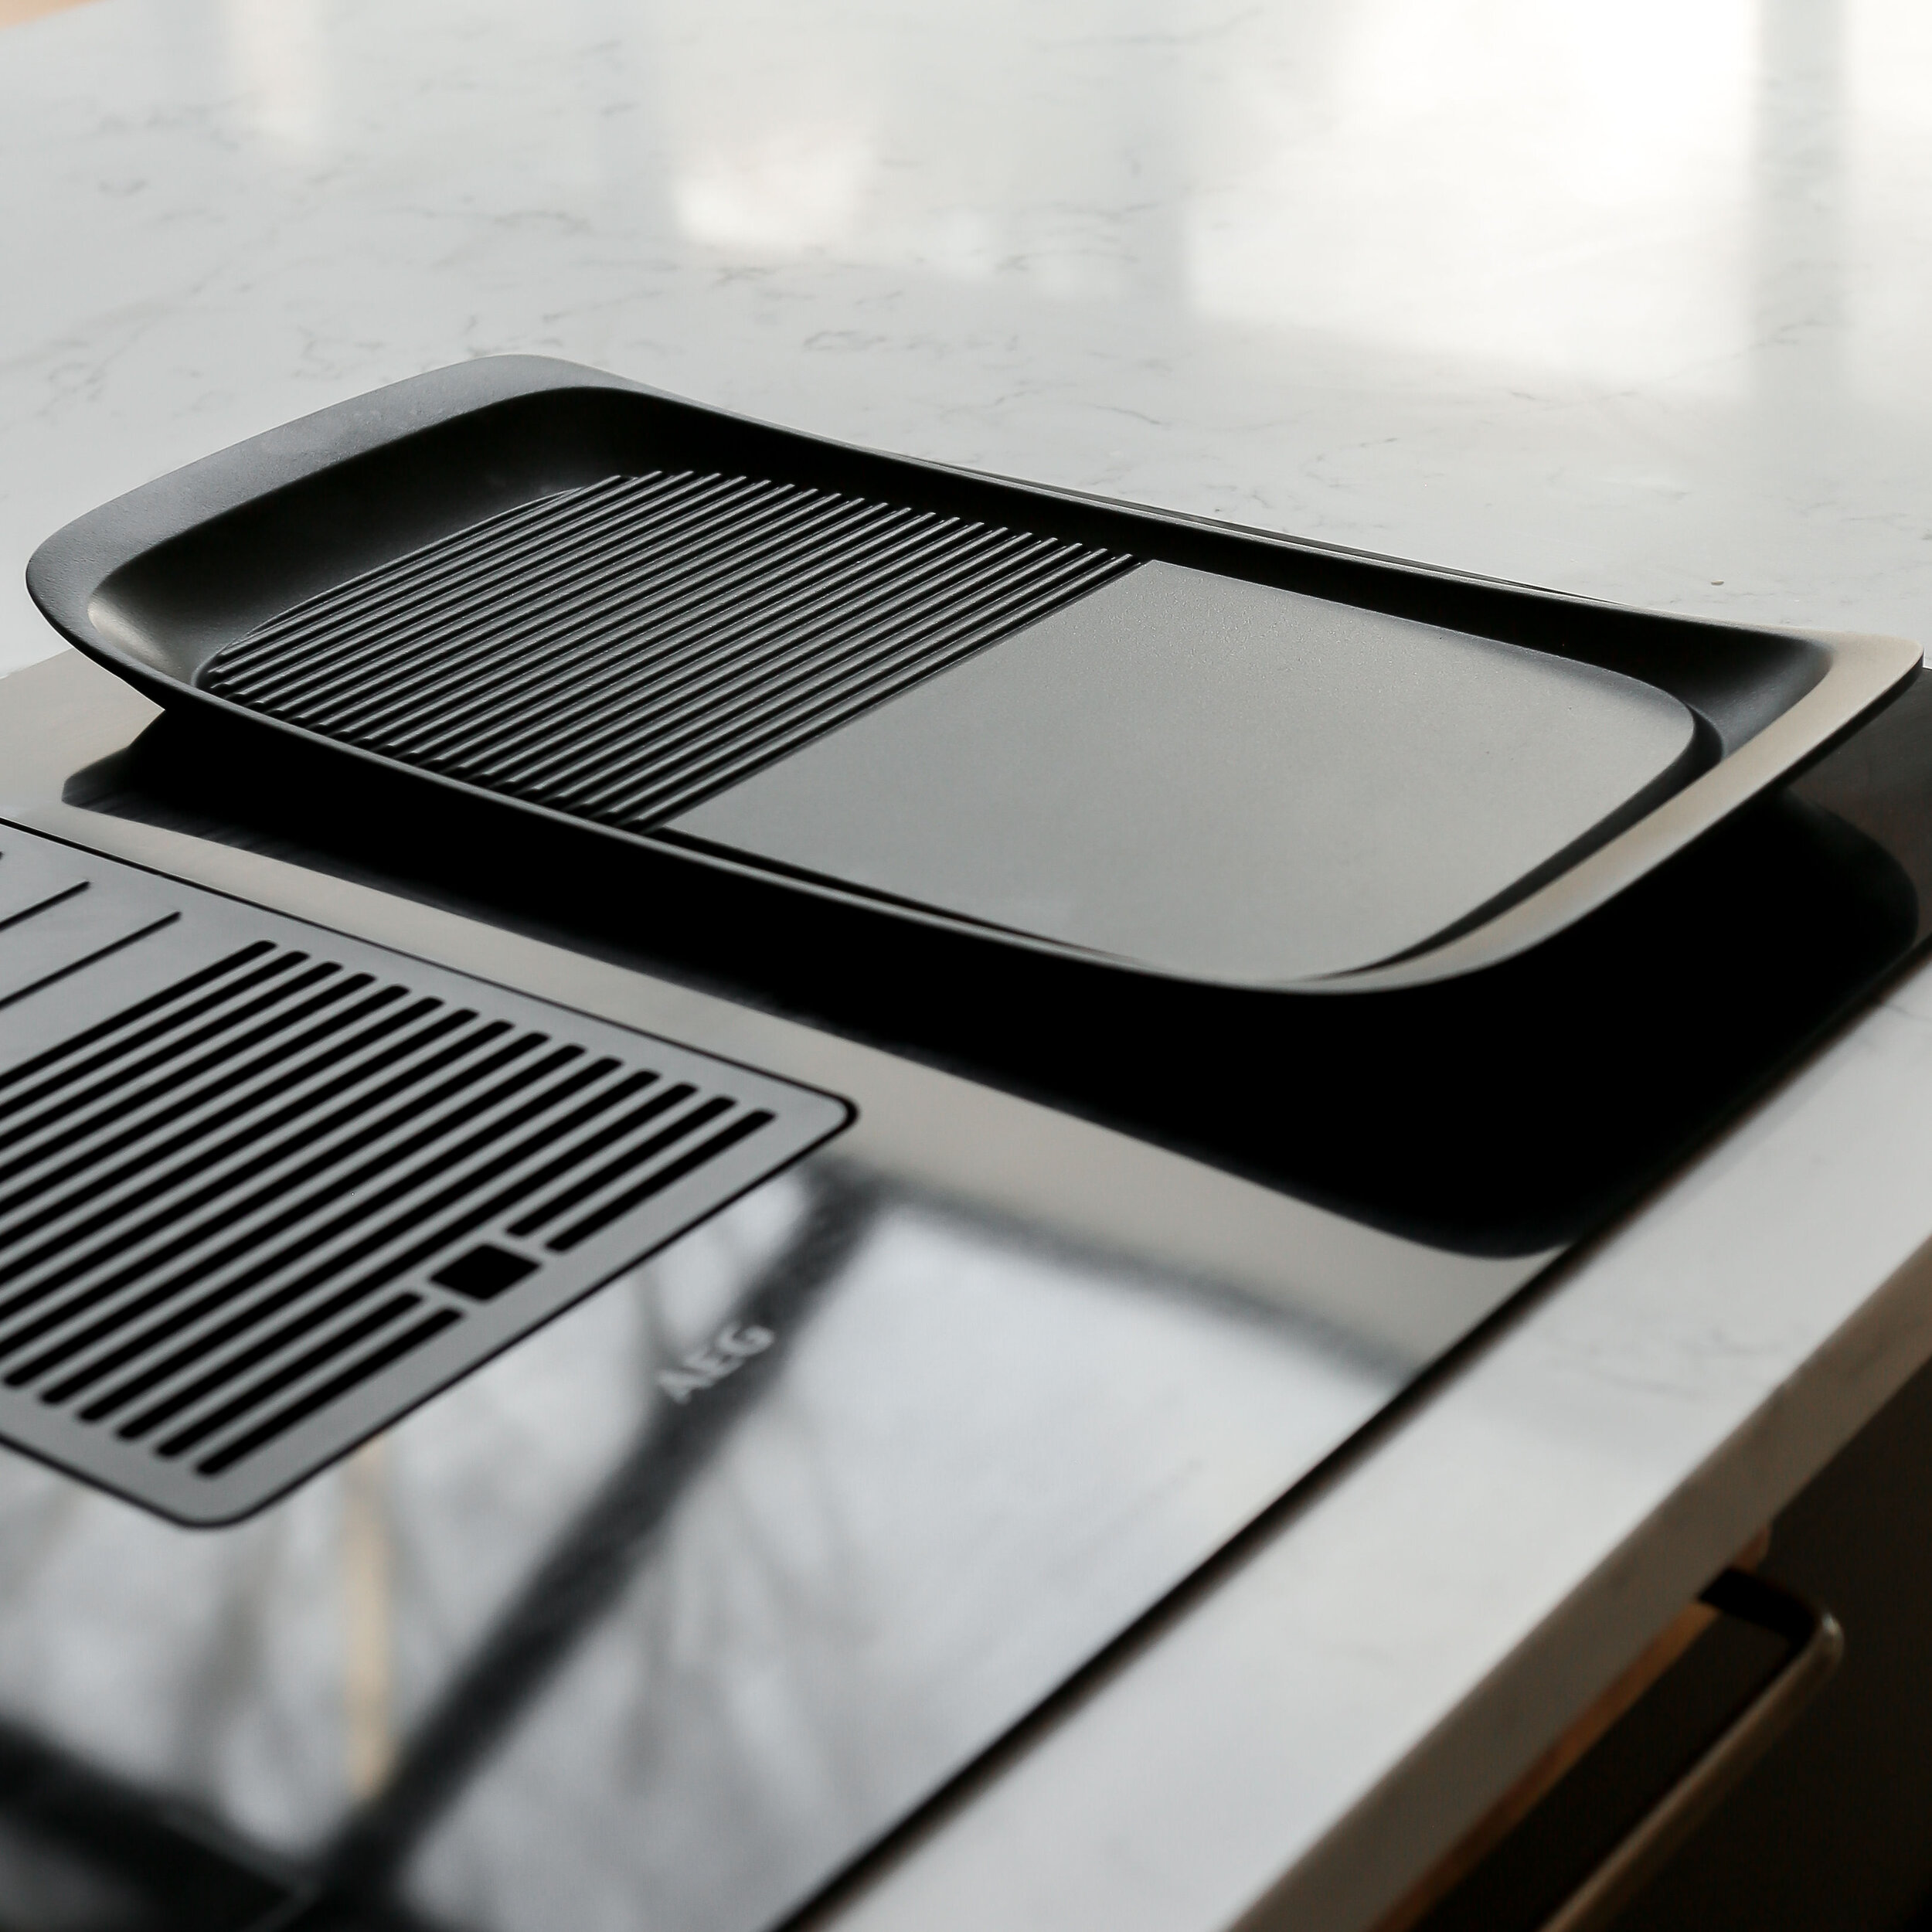
AEG Cookware Set (product code A3SS) RRP £130 and AEG MaxiSense® Plancha Grill for Induction Hobs RRP £179.99 (Product code MAXI-GRILL)

AEG Cookware Set (product code A3SS) RRP £130 and AEG MaxiSense® Plancha Grill for Induction Hobs RRP £179.99 (Product code MAXI-GRILL)

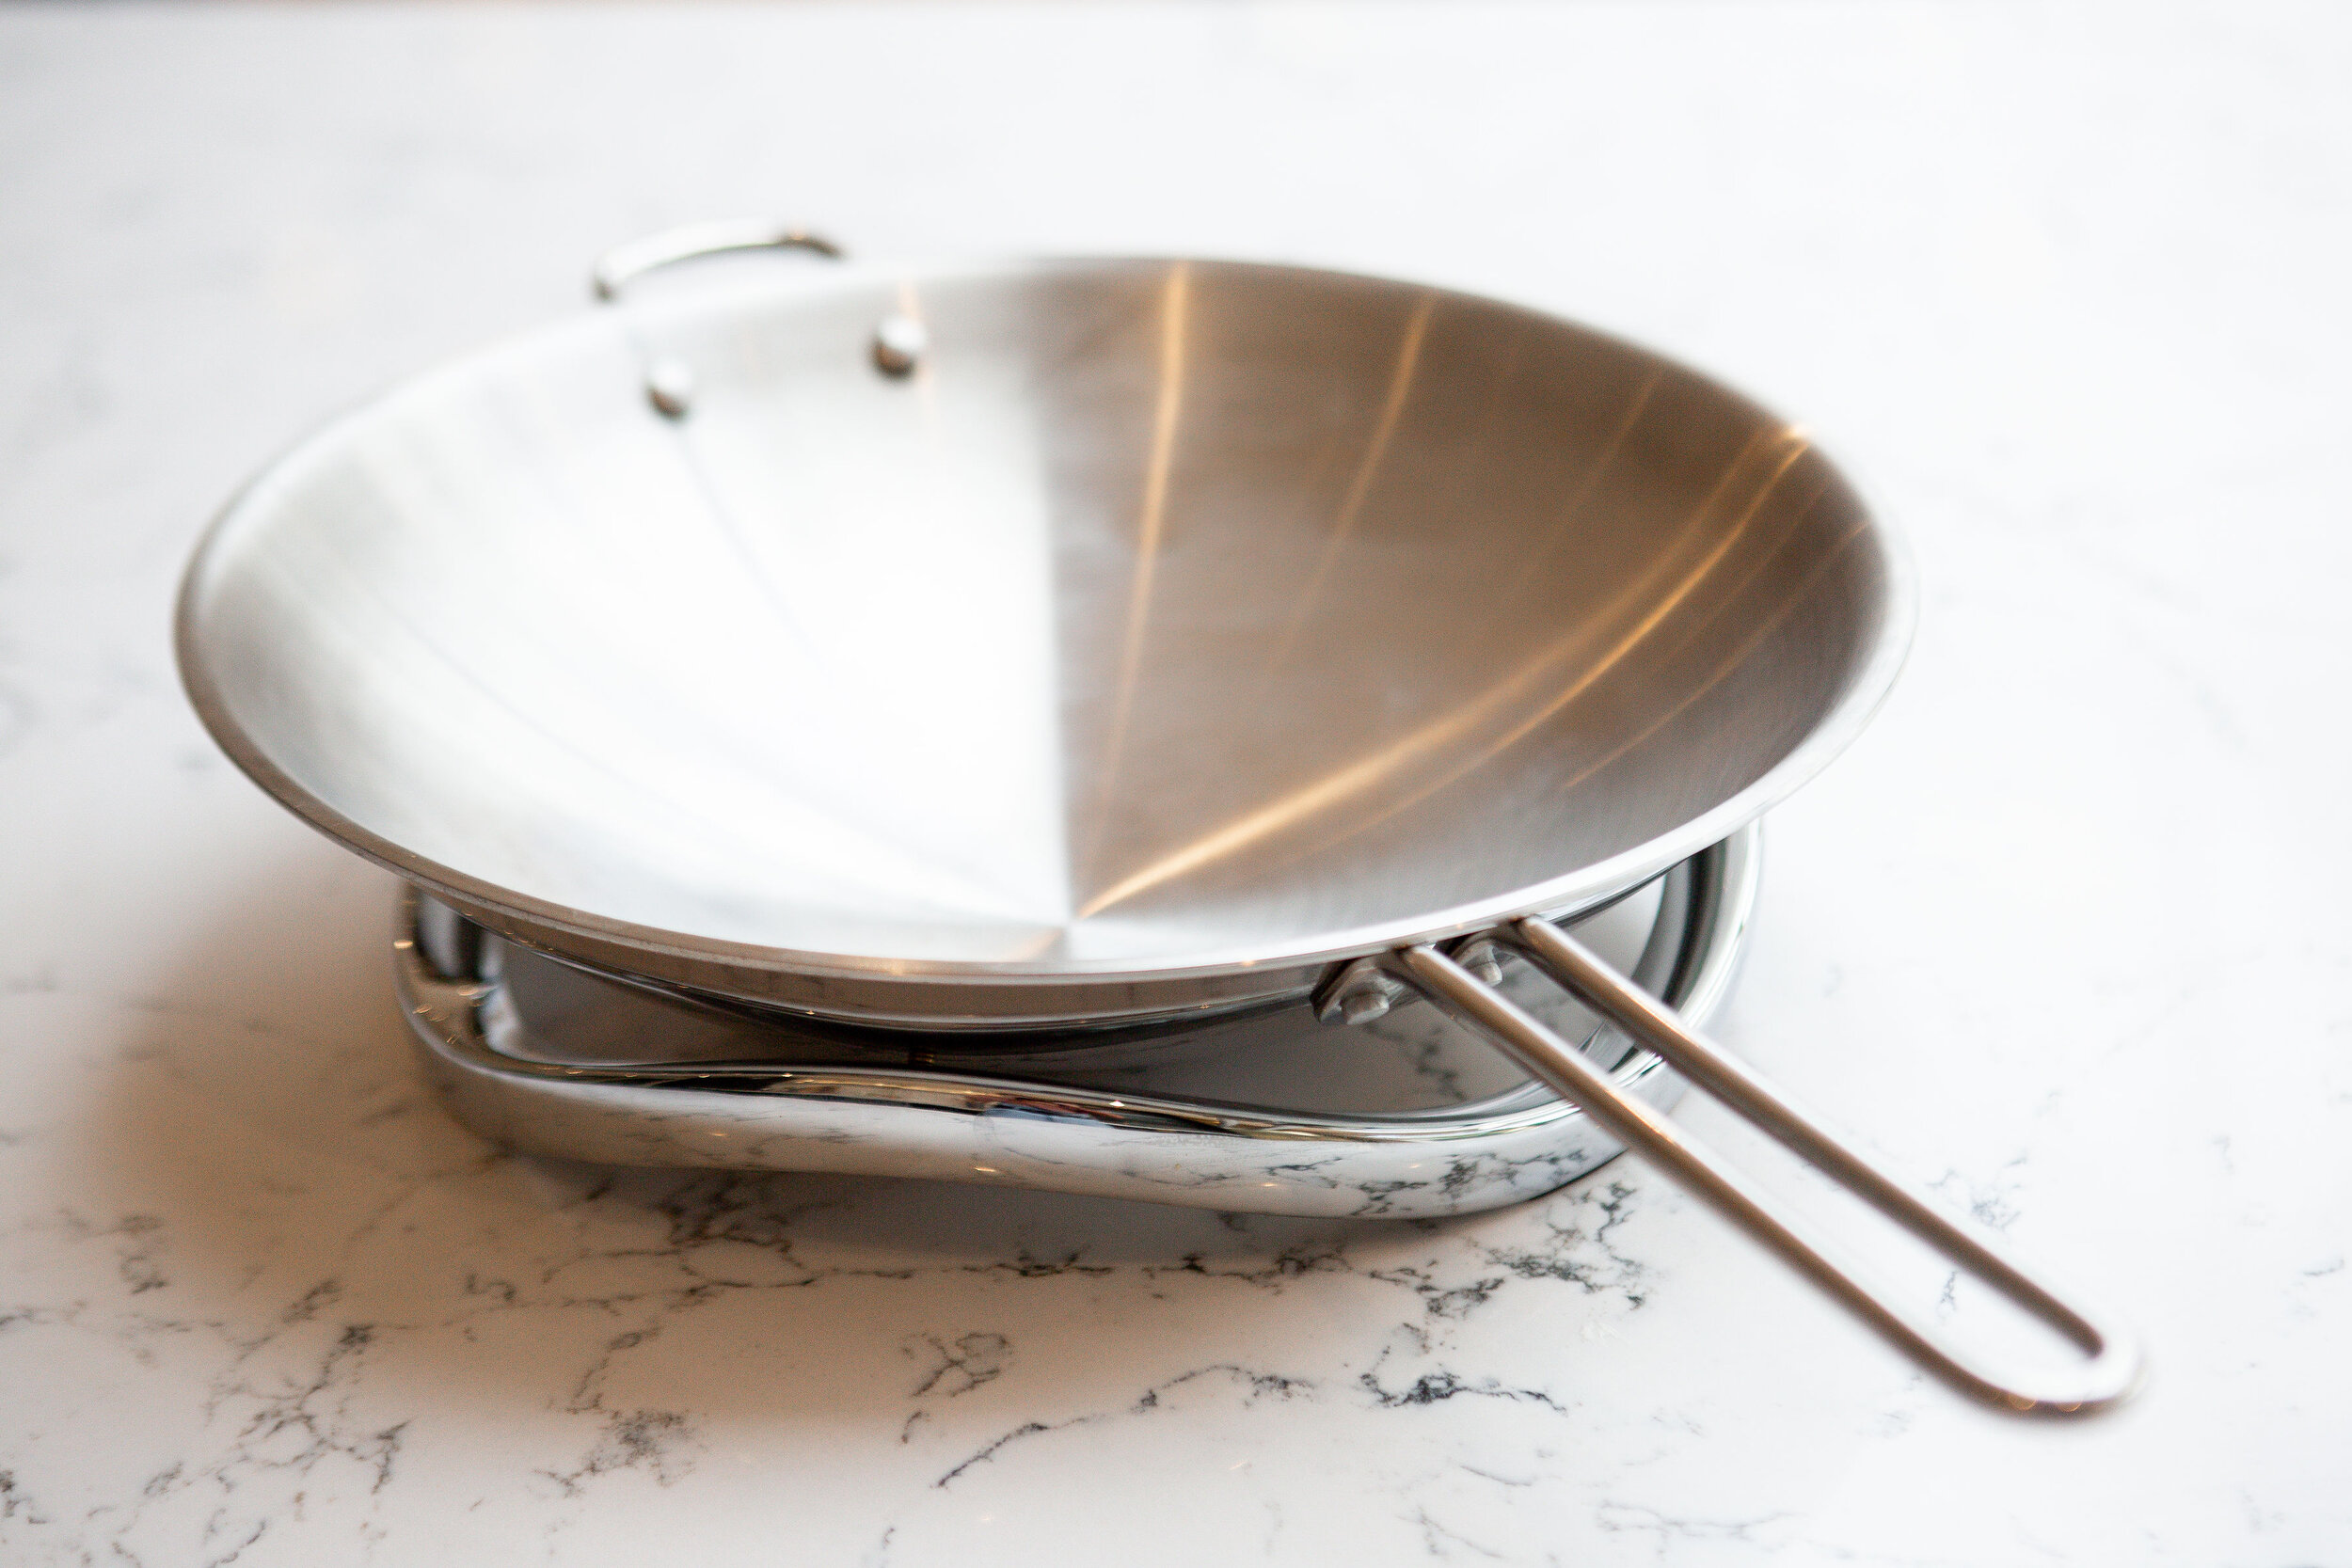
AEG Fusion Wok (Product code Fusion-Wok) RRP £179.99

Traditionally, a wok would sit inside a hob ring, which would mean it’s a no-go for us flat surface induction owners. Well, that might have been the case, but not anymore! The clever guys over at AEG have created the perfect curved bottom wok to sit in its own support ring, which means you can have all the benefits of wok cooking, but with the speed and energy efficiency of induction cooking. It also means you can easily transfer the wok with the support ring to your dining table making it easy to serve straight from the wok if you're cooking up something that you want to share.

The fusion wok looks pretty cool, too. Its sleek ergonomic design has bridged the gap between function and beauty. Its rounded bottom design makes it ideal for stir frying, braising, sautéing, simmering and other techniques to bring out all the flavours. By using it with its traditional movements, the induction will heat up the wok faster than gas and is also energy efficient.

AEG MaxiSense® Plancha Grill for Induction Hobs RRP £179.99 (Product code MAXI-GRILL)


Hands up if you like to griddle your asparagus or sear your steak? AEG have created the Plancha Grill which is compatible with all of their MaxiSense® induction hobs with bridging zones, including mine. (Did you know with a bridging zone you can combine two smaller zones to make one large zone?!) This custom made kitchen accessory combines style and function, allowing perfect heat distribution on MaxiSense® induction hobs. The extra-large non-stick surface is perfect for grilling, sautéing or browning with no added fat. It has a sturdy base and high-quality coating, which makes it the perfect cooking tool for your induction hob by bridging two hobs together to create a bigger cooking zone. Plus it’s also suitable for ovens, up to 200°C, so can also be used as a baking tray. I cooked steak on it last week and it sure does give it that crusty smokey sear, whilst keeping the meat succulent inside. It’s also very easy to clean. Have I mentioned how much easier Induction hobs are to clean compared to gas?

AEG Cookware Set (product code A3SS) RRP £130


A new hob calls for new pans. Especially in my case as I’ve recently moved over from gas.

This three-piece cookware set from AEG provides the tools for mastering more recipes as the set comprises of a frying pan (24cm) and two saucepans (16cm, 20cm)  which are kitchen essentials.

One of the huge benefits to this set is that they are all induction and gas compatible. The stainless-steel surface means you get optimum heat distribution, ensuring the best cooking results every time.

The thick base is stable, meaning an even better connection with induction hobs – evenly distributing heat across all their surfaces.

They’re also all coated to ensure non-stick cooking, meaning no excess oil or butter is required. The non-stick surface also means cleaning is more efficient, as there’s no scrubbing- and they’re dishwasher friendly, too.

In essence, if you’re at that cross road and aren’t sure if you’ll have the same cooking methods on induction as you did with gas then let me reassure you the choices on induction cooking accessories are endless, and if you want more inspiration then have a look at AEG’s accessory page.

I’m officially an induction convert and won’t be returning to the gas side anytime soon.

I’m using AEG Cookware Set (product code A3SS) RRP £130 and AEG MaxiSense® Plancha Grill for Induction Hobs RRP £179.99 (Product code MAXI-GRILL)

I’m using AEG Cookware Set (product code A3SS) RRP £130 and AEG MaxiSense® Plancha Grill for Induction Hobs RRP £179.99 (Product code MAXI-GRILL)

COOKING-ON-INDUCTION-—-HOUSE-LUST 2.jpg
COOKING-ON-INDUCTION-—-HOUSE-LUST 5.jpg