HOW TO CREATE A PAINTED WALL MURAL, INSPIRED BY DULUX CHANGING ROOMS - AD

AD - This post is a paid partnership with Dulux, inspired by Dulux Changing rooms.

After an 18 year hiatus, my favourite 90’s TV show for all interior design lovers is back; Changing Rooms!

Changing Rooms re-launched in August 2021 and aired on Channel 4 in the UK, on Wednesdays at 8pm, and is being powered by non other than leading paint brand Dulux.

So what is Changing Rooms? Well, in a nutshell it’s a fun interior design TV show where we see two sets of homeowners from the same neighbourhood work against the clock to renovate a room in each other’s houses. They won’t be alone though, they’ll have the help of interior designers Jordan Cluroe and Russell Whitehead of 2LG Studio and Laurence Llewelyn-Bowen, whilst also having a skilled carpenter and joiner on hand; Tibby Singh.

It’s packed full of design and DIY hints and tips, teaching us all how to be crafty on a budget by upscaling and adding sparkle to unloved or outdated corners of our homes. It’s inspiring to watch how a room can be easily transformed with just a lick of paint.

I’ve been hugely inspired by watching Changing Rooms, and fancied updating a tired and boring wall within my home, by using some of the tips I’ve learnt whilst watching the show.

Today, in this blog post I’m going to show you how I took a drab empty white wall in my home, and added some fun and colour, which adds print and texture, whilst only using Dulux ‘Simply Refresh One coat’ paint’.

I decided I wanted to add a painted mural to my dining room wall. I’ve seen murals making a reappearance since 70’s trends returned this last year, and I love the idea of how just using masking tape, a spirit level and some house hold items for templates, you can create your own 70’s wall. So thats exactly what I did.

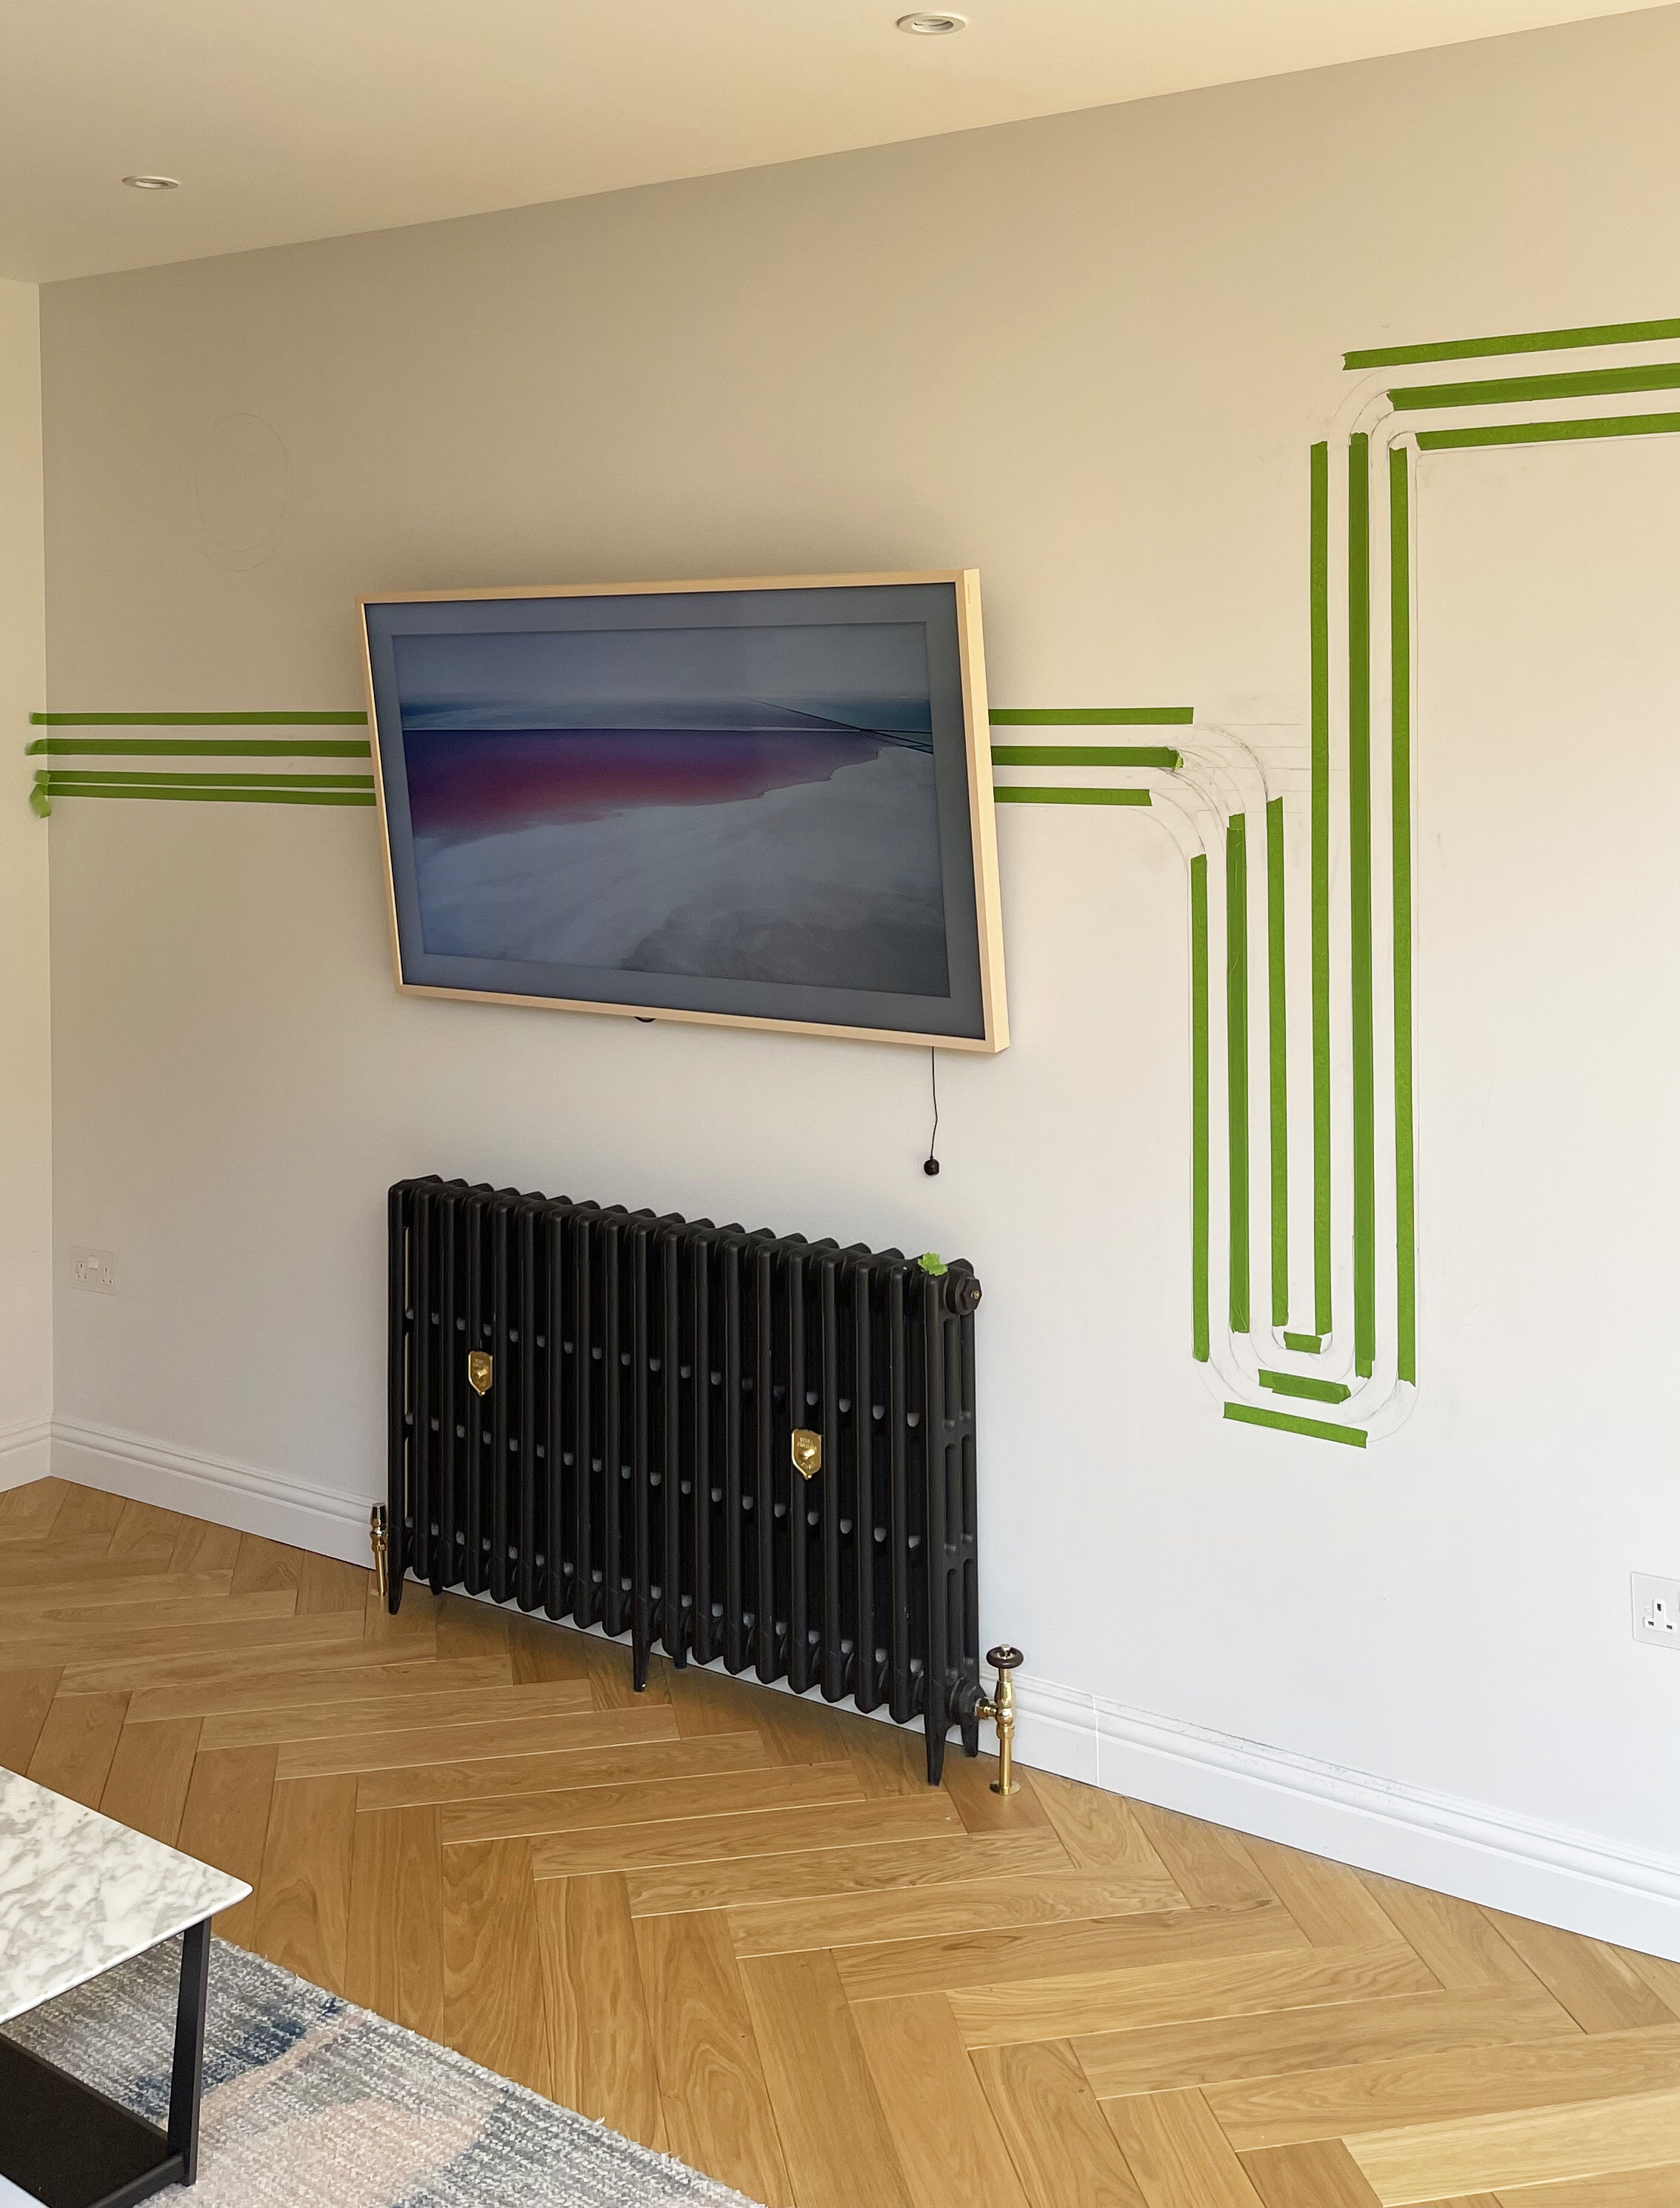
This is the wall in question. The opposite side of this wall is our kitchen which is a lot more interesting, I just seemed to have neglected this side after our renovation.

BEFORE

THE INSPIRATION

I love the simplicity of these ideas, using masking tape and a spirit level. They make such an impact without having to add tones of layers of paint.

Image credit Very Gay Paint .

Image credit Very Gay Paint .

Image credit : Forget Me Via Pinterest.

Image credit : Forget Me Via Pinterest.

THE PROCESS

The first thing I did was mark out a rough plan of where I wanted to add the lines and curves. You can do this on a bit of paper, I used Adode illustrator just so I could visualise the curves and lines with the correct proportions.

I then decided on the paint and colours. I wanted my wall mural to be quite harmonious, so I chose colours from Dulux Simply Refresh One Coat Pinks, Violets and yellow range, with an added neutral, as I knew the coverage would be perfect, and I’d only have to do one coat to save me time.

How I designed my wall mural.

How I designed my wall mural.

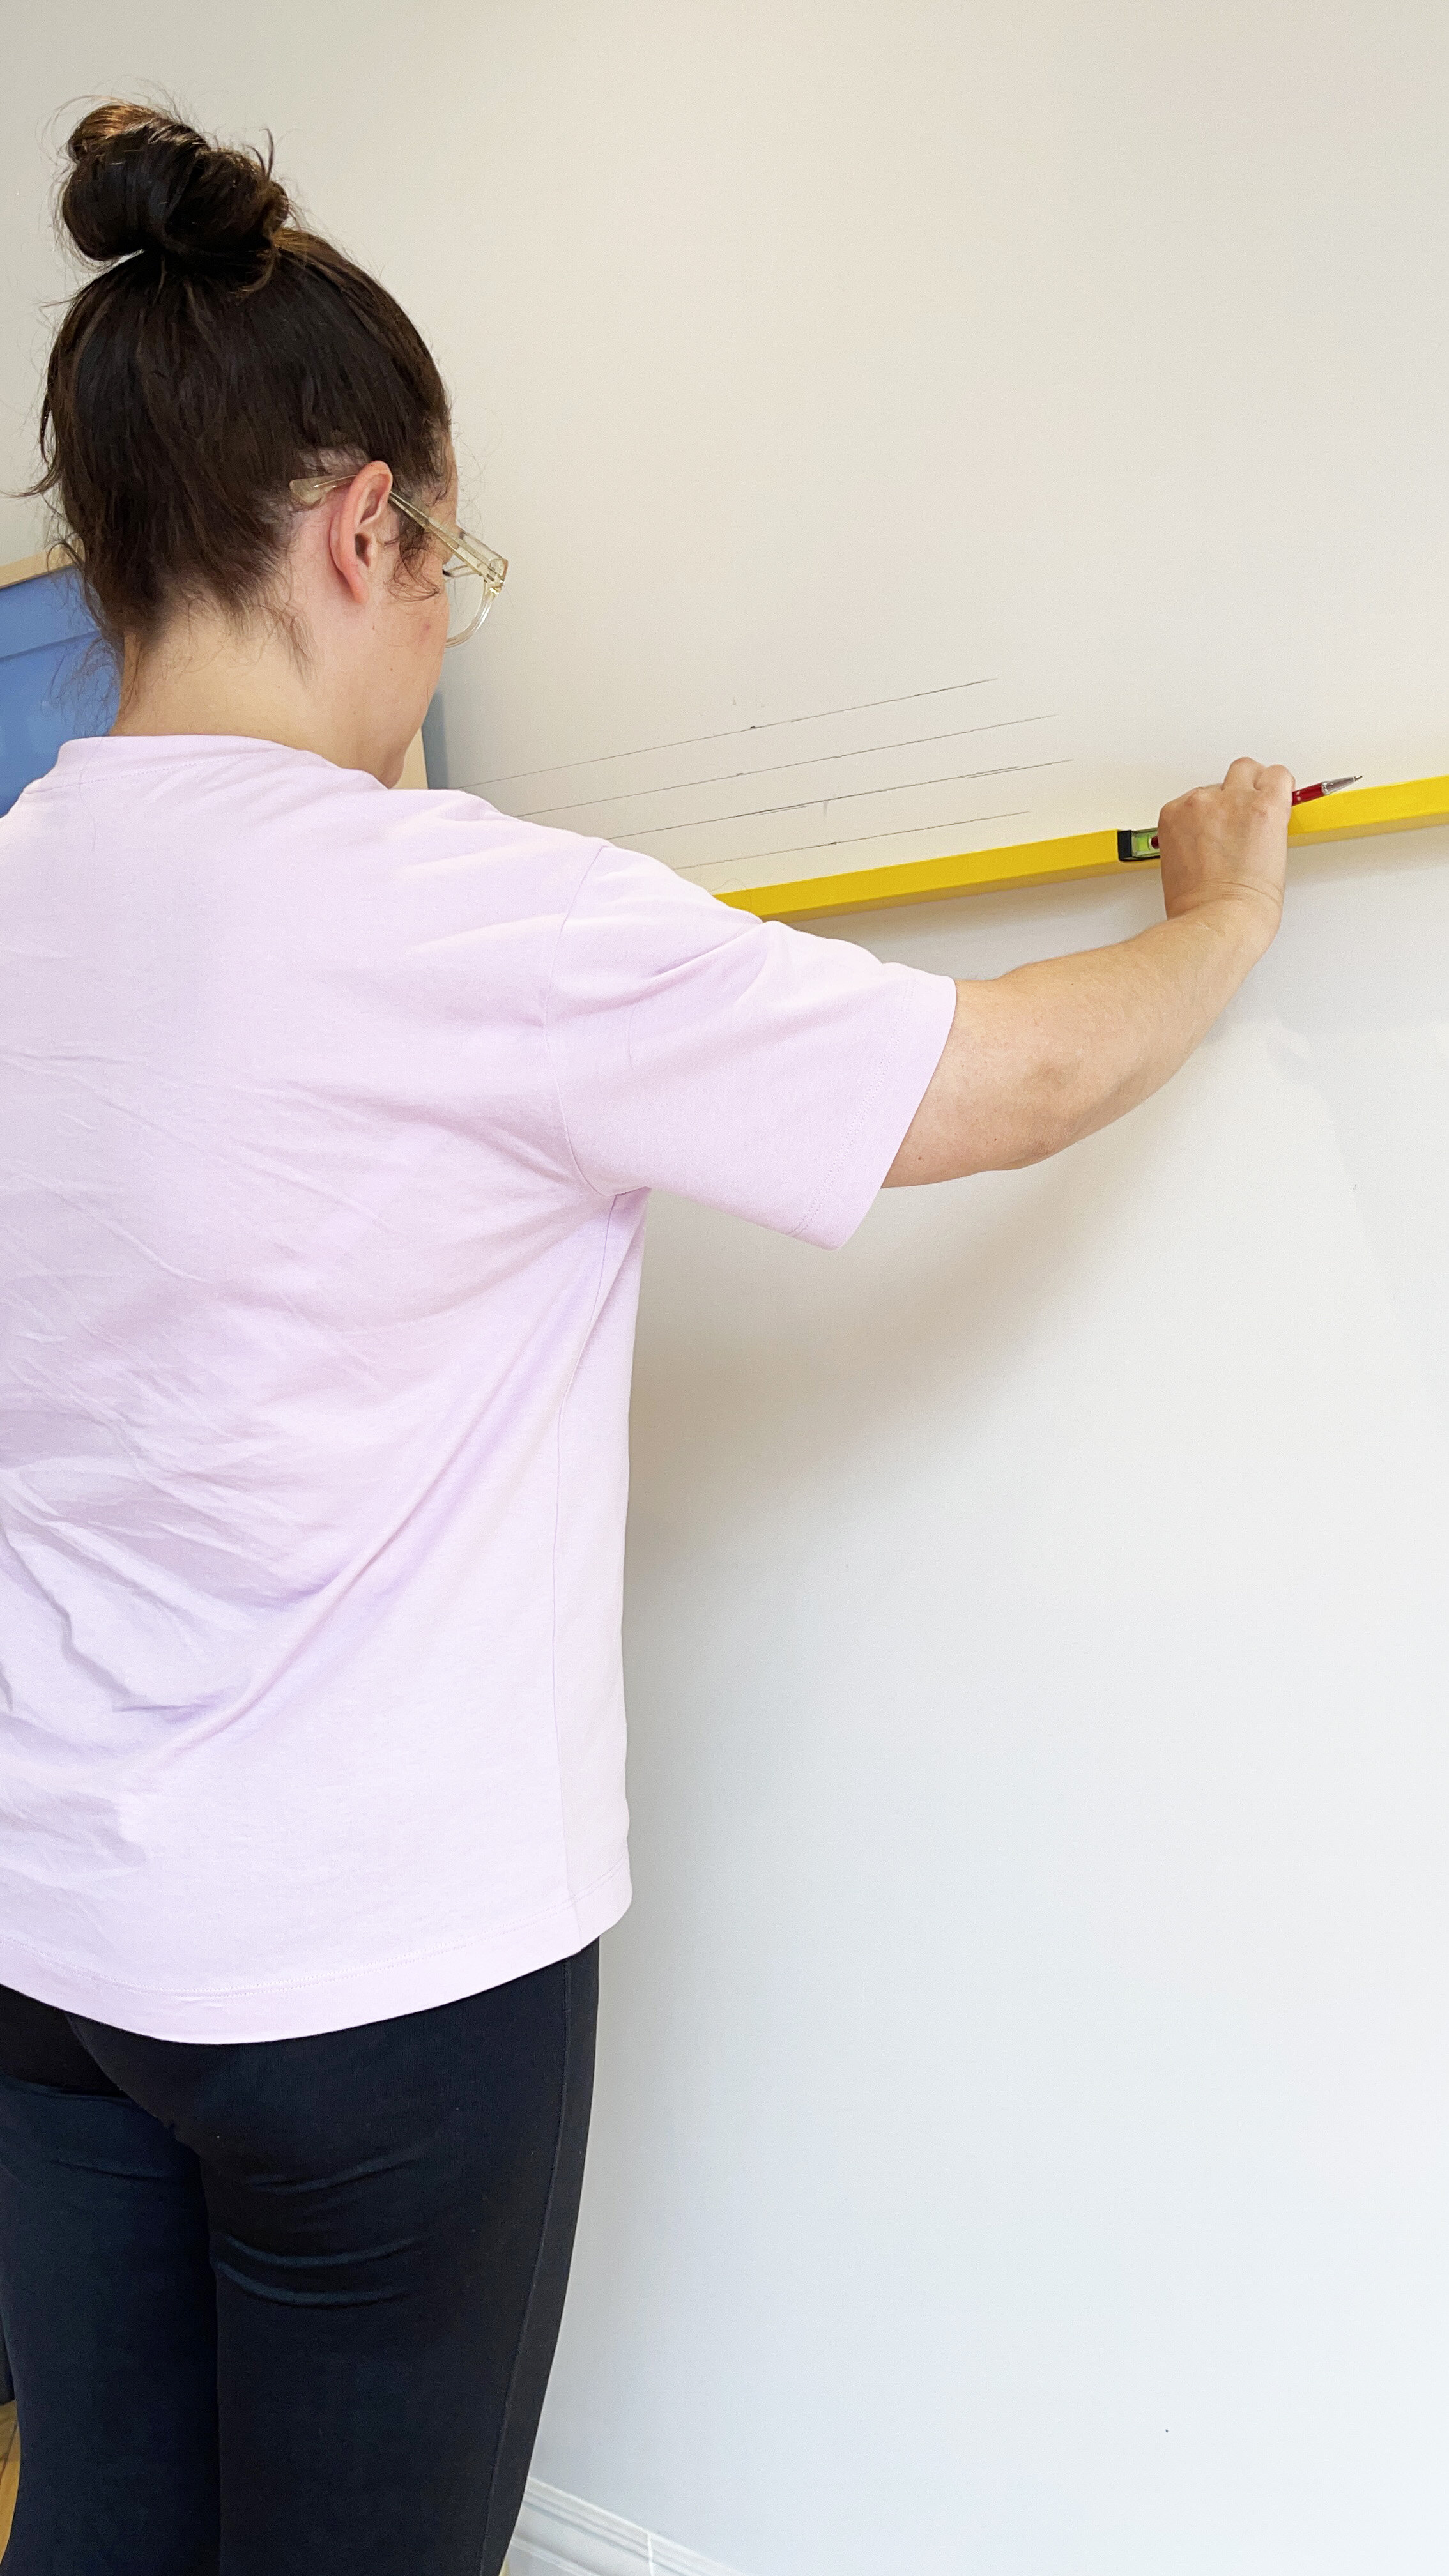
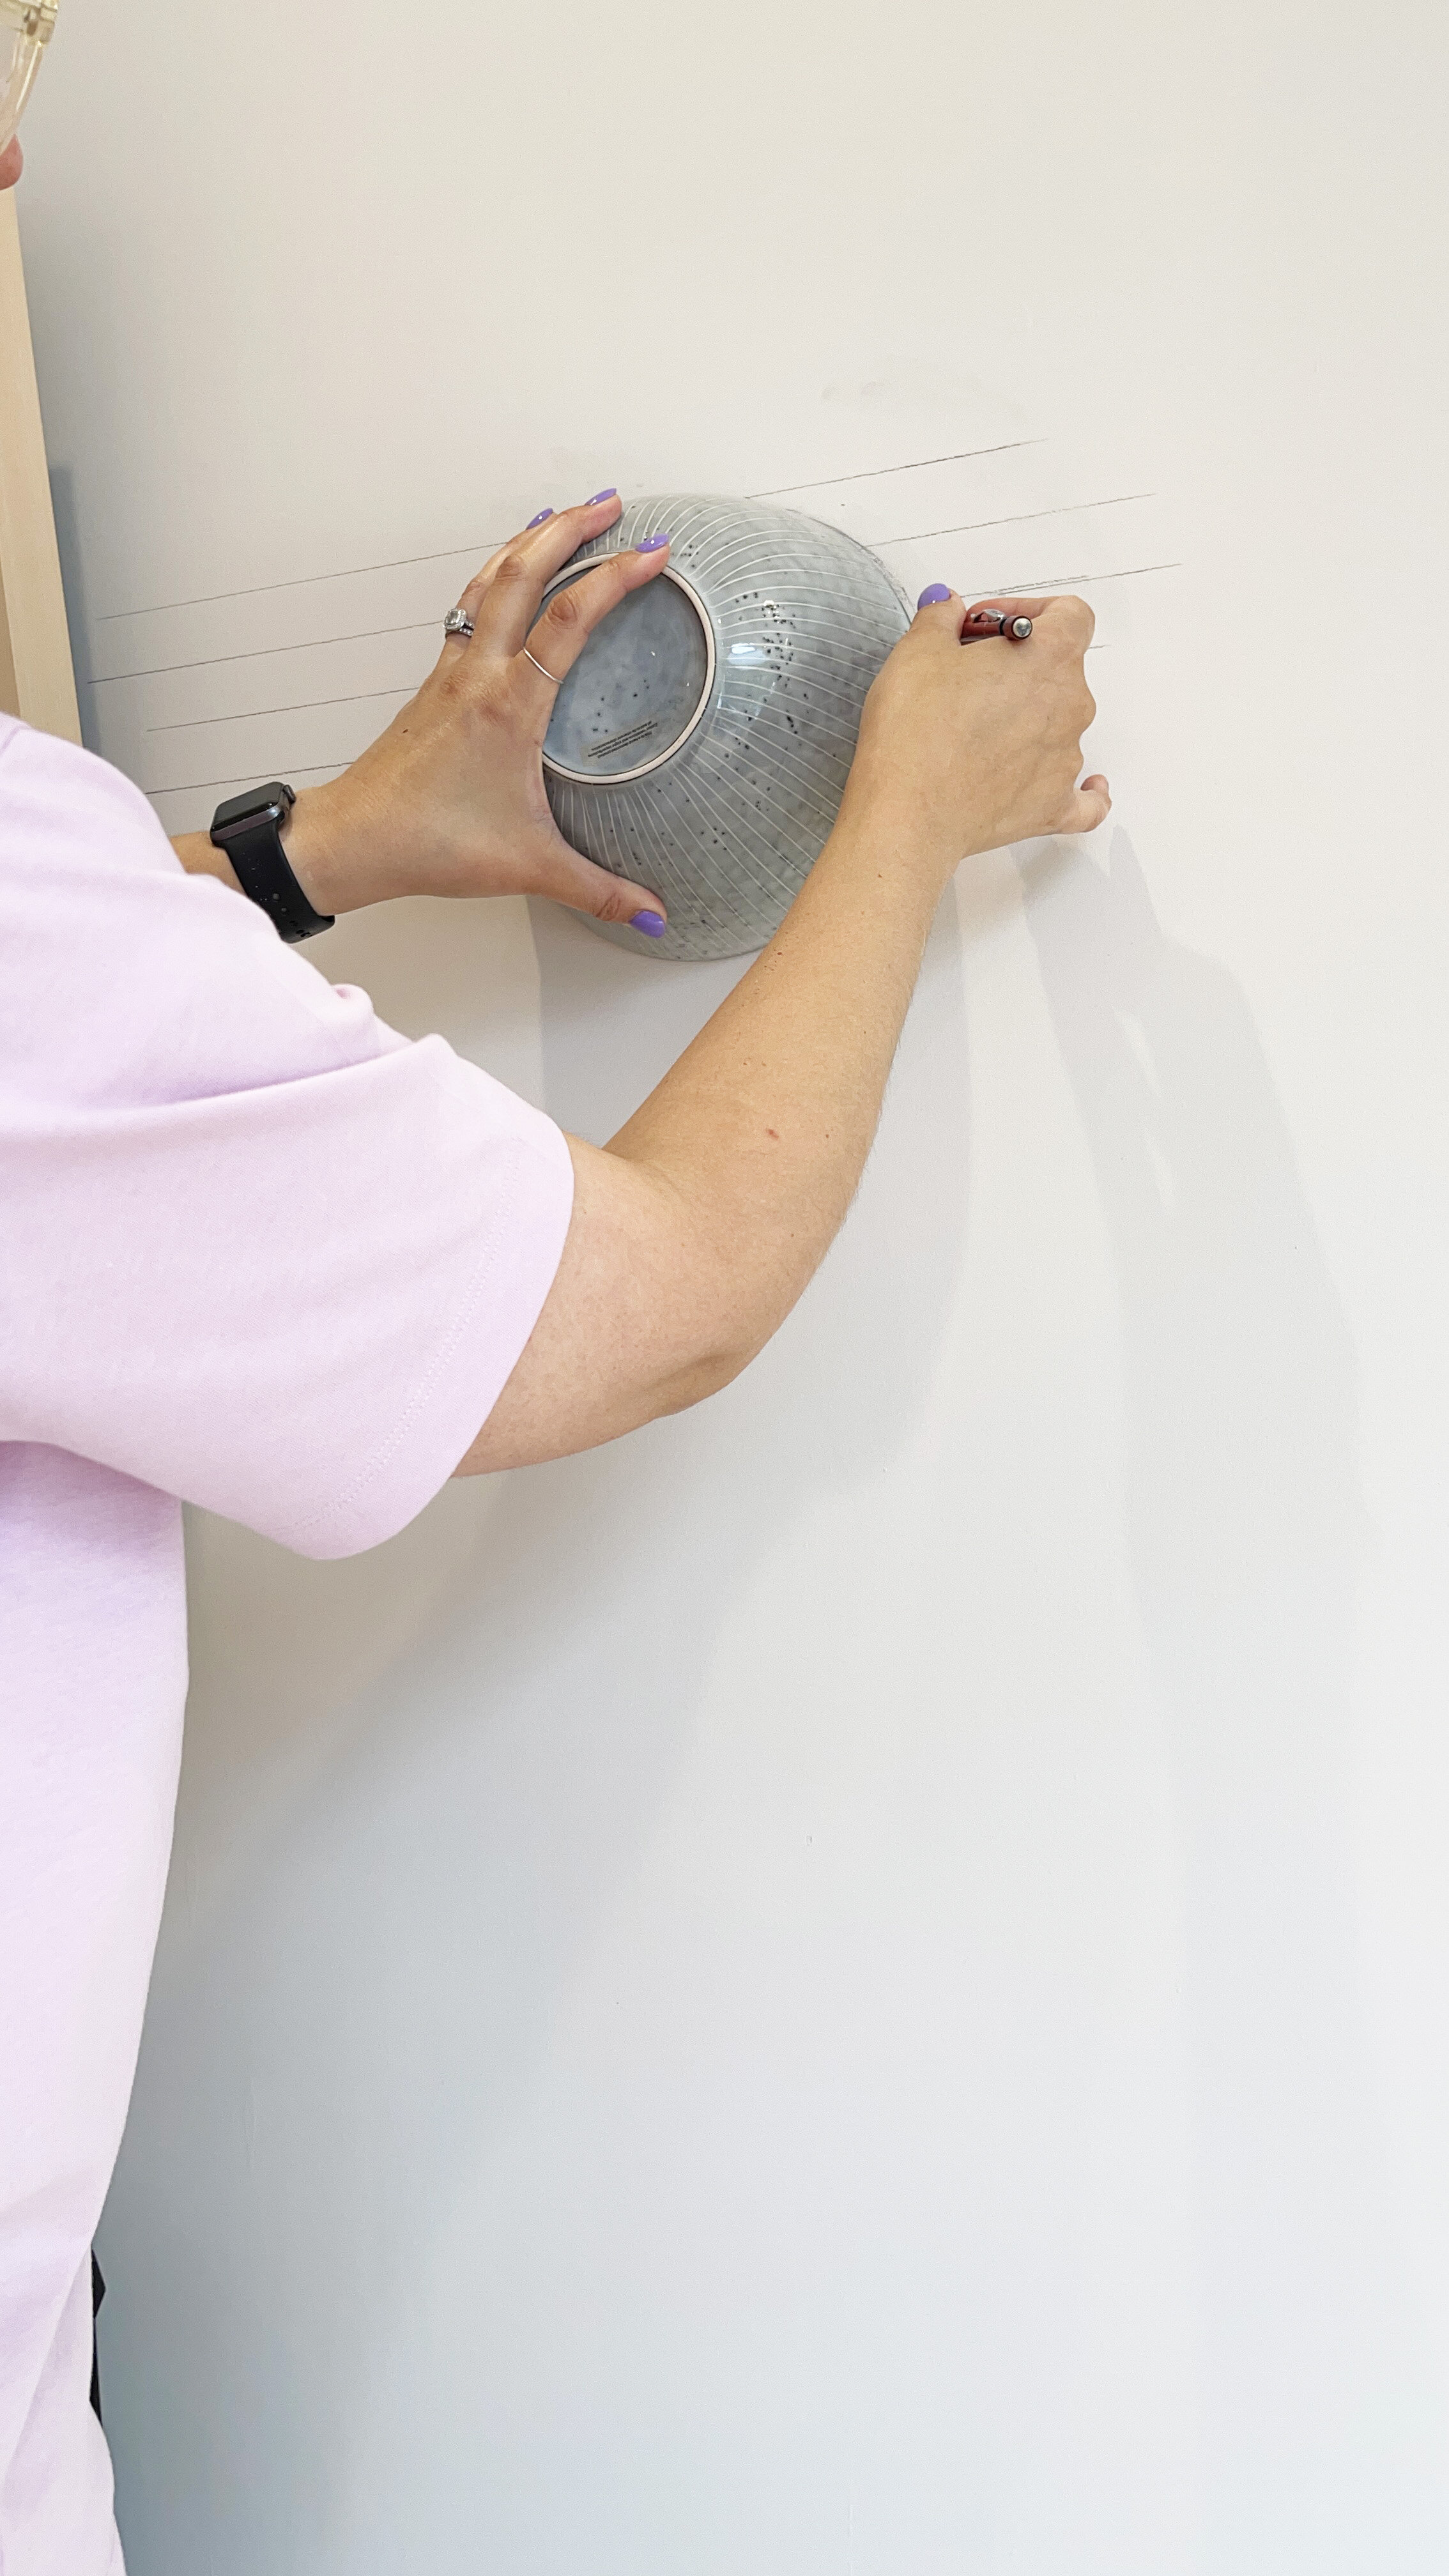
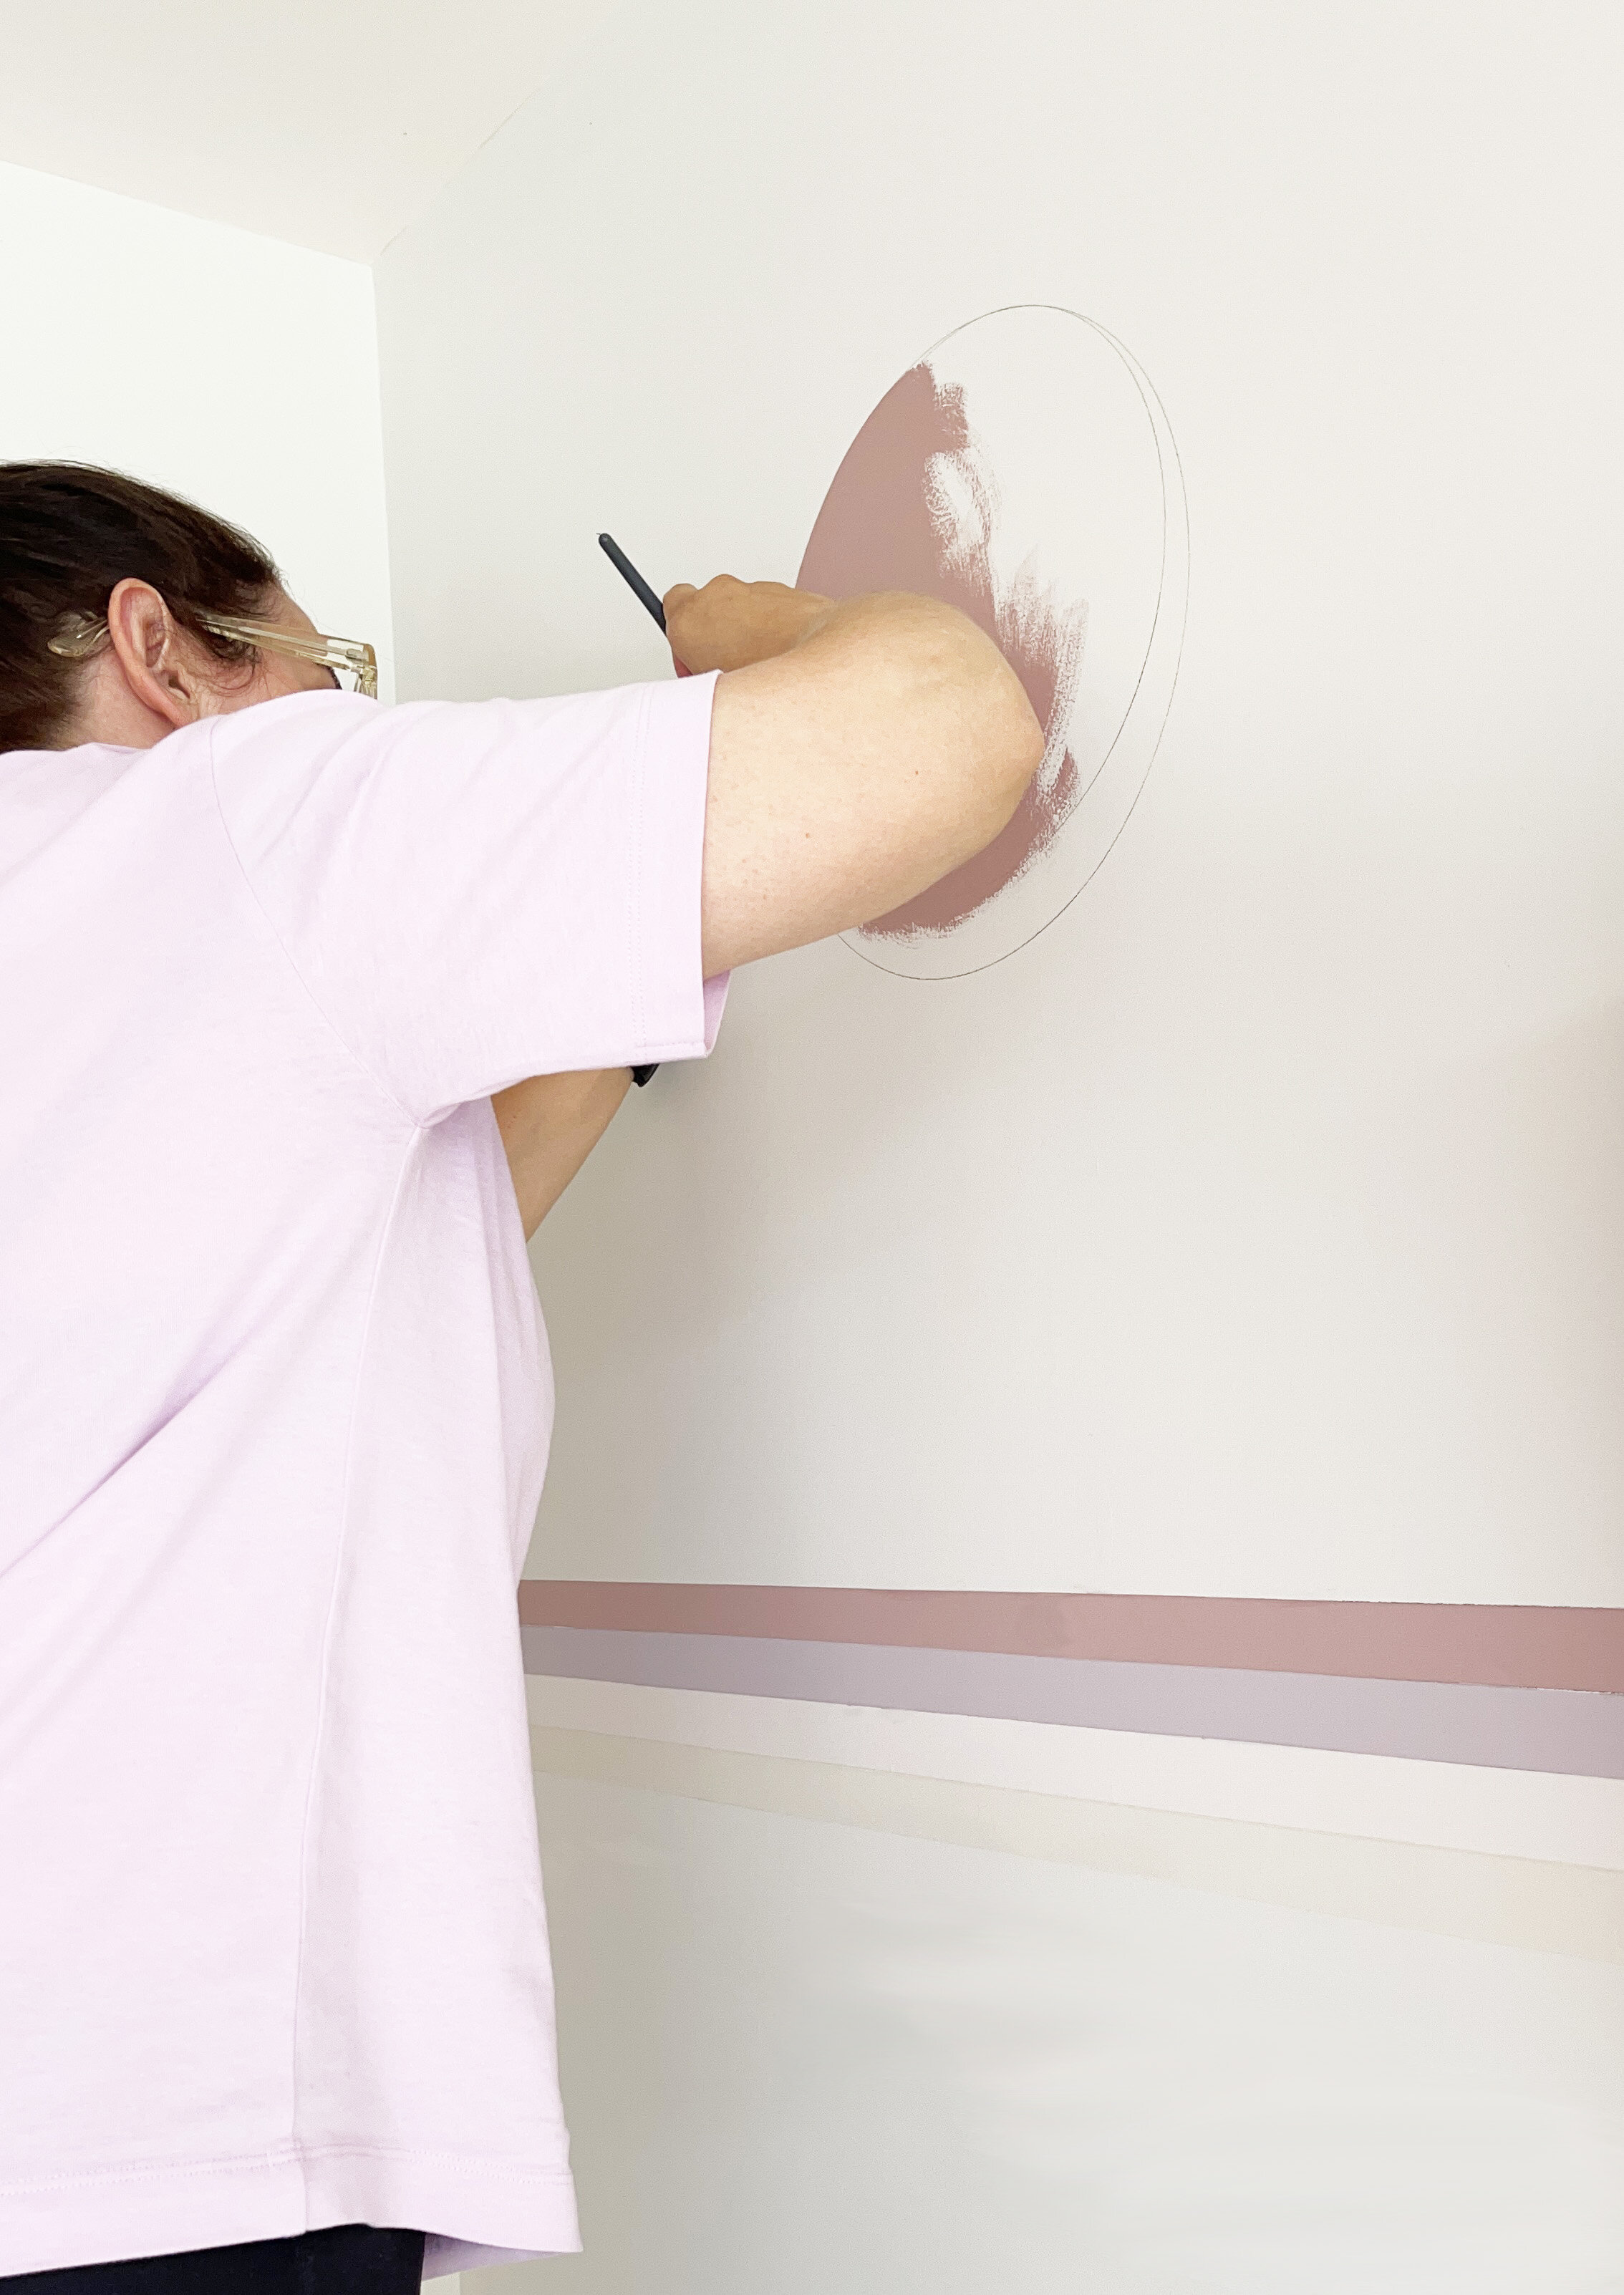
I then got to work on drawing all the lines in pencil on the wall. I used a spirit level to make sure the lines were straight , and I used a kitchen bowl to do the curves.

I measured each painted line to be 3cm wide each.

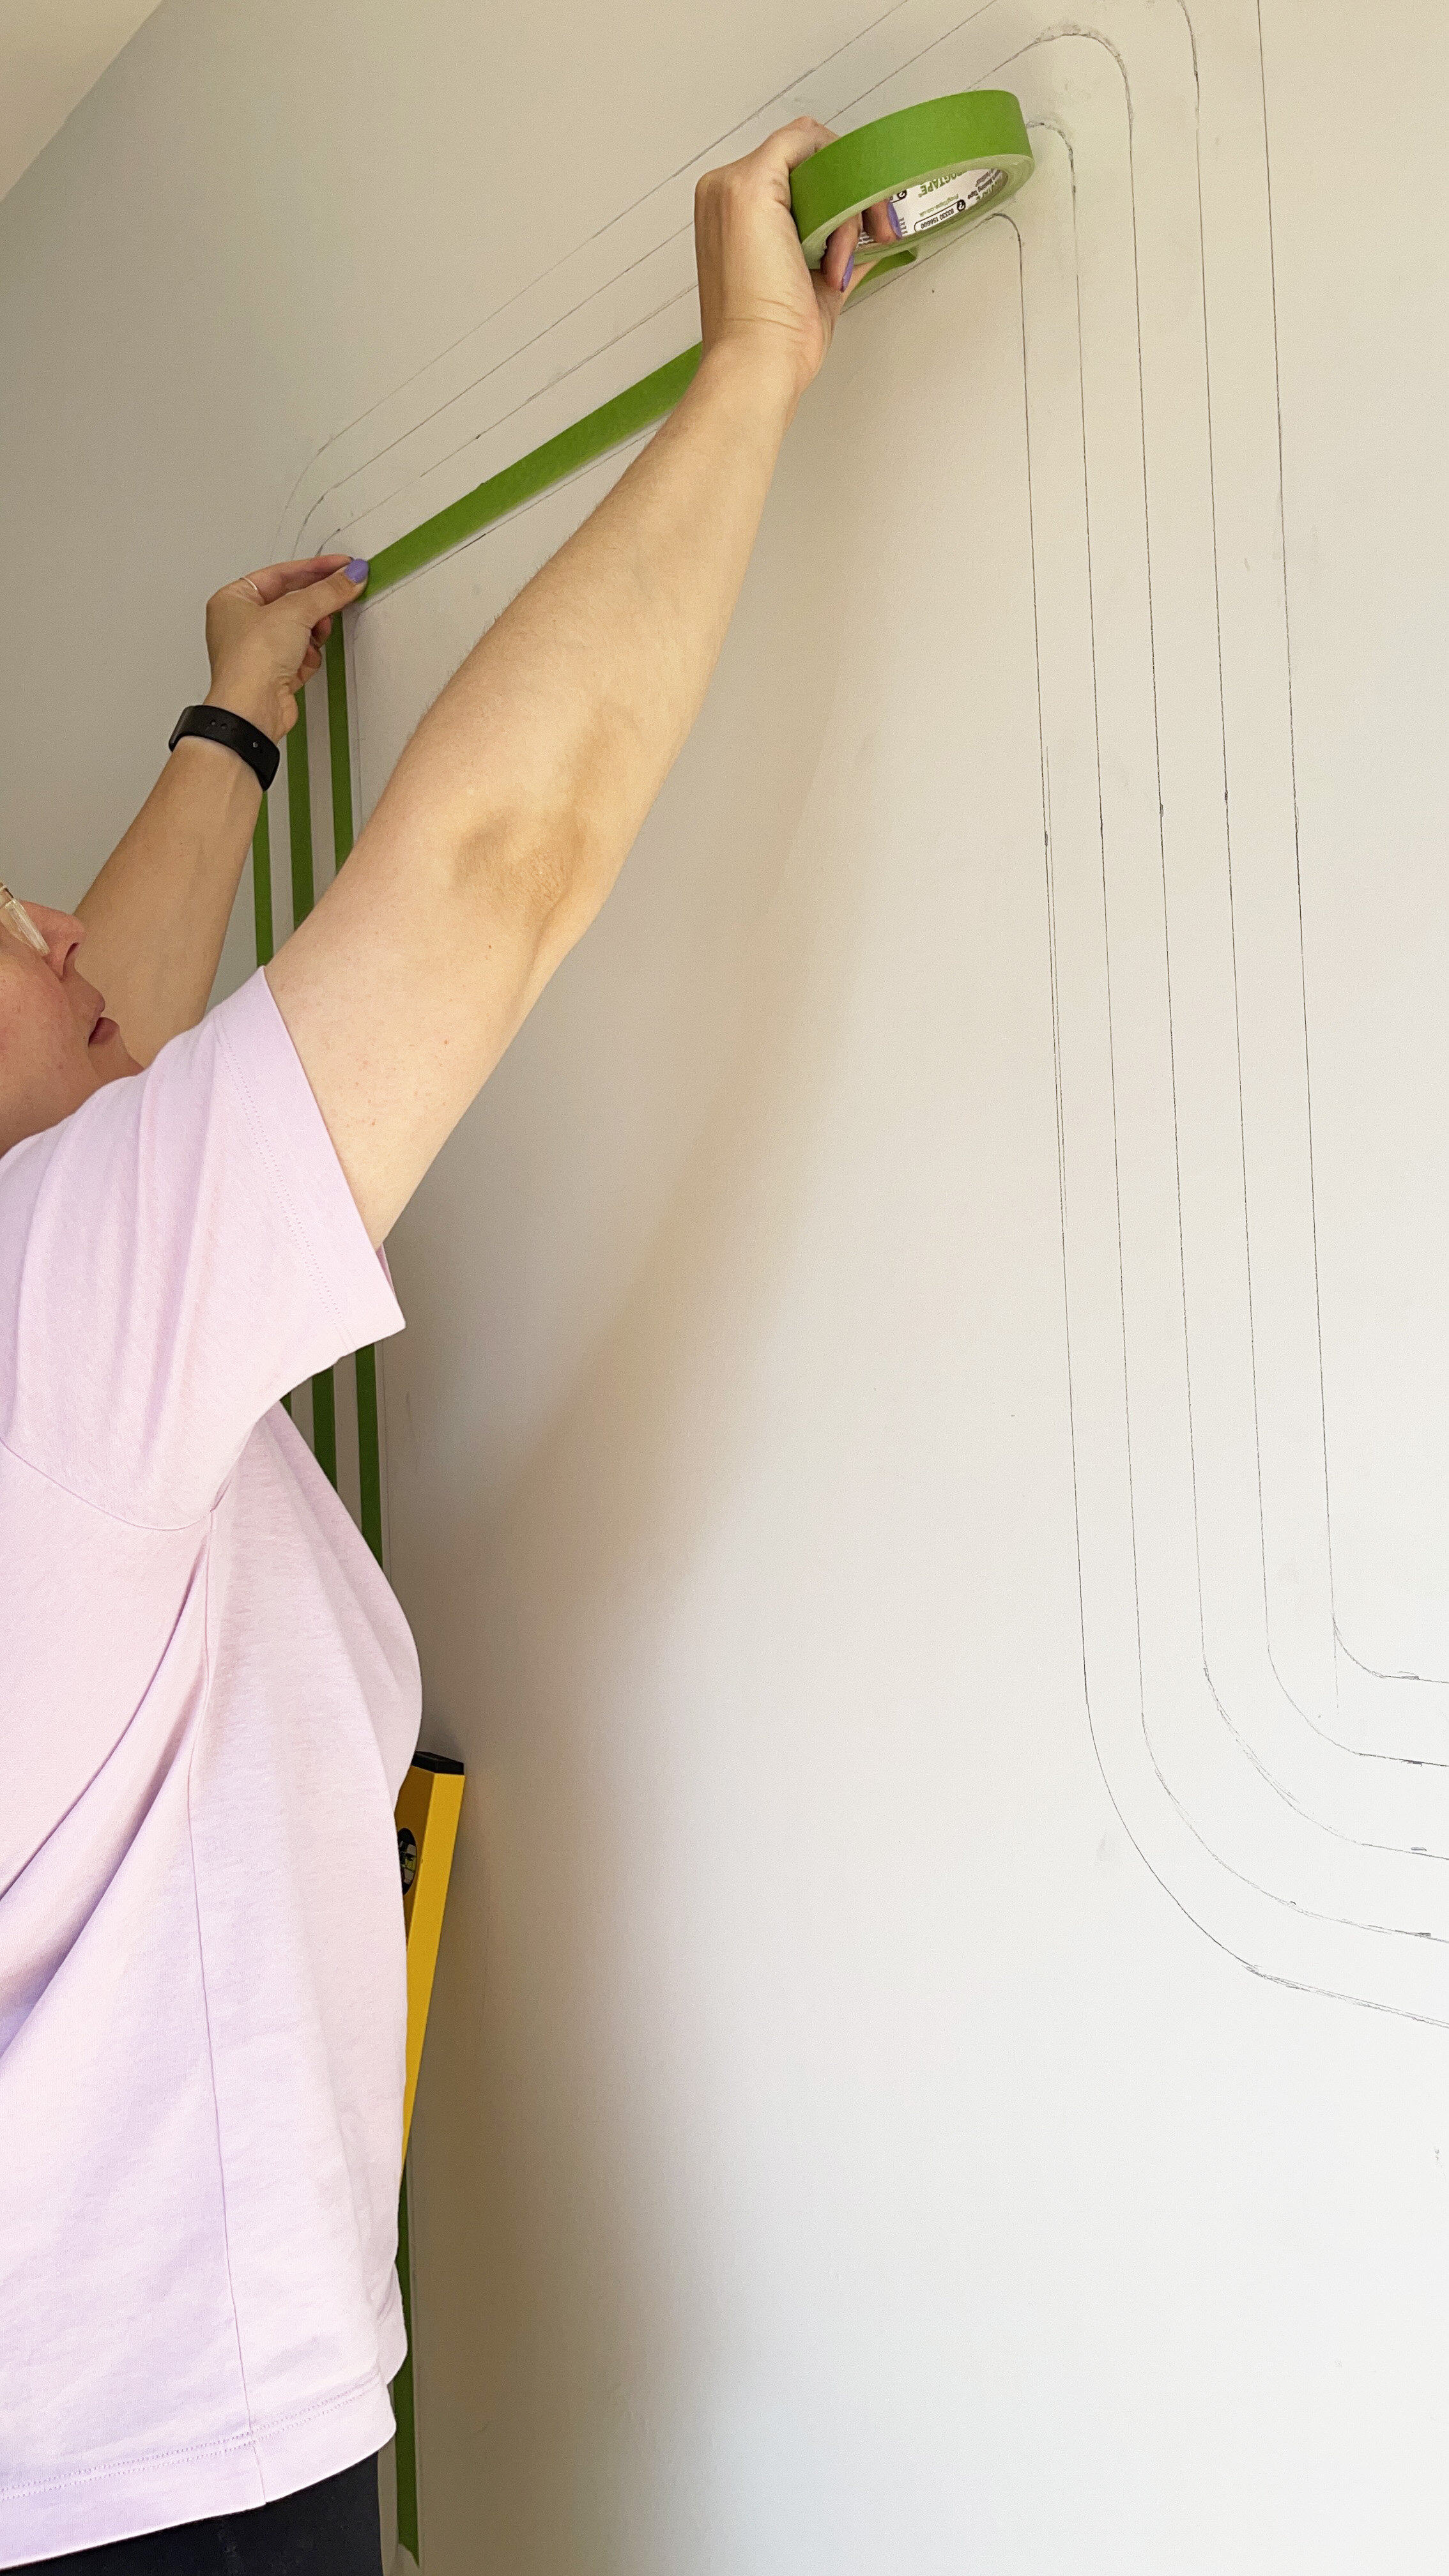
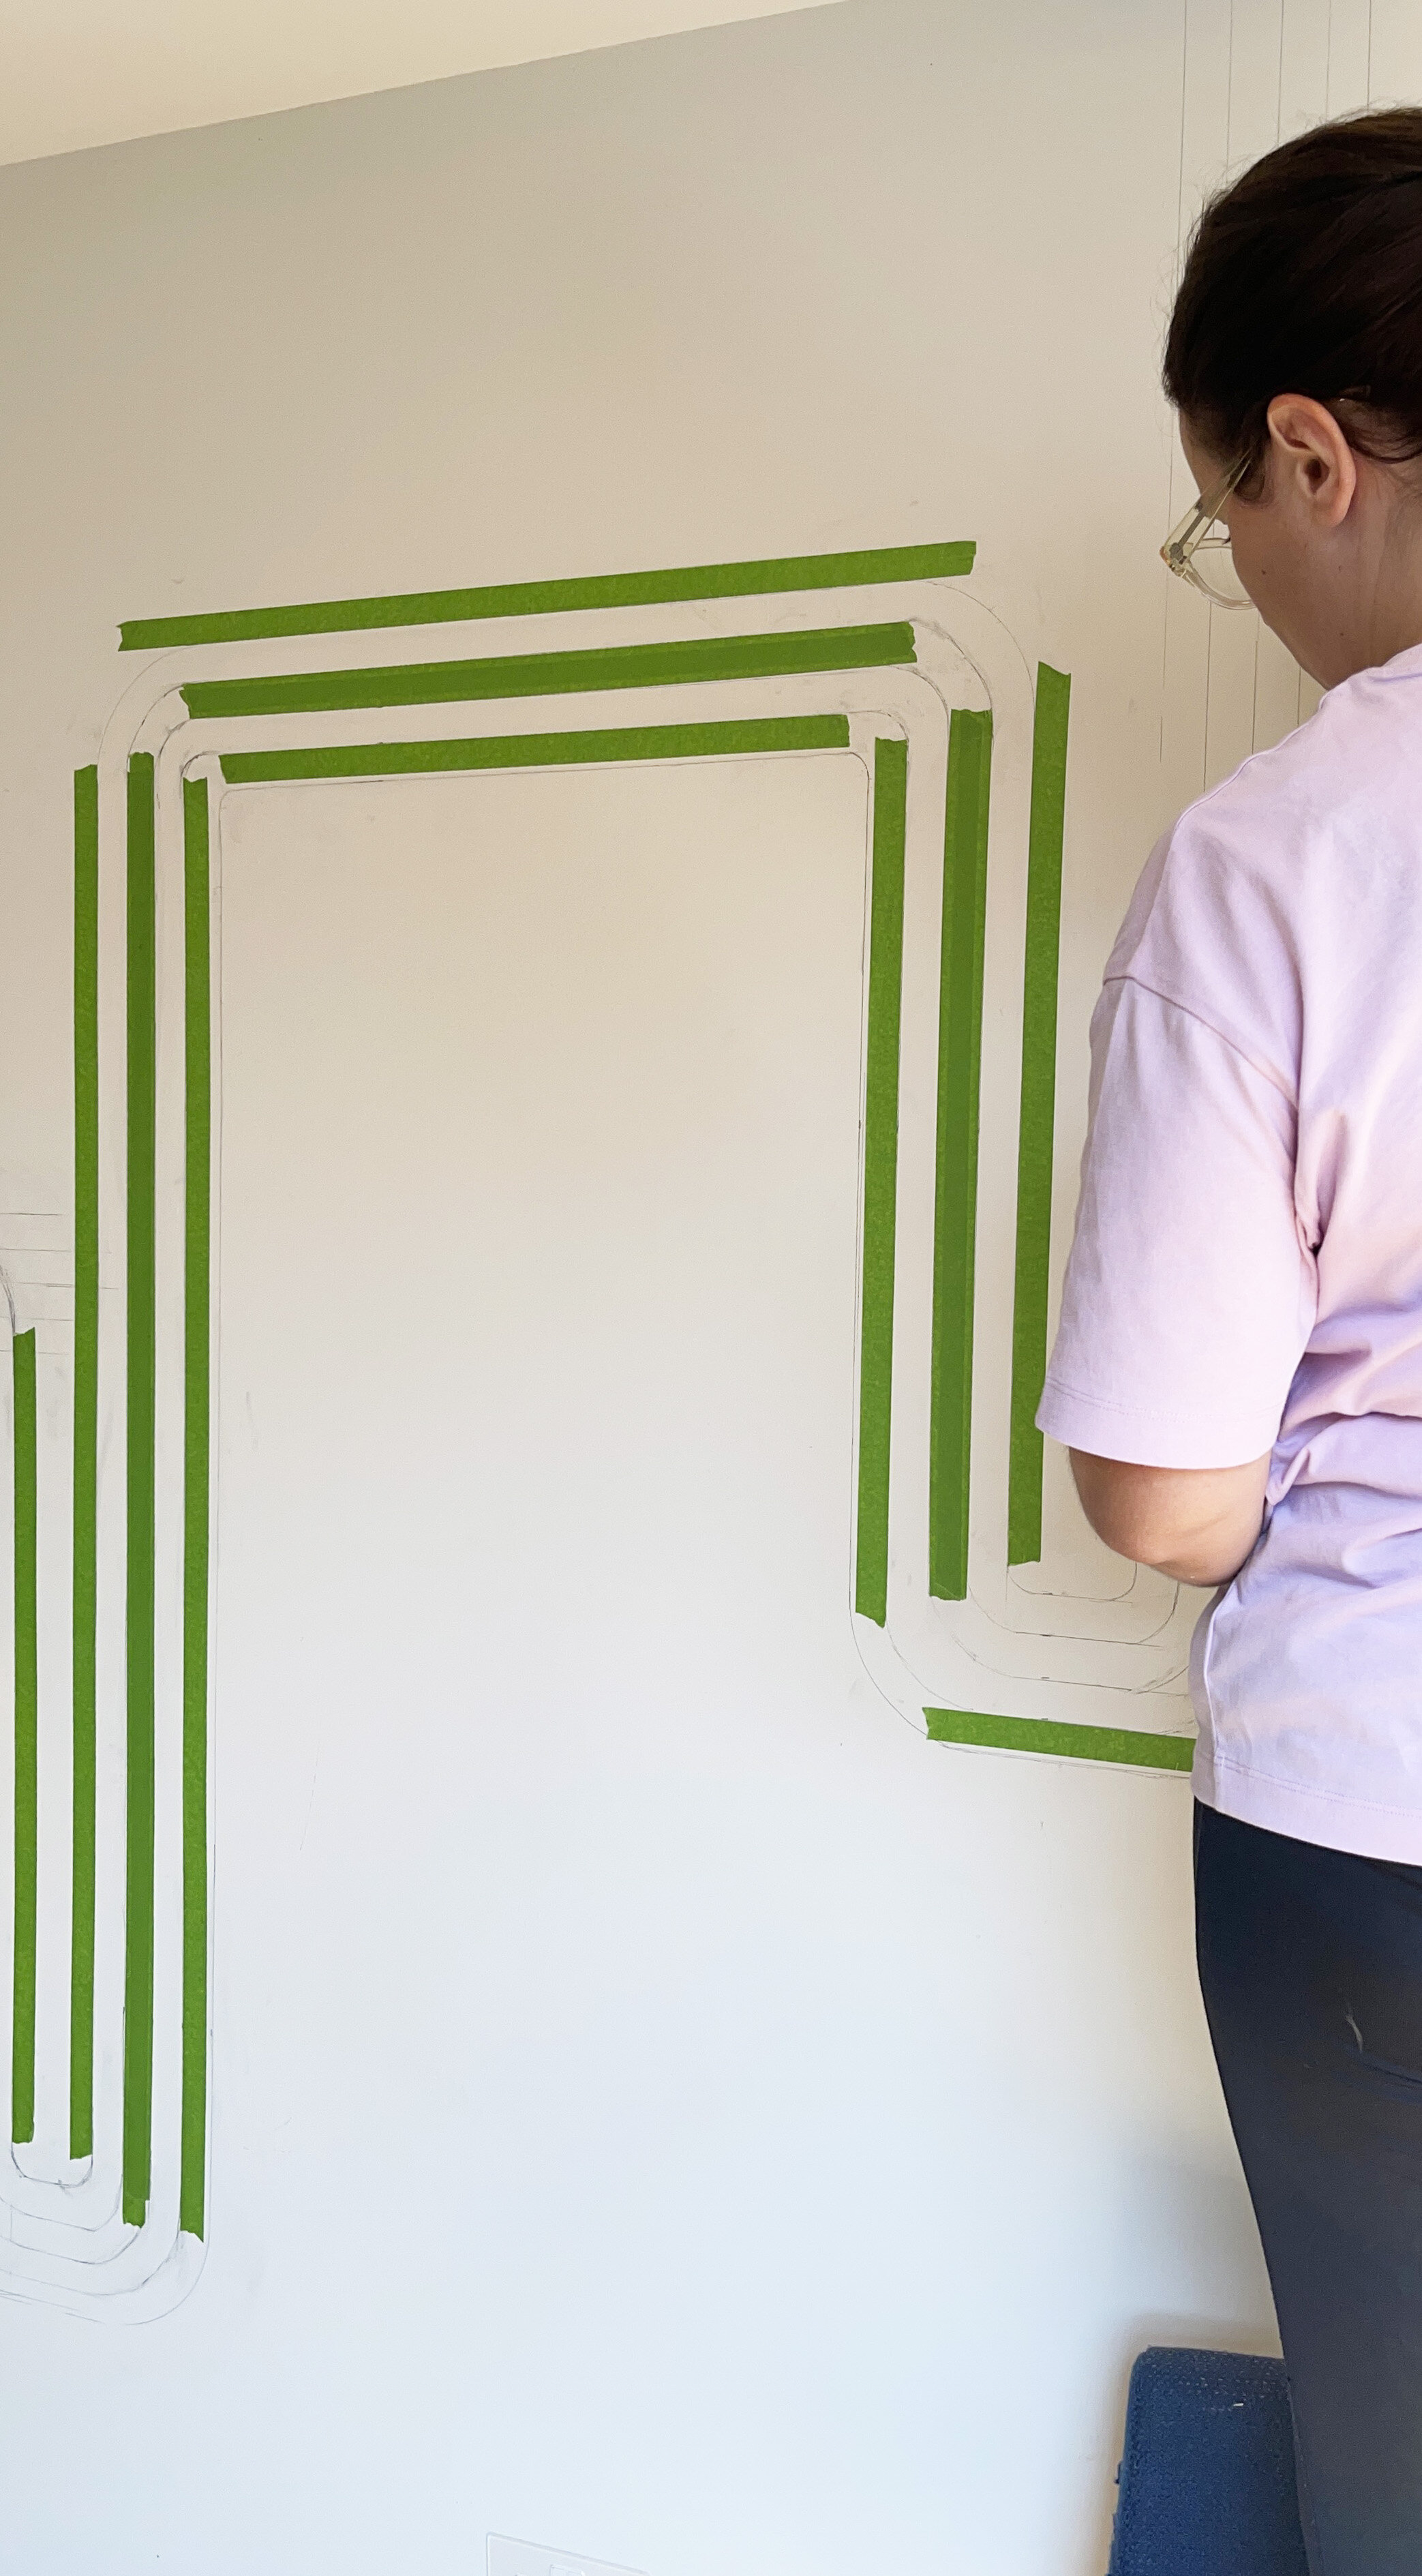
I then started to mask the areas using a general masking tape which is suitable for decorating, to give me the ultimate straight lines for decorating.

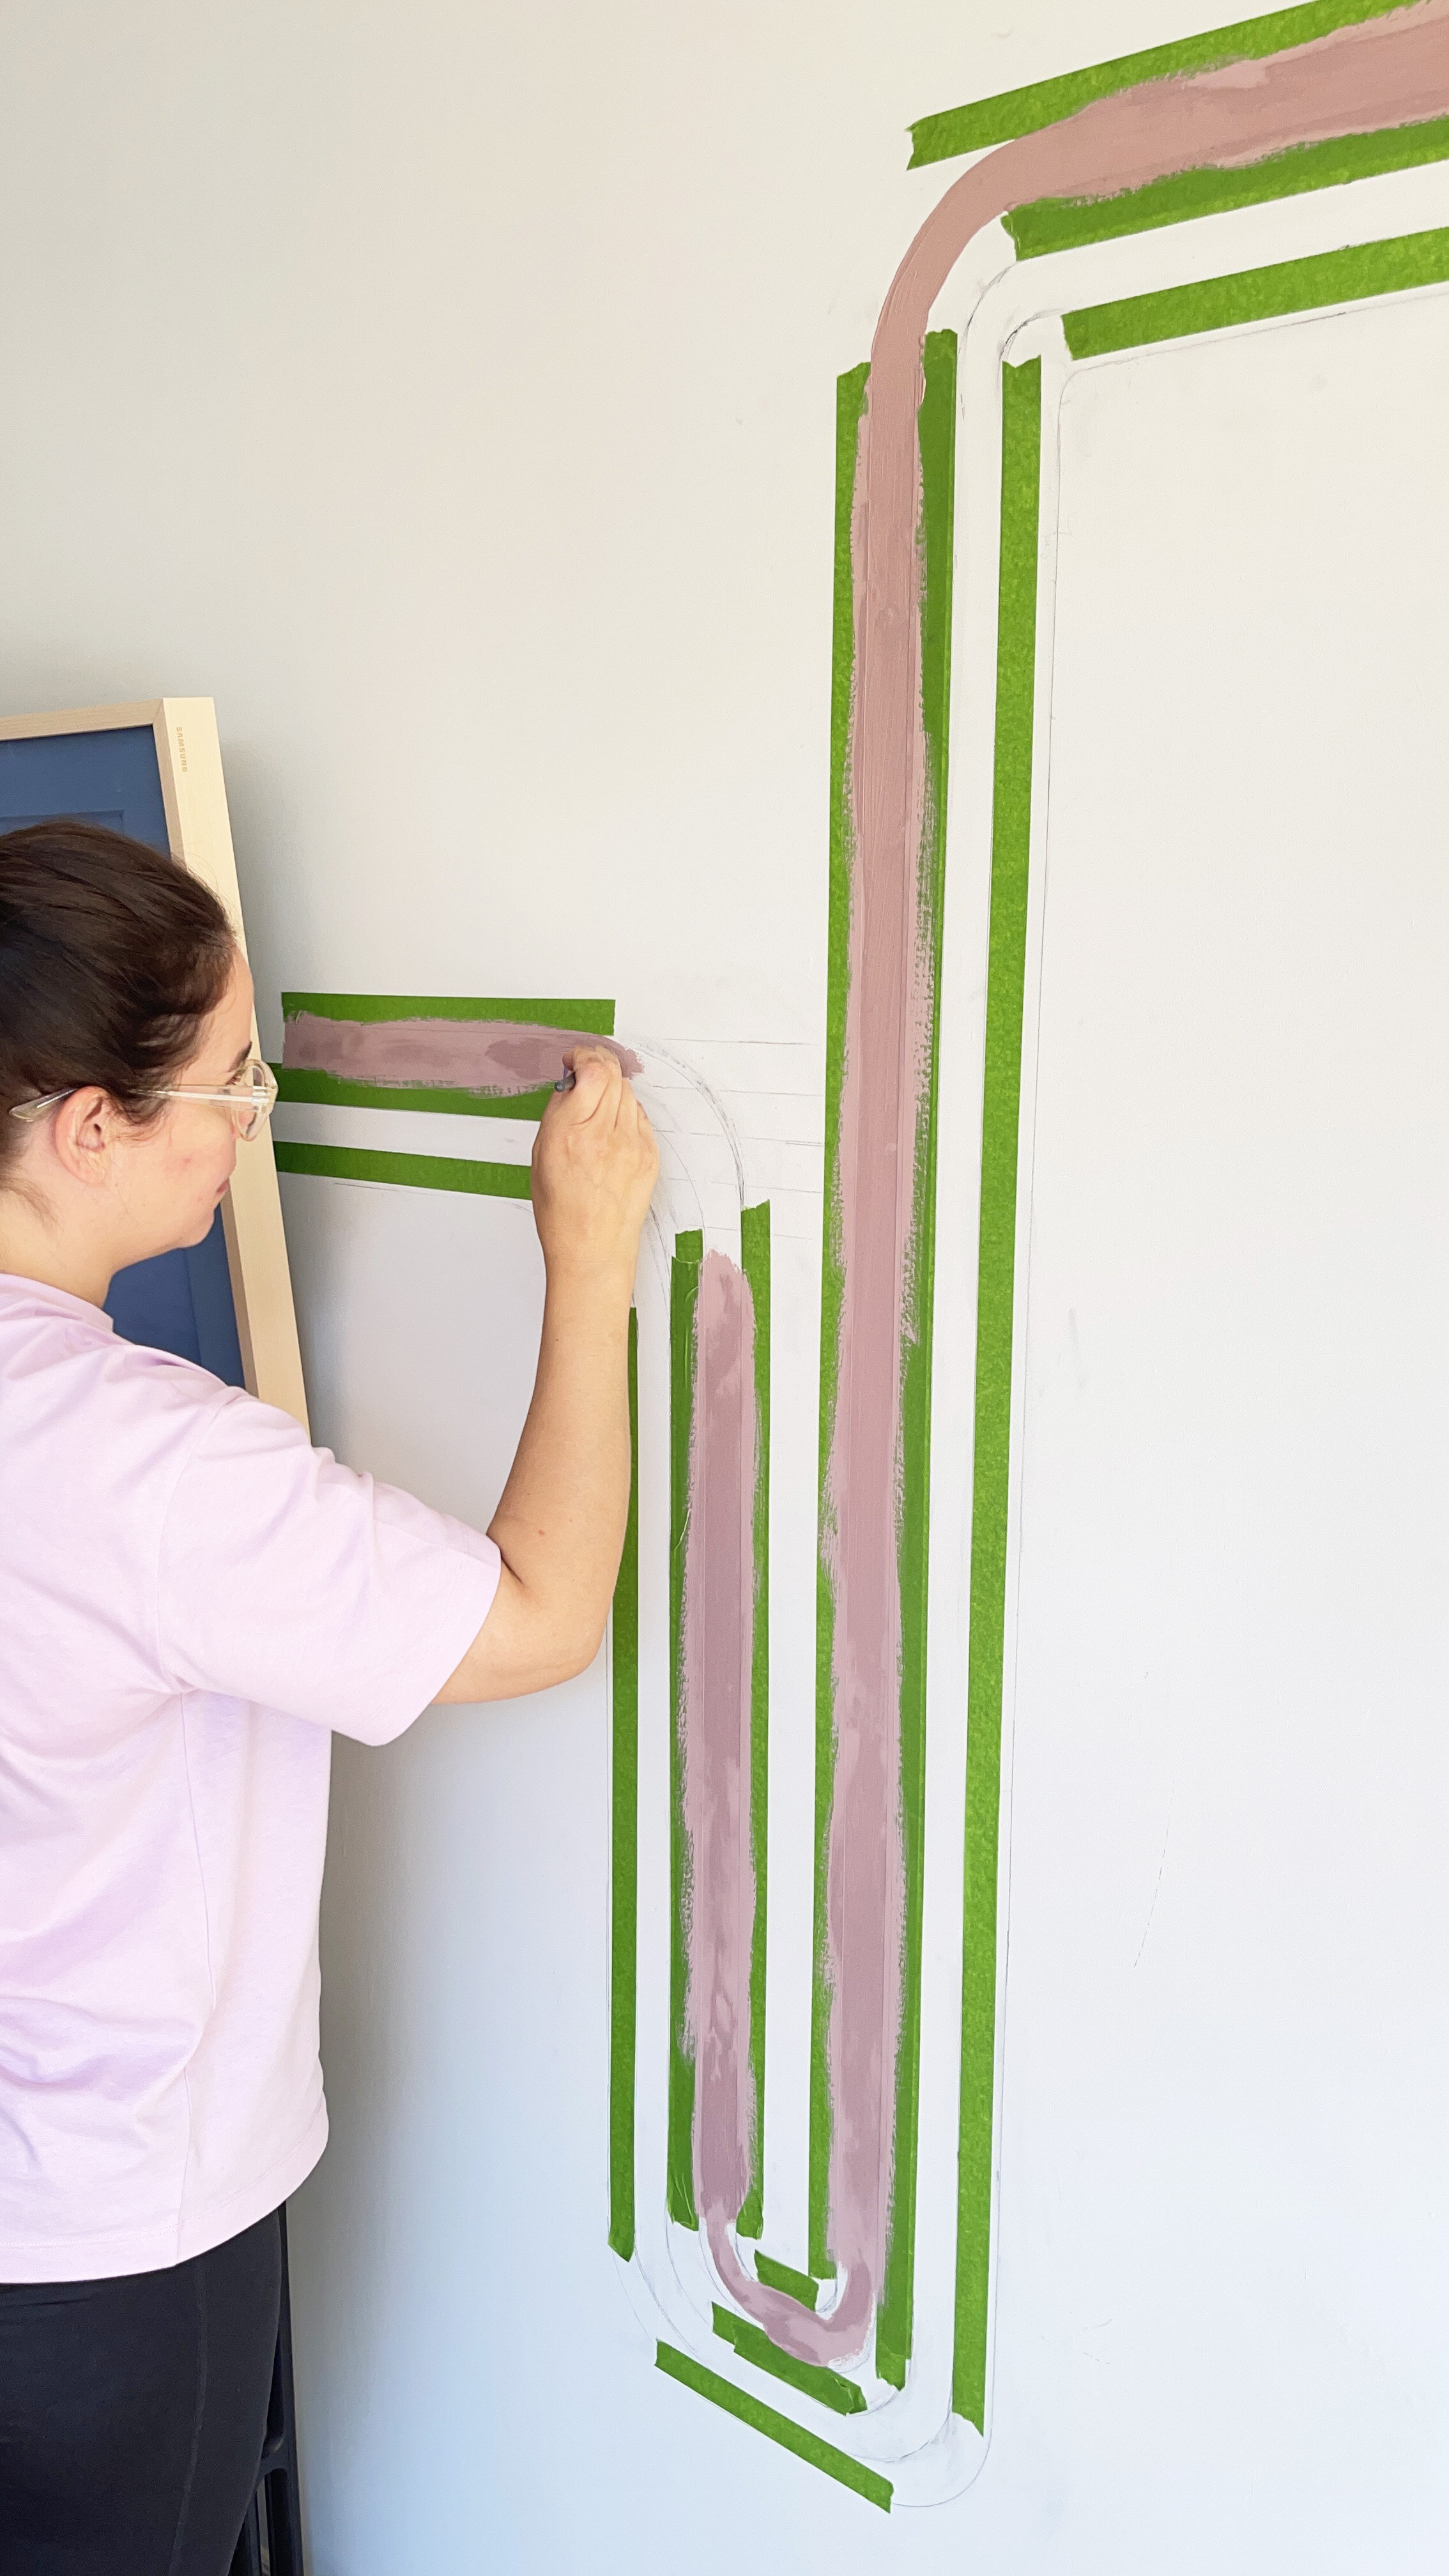
I then got to work on the painting , choosing to paint the curves by free hand as I has already marked out the lines in pencil.

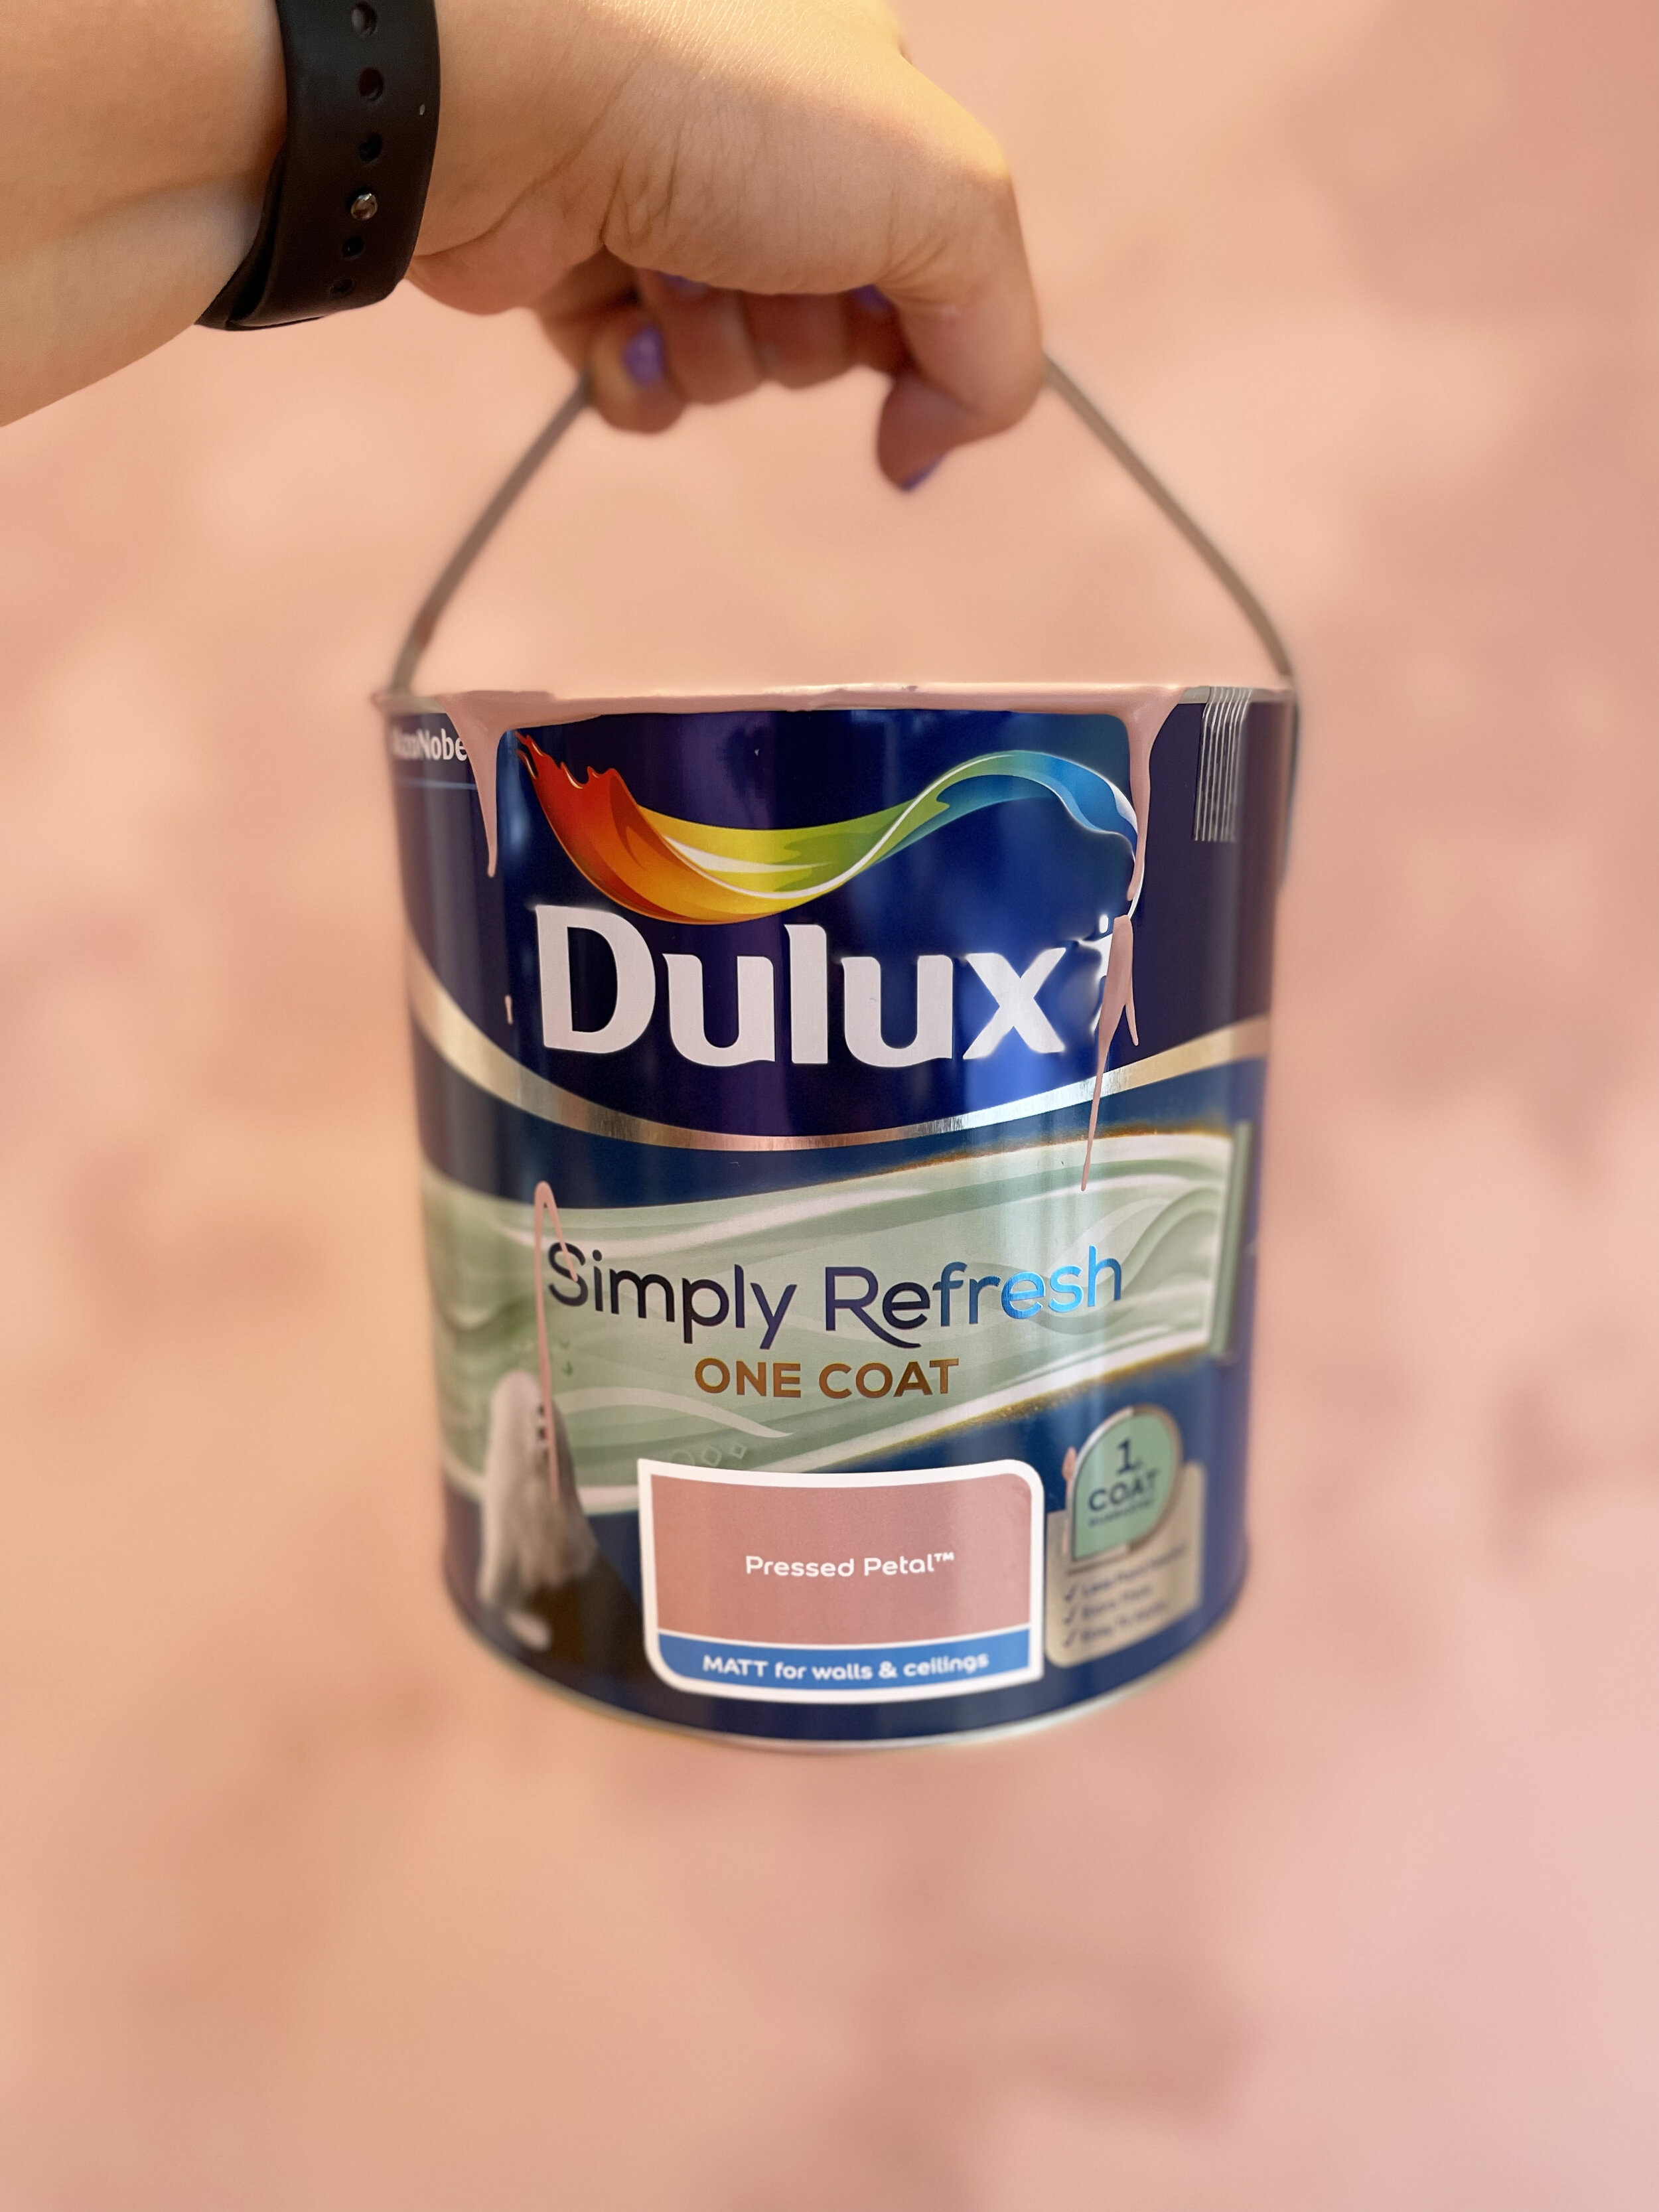
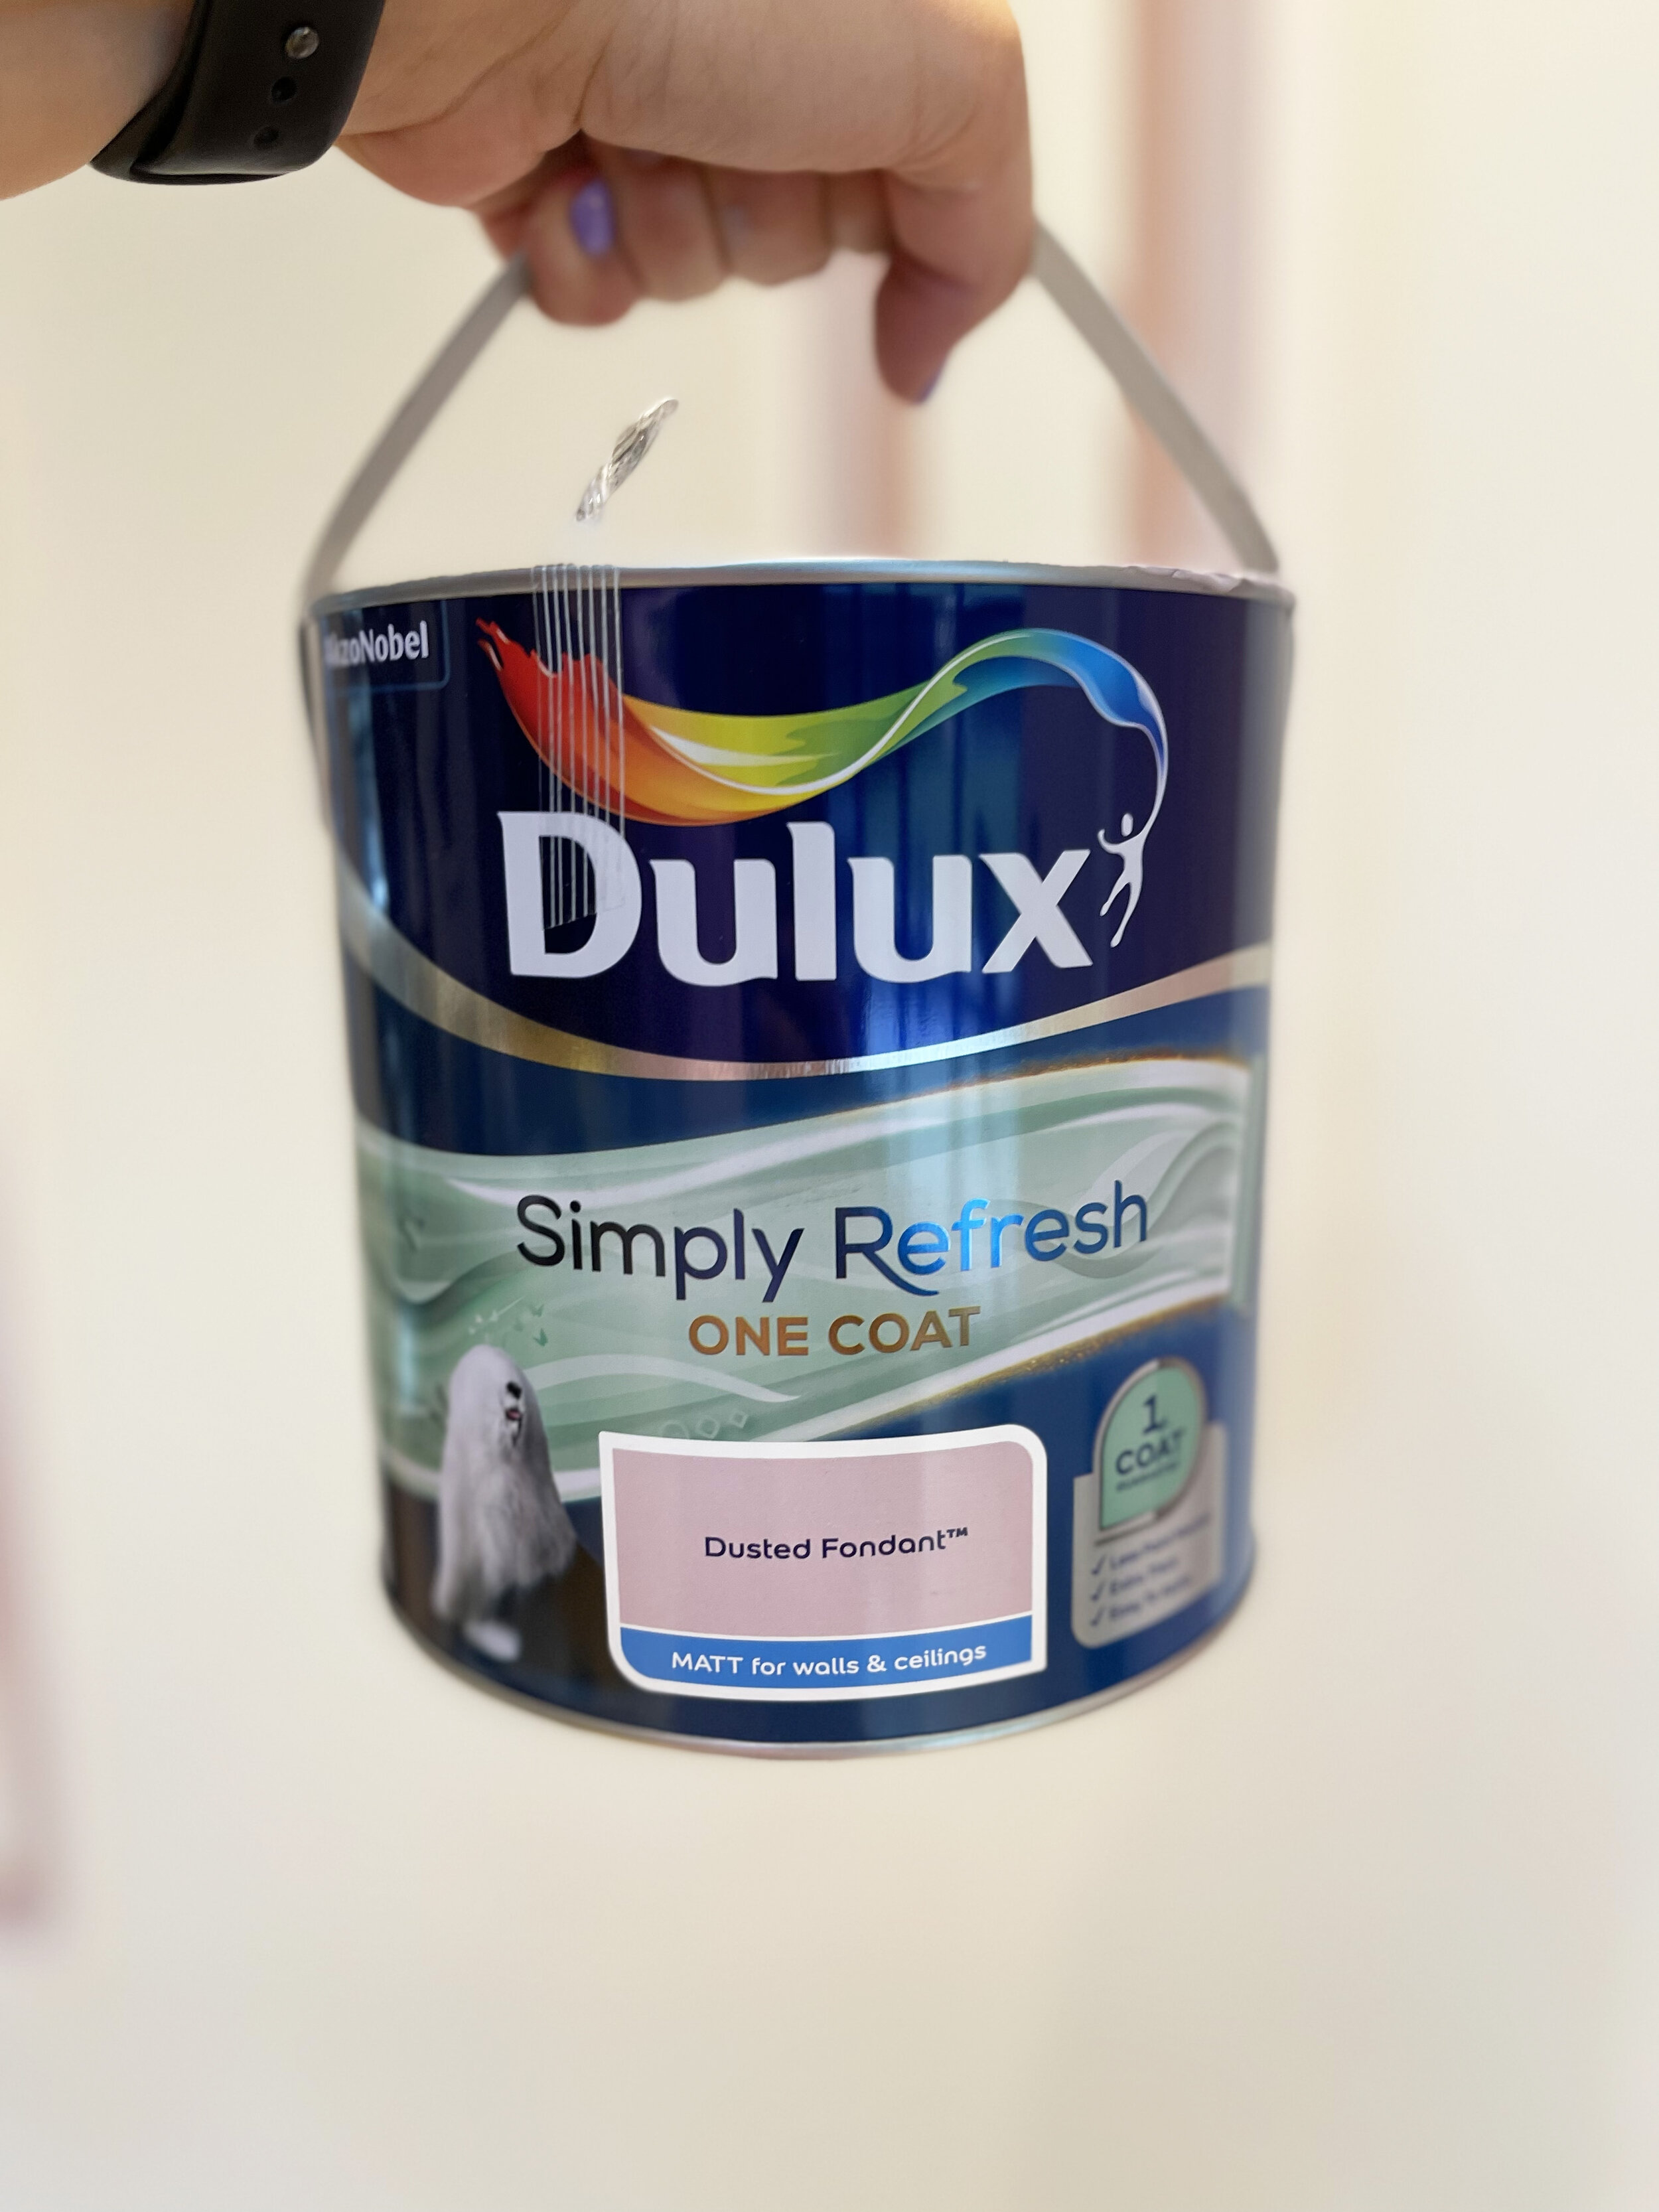
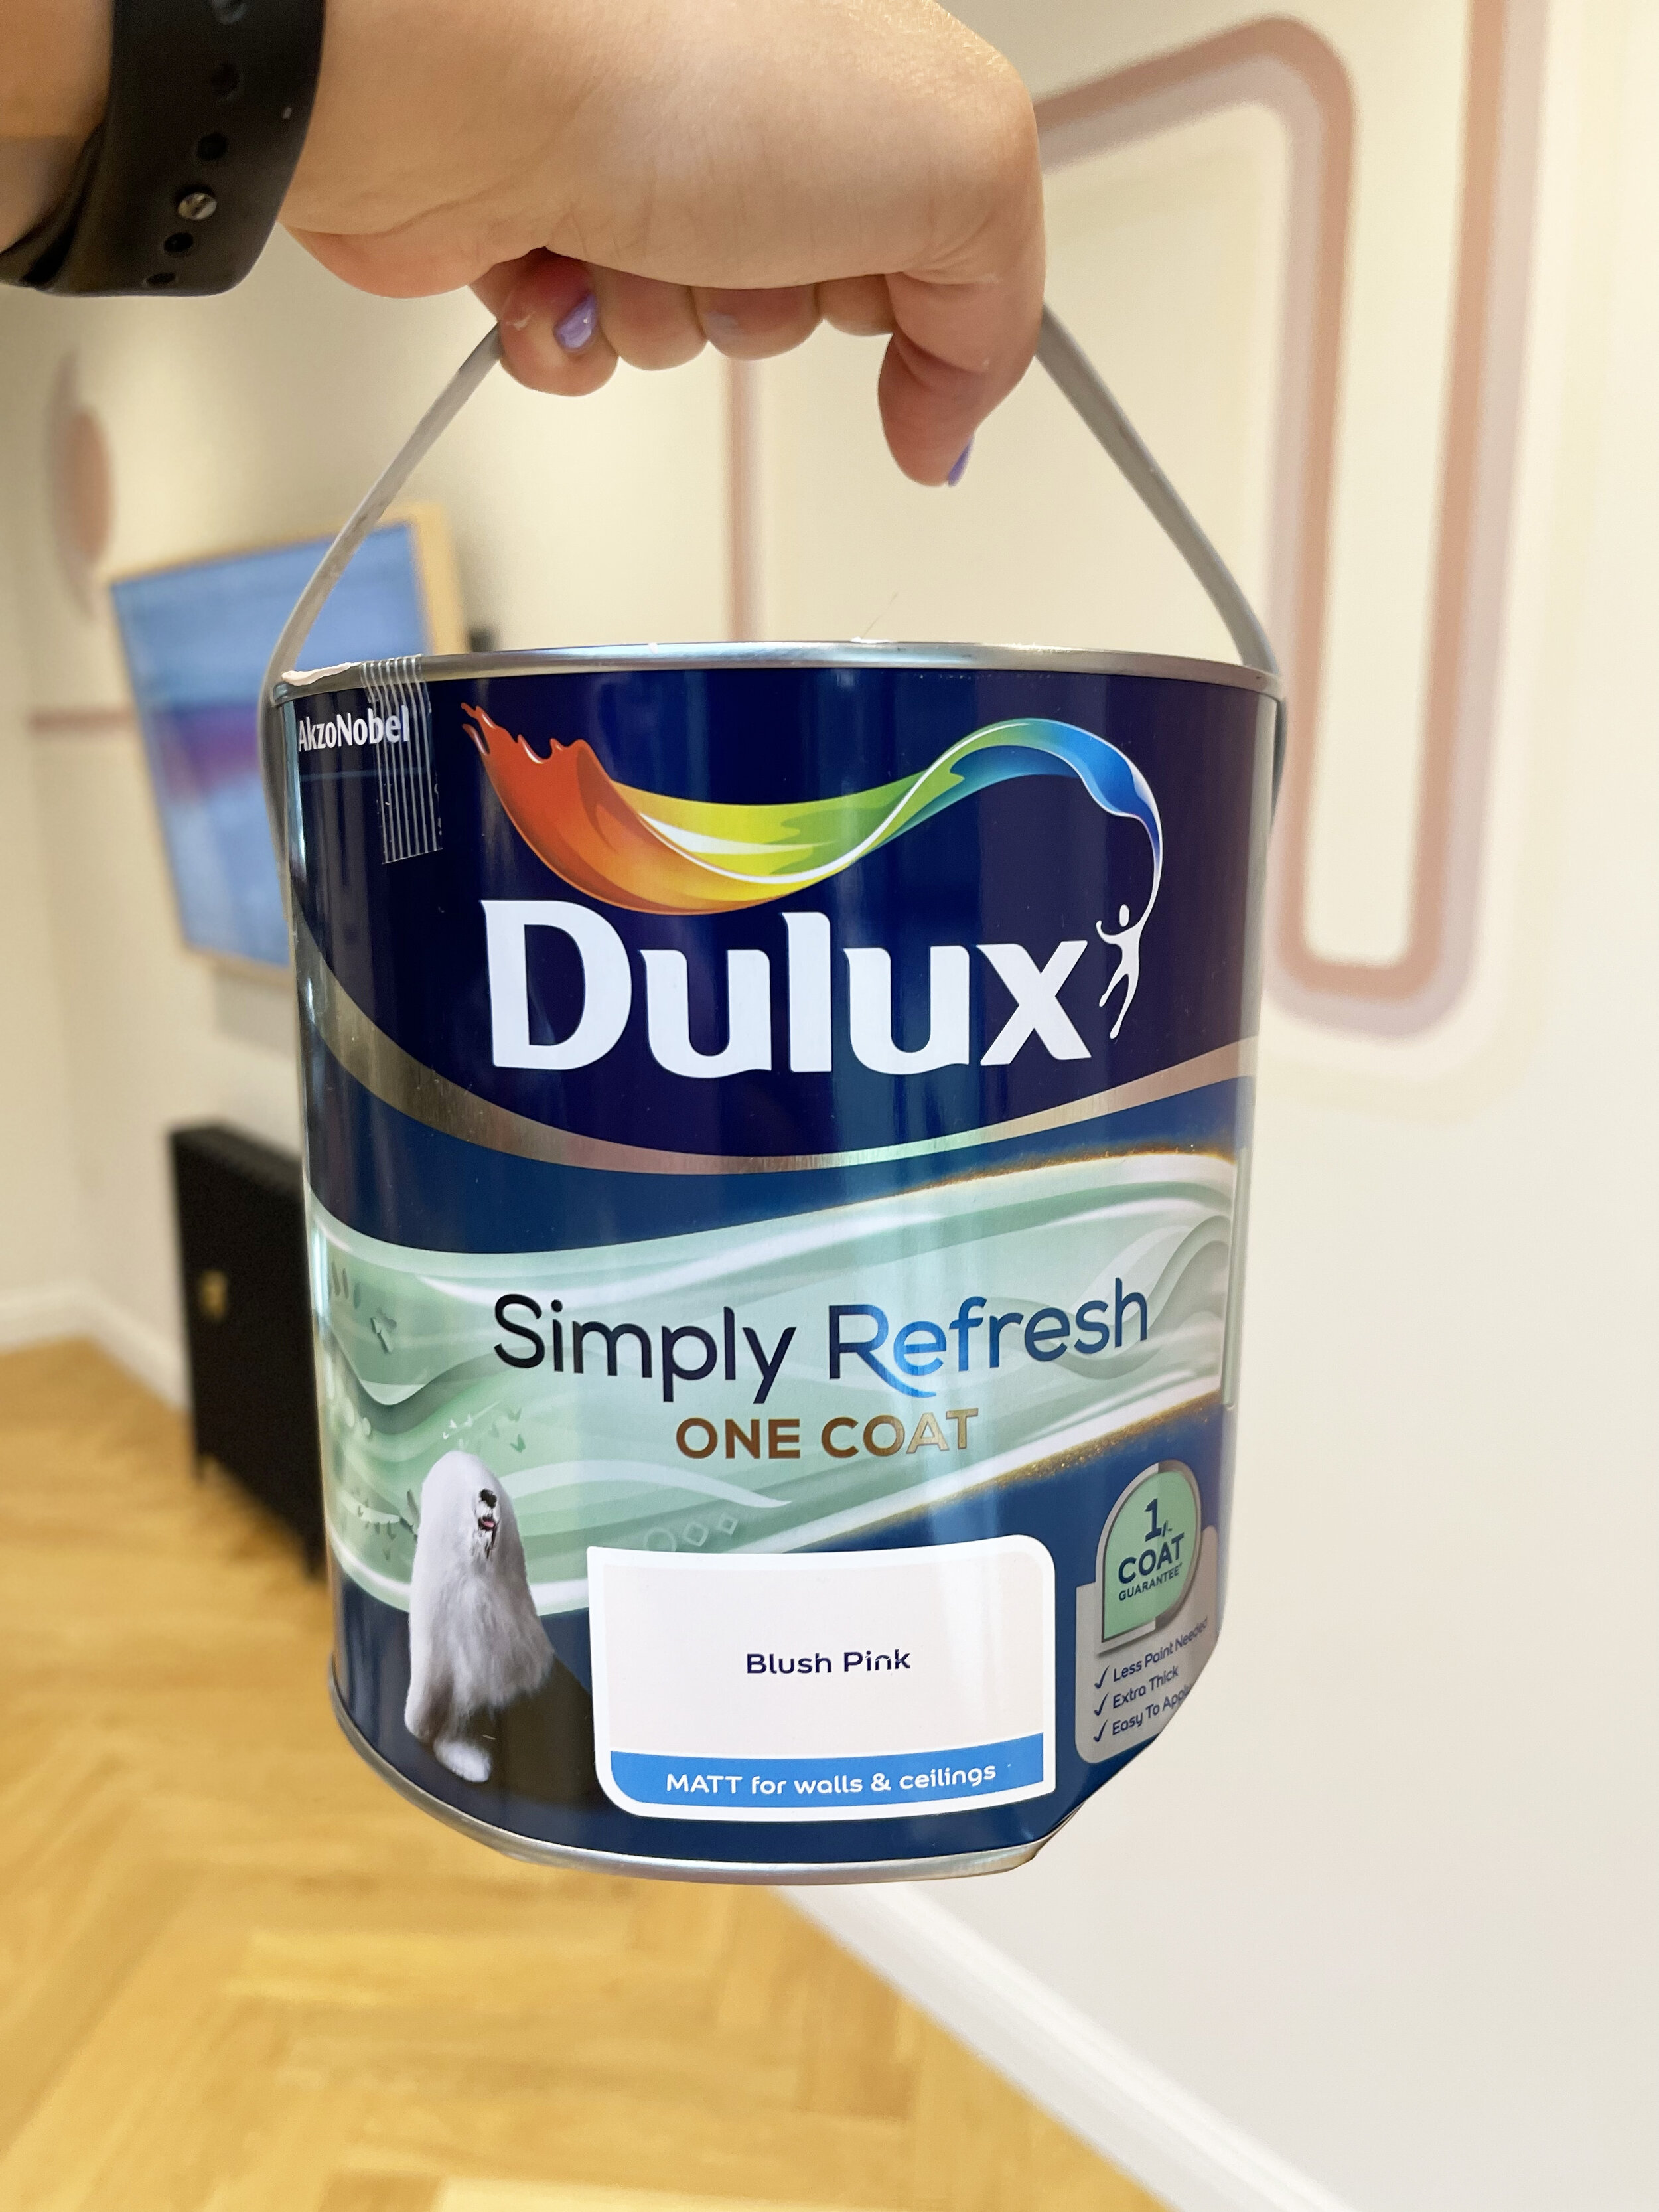
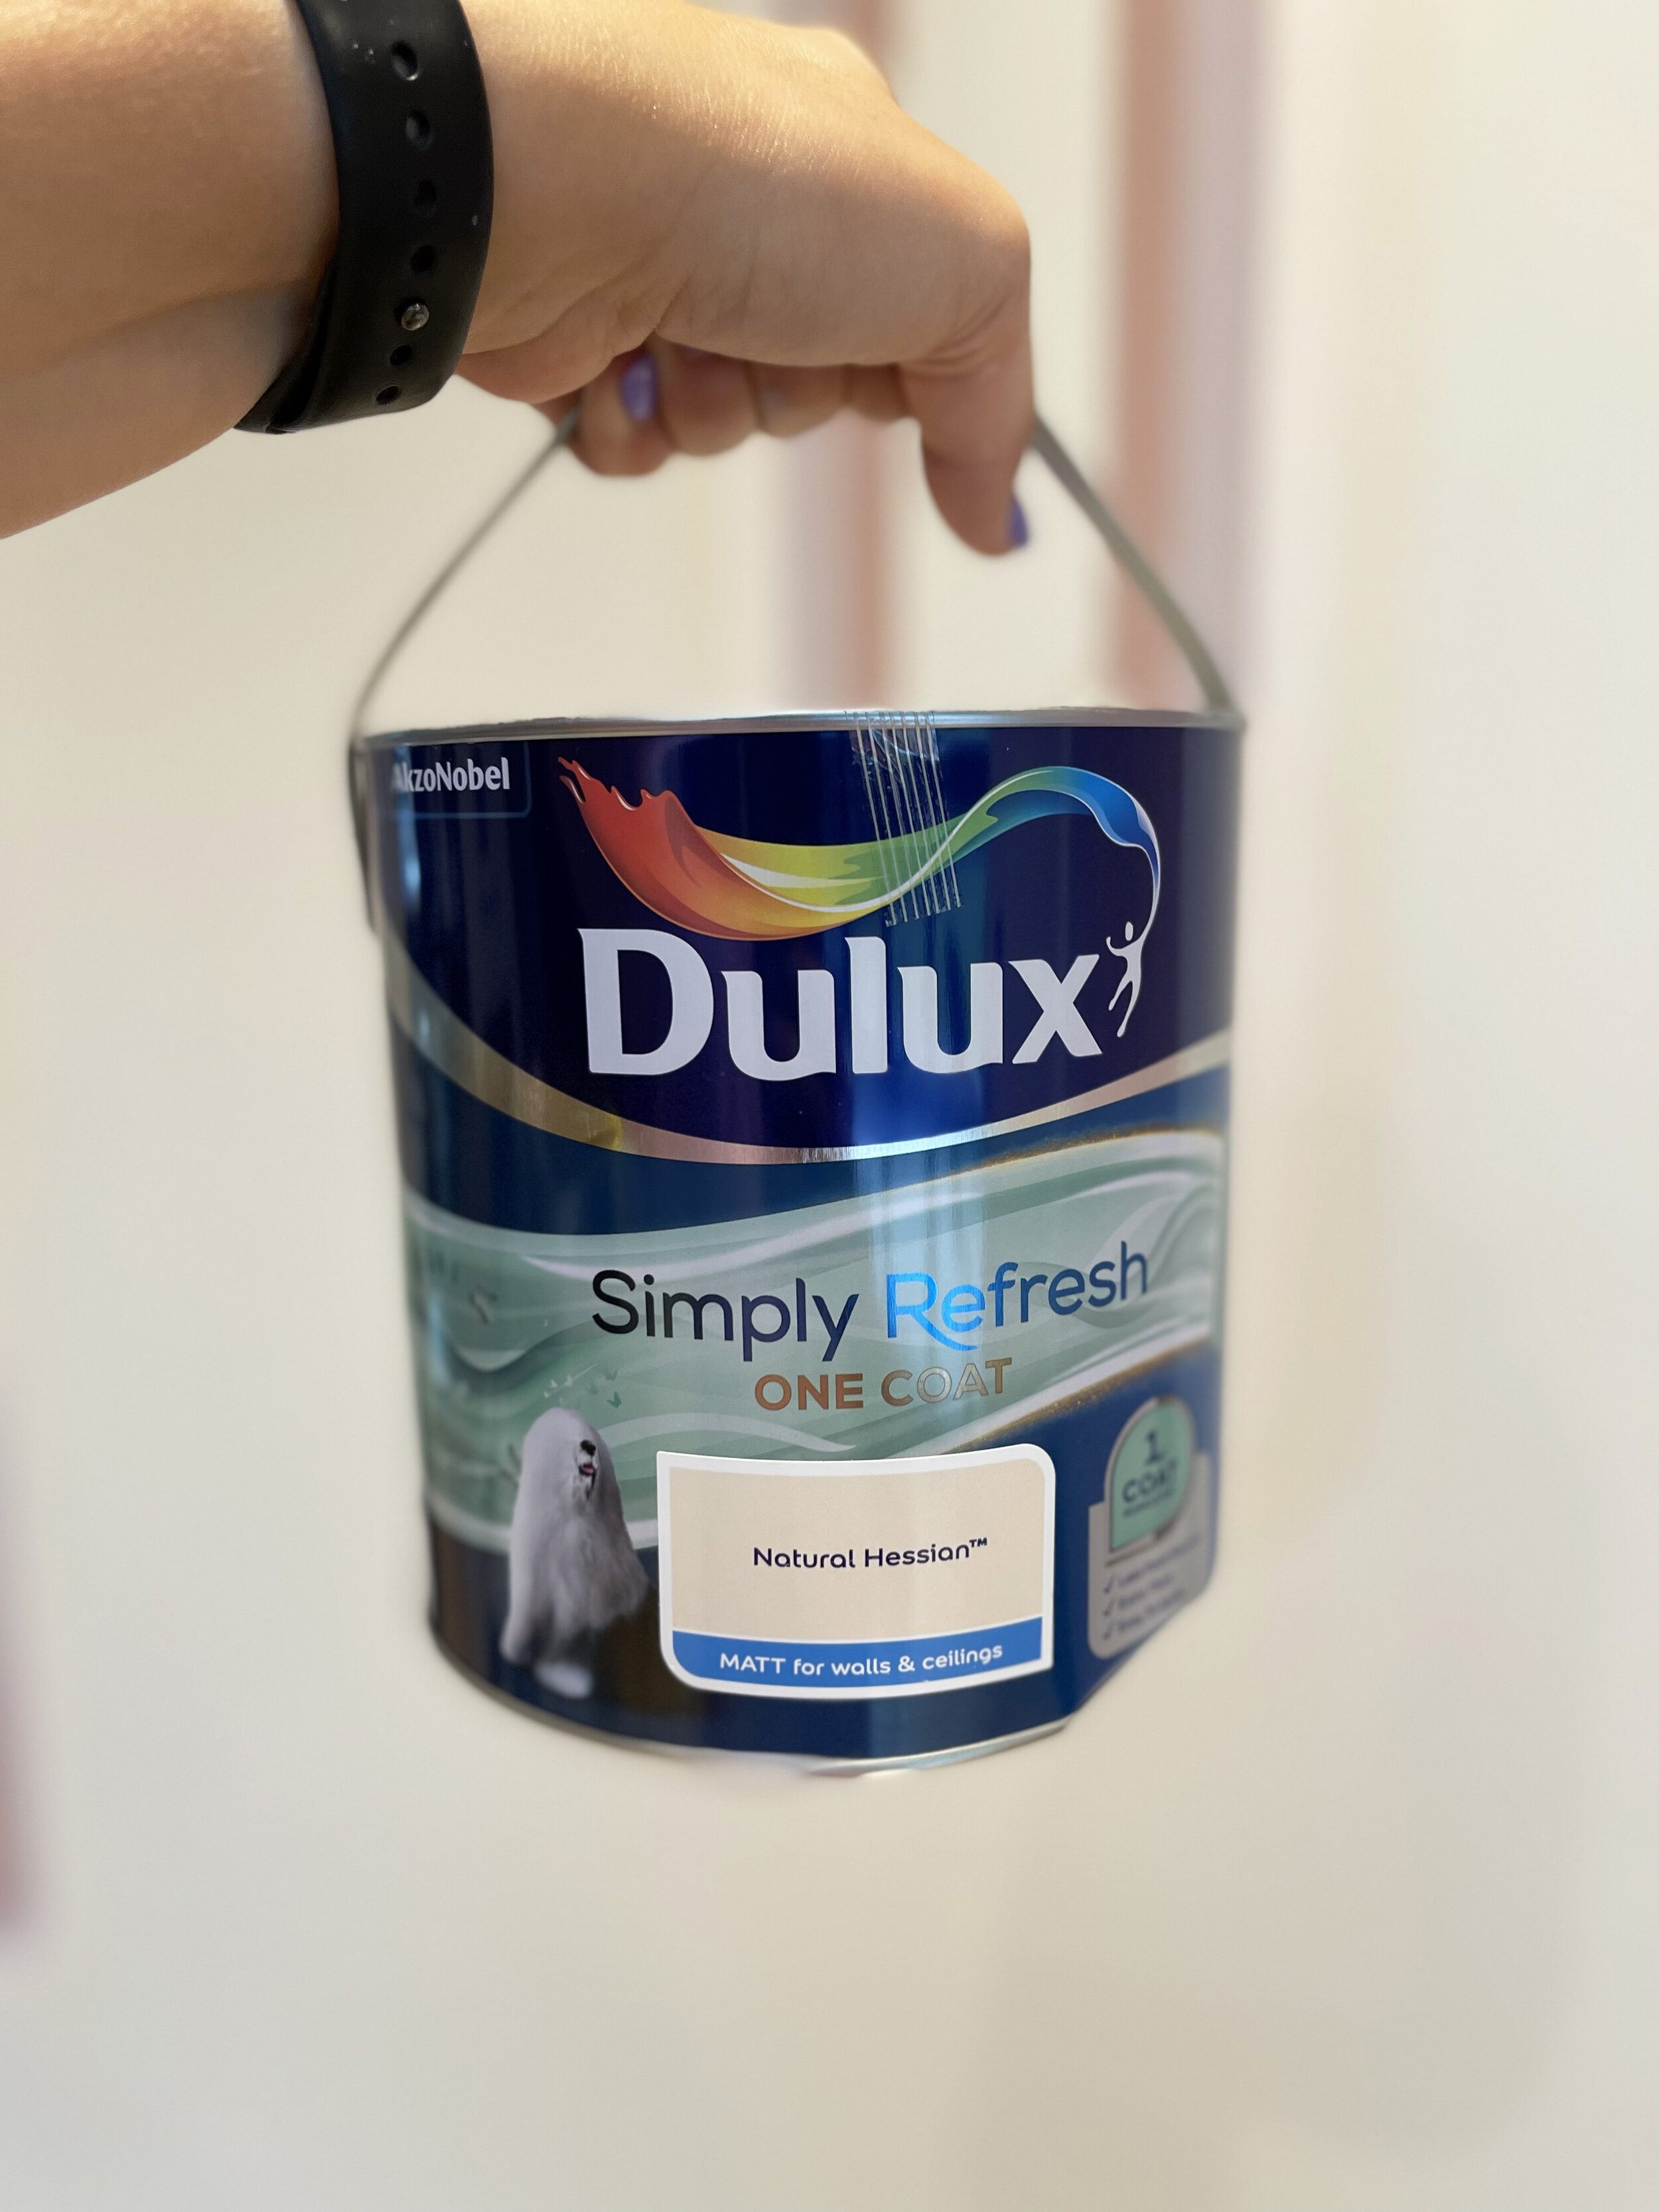
I started with the darkest paint colour on the outside line which was Dulux Simply Refresh One Coat in Pressed Petal, then did the third line which Dulux Simply Refresh One Coat in Blush. Once these had dried, I peeled away the masking tape and re masked up the other two lines which were Dusted Fondant as the second line and Natural Hessian as the fourth. All From Dulux Simply Refresh one Coat range.

After painting the first and third line, I waited for the paint to dry, before peeling back the masking tape, to then re apply new tape for the second and fourth colour blocked line.

After painting the first and third line, I waited for the paint to dry, before peeling back the masking tape, to then re apply new tape for the second and fourth colour blocked line.

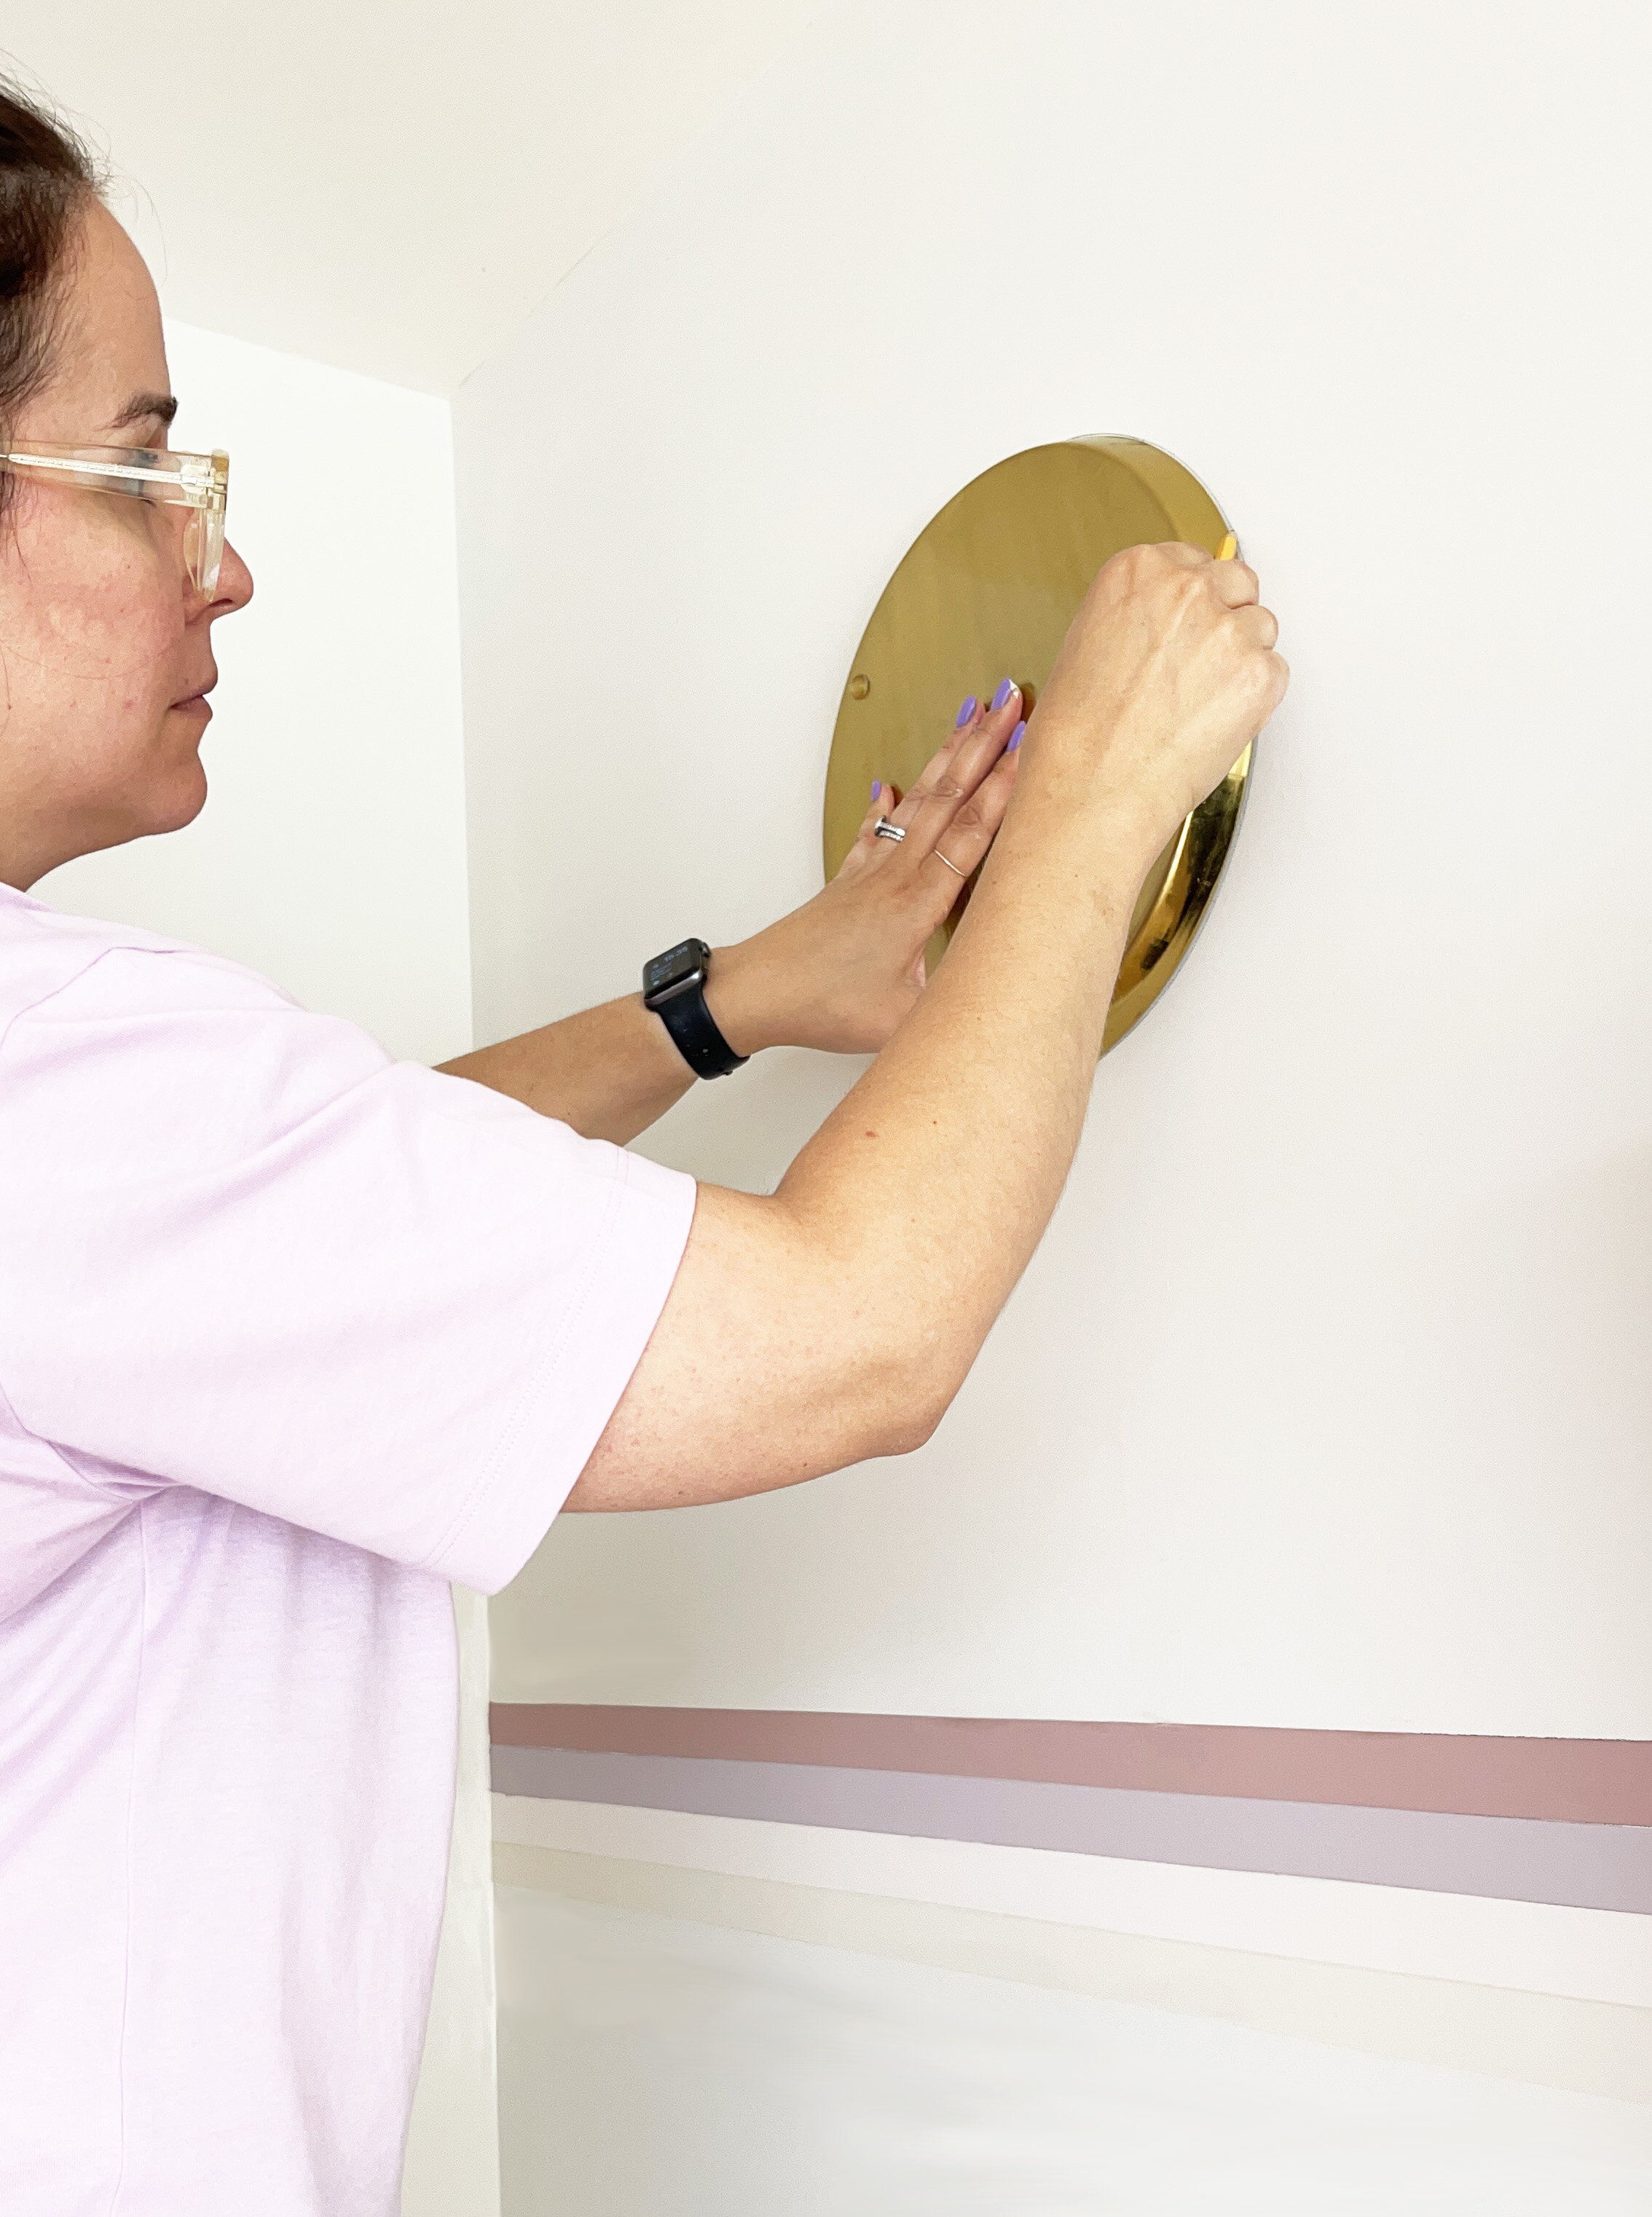
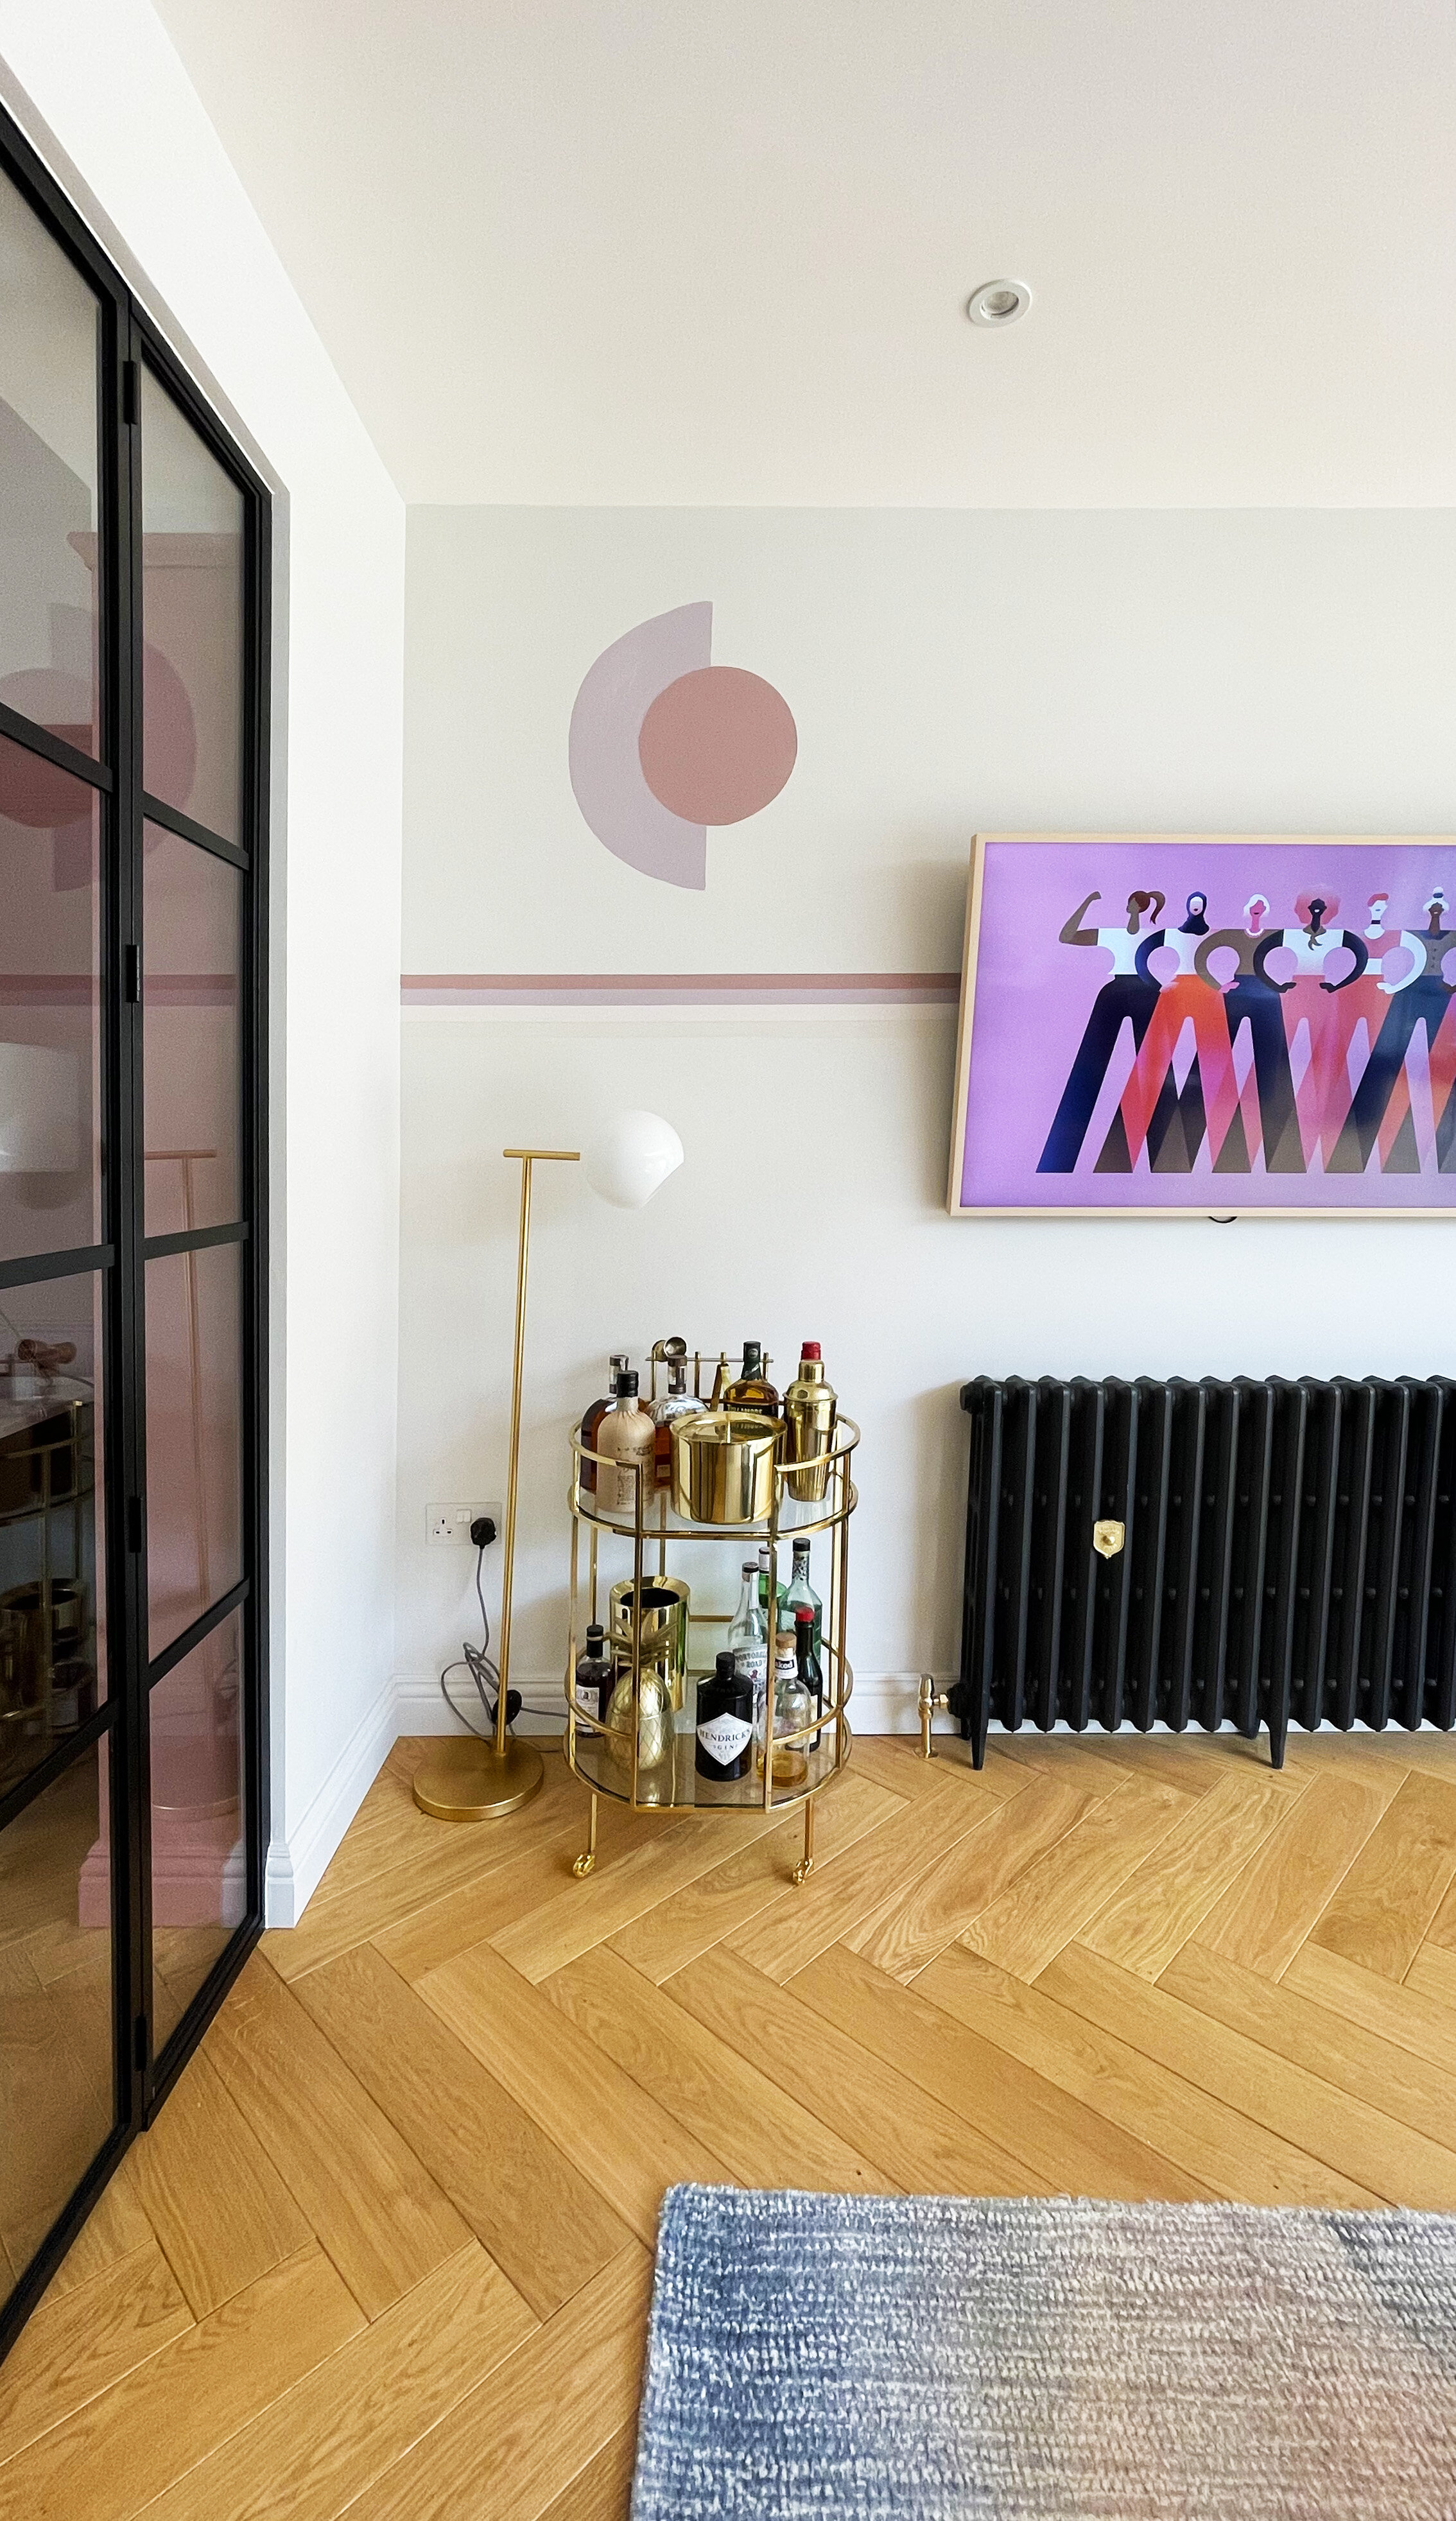
To draw the circle, I used a large round brass tray that I had laying around the house, and then filled it in with Dulux SimplyRefresh One Coat in shade Pressed Petal.

CREATING THE ARCH

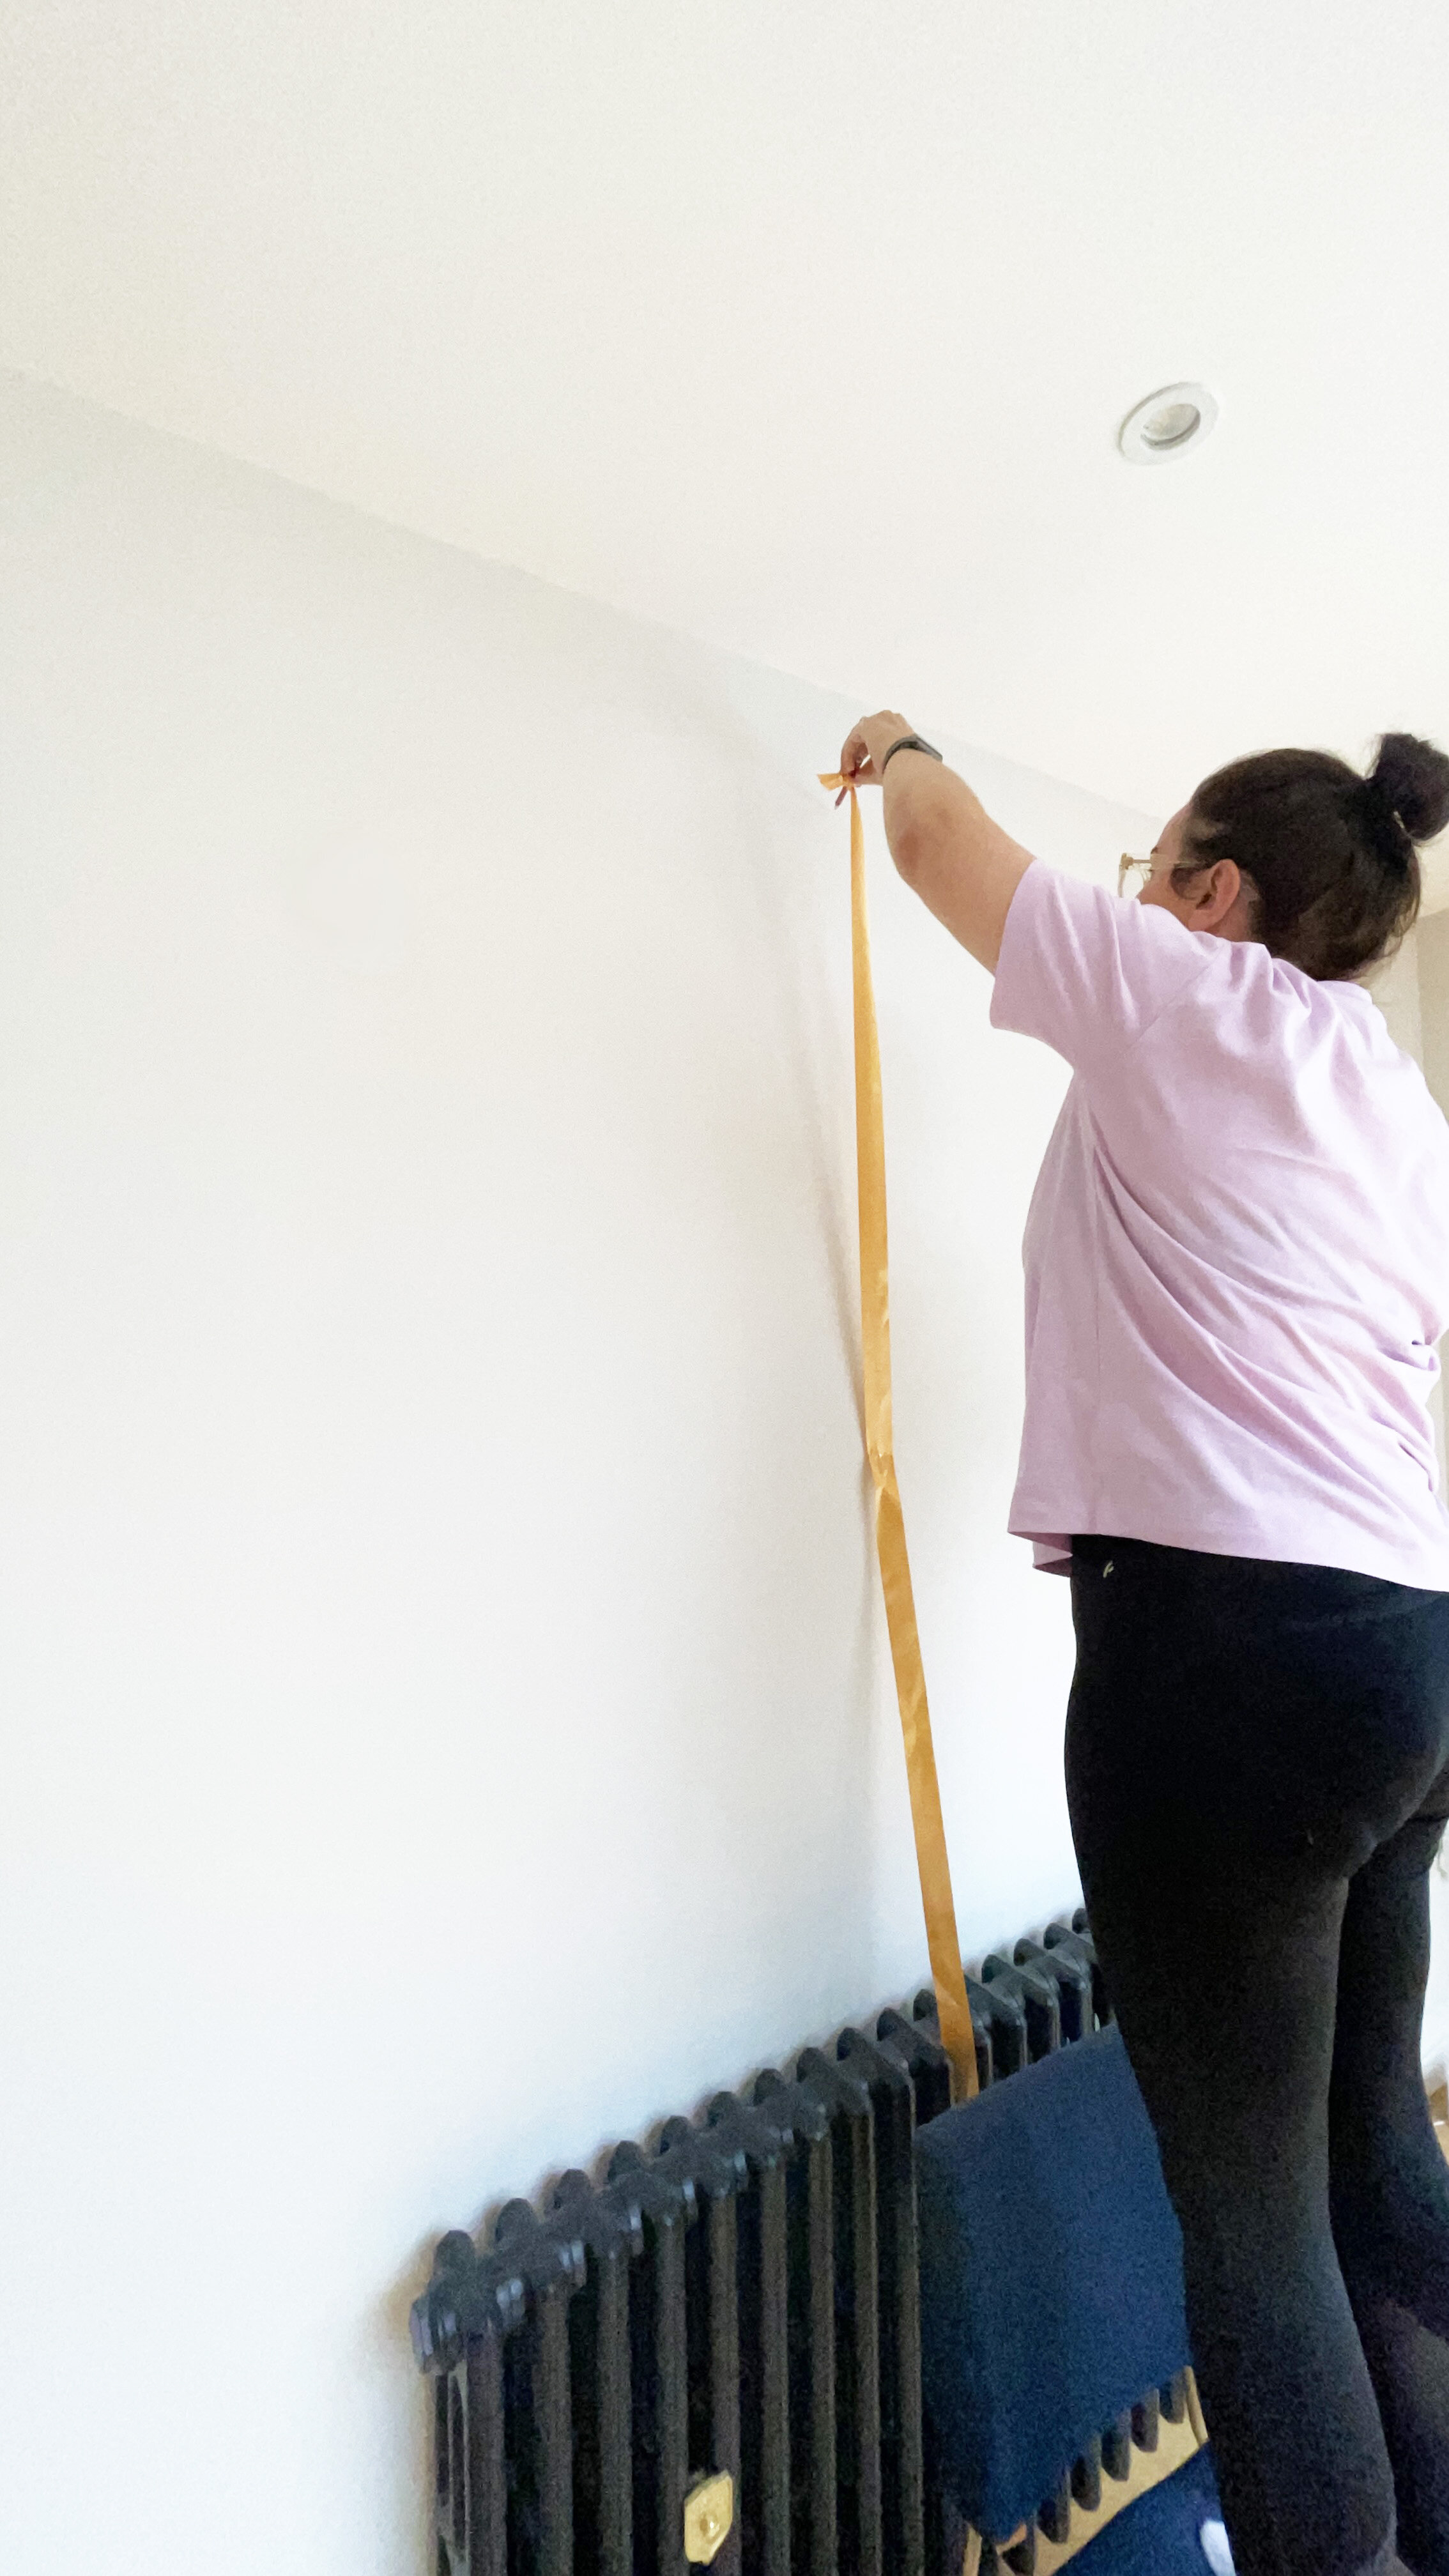
My design included an arch to the right hand side of the wall. To create an arch, you have to find the centre of the arch, then use a ribbon or a piece of string which you nail into the middle point, then attach a pencil and drawer out your perfect symmetrical arch, following the curve of the pencil. I used a piece of ribbon as we didn’t have any string.

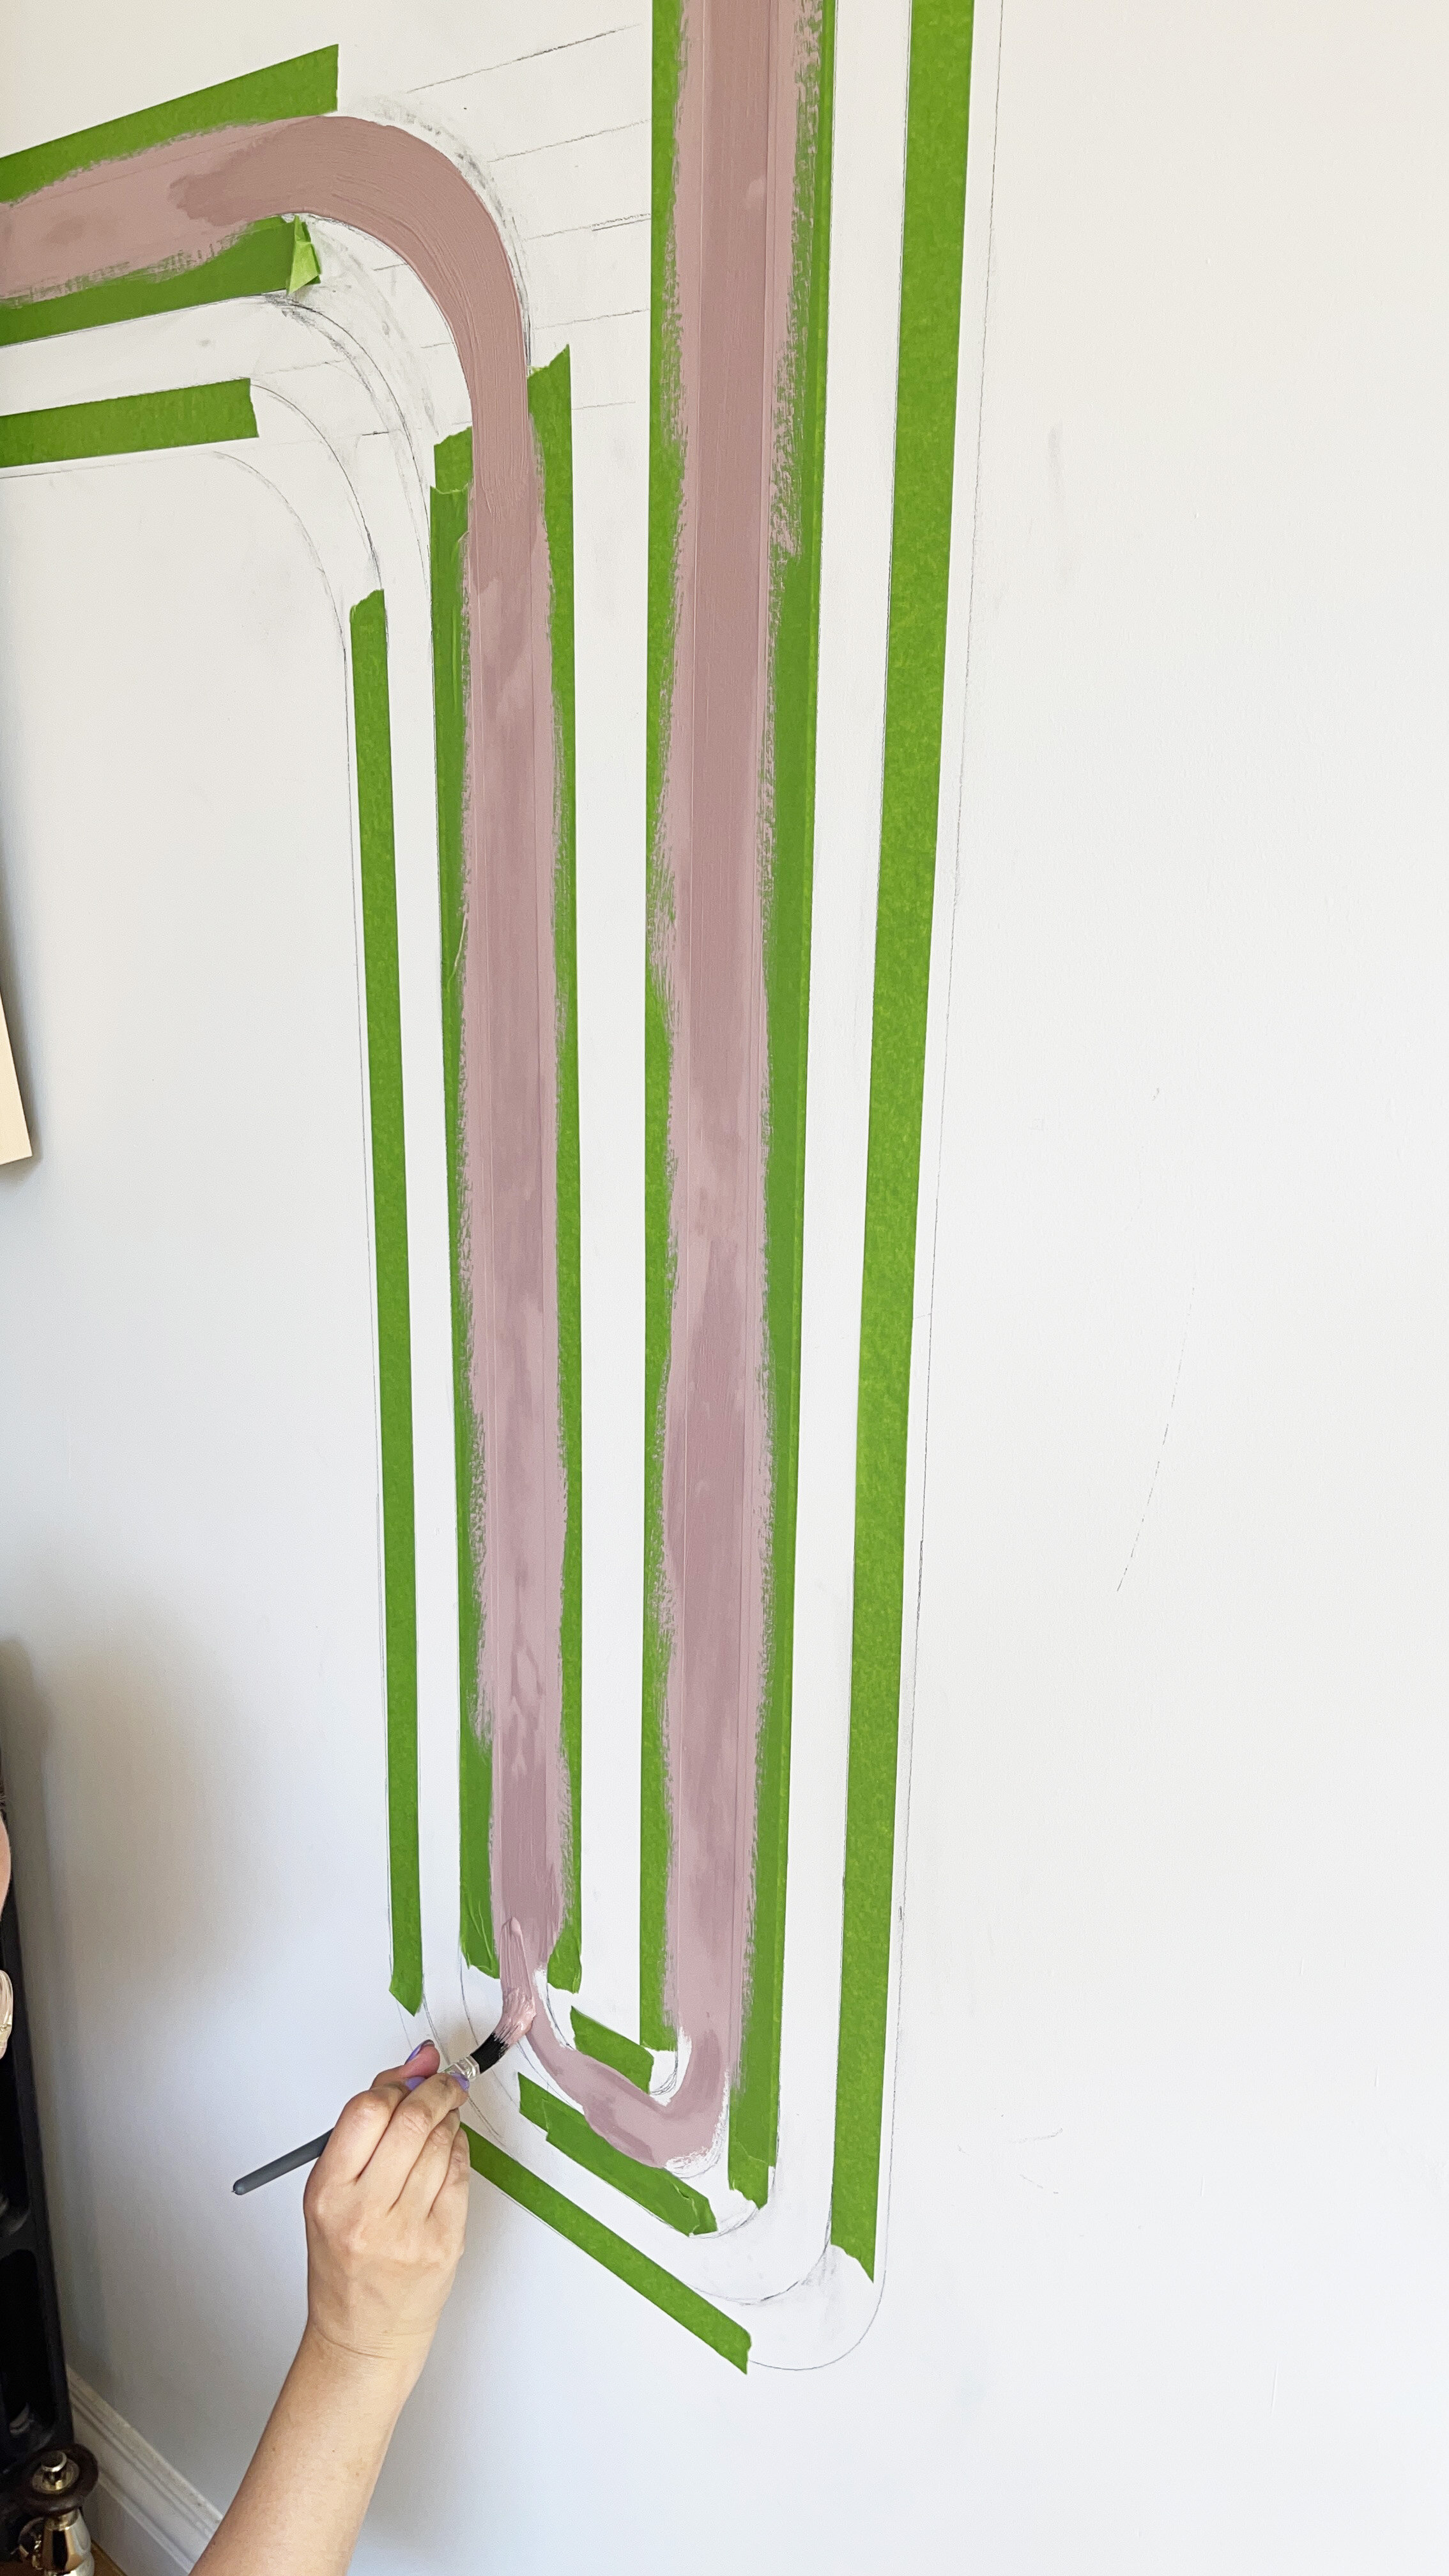
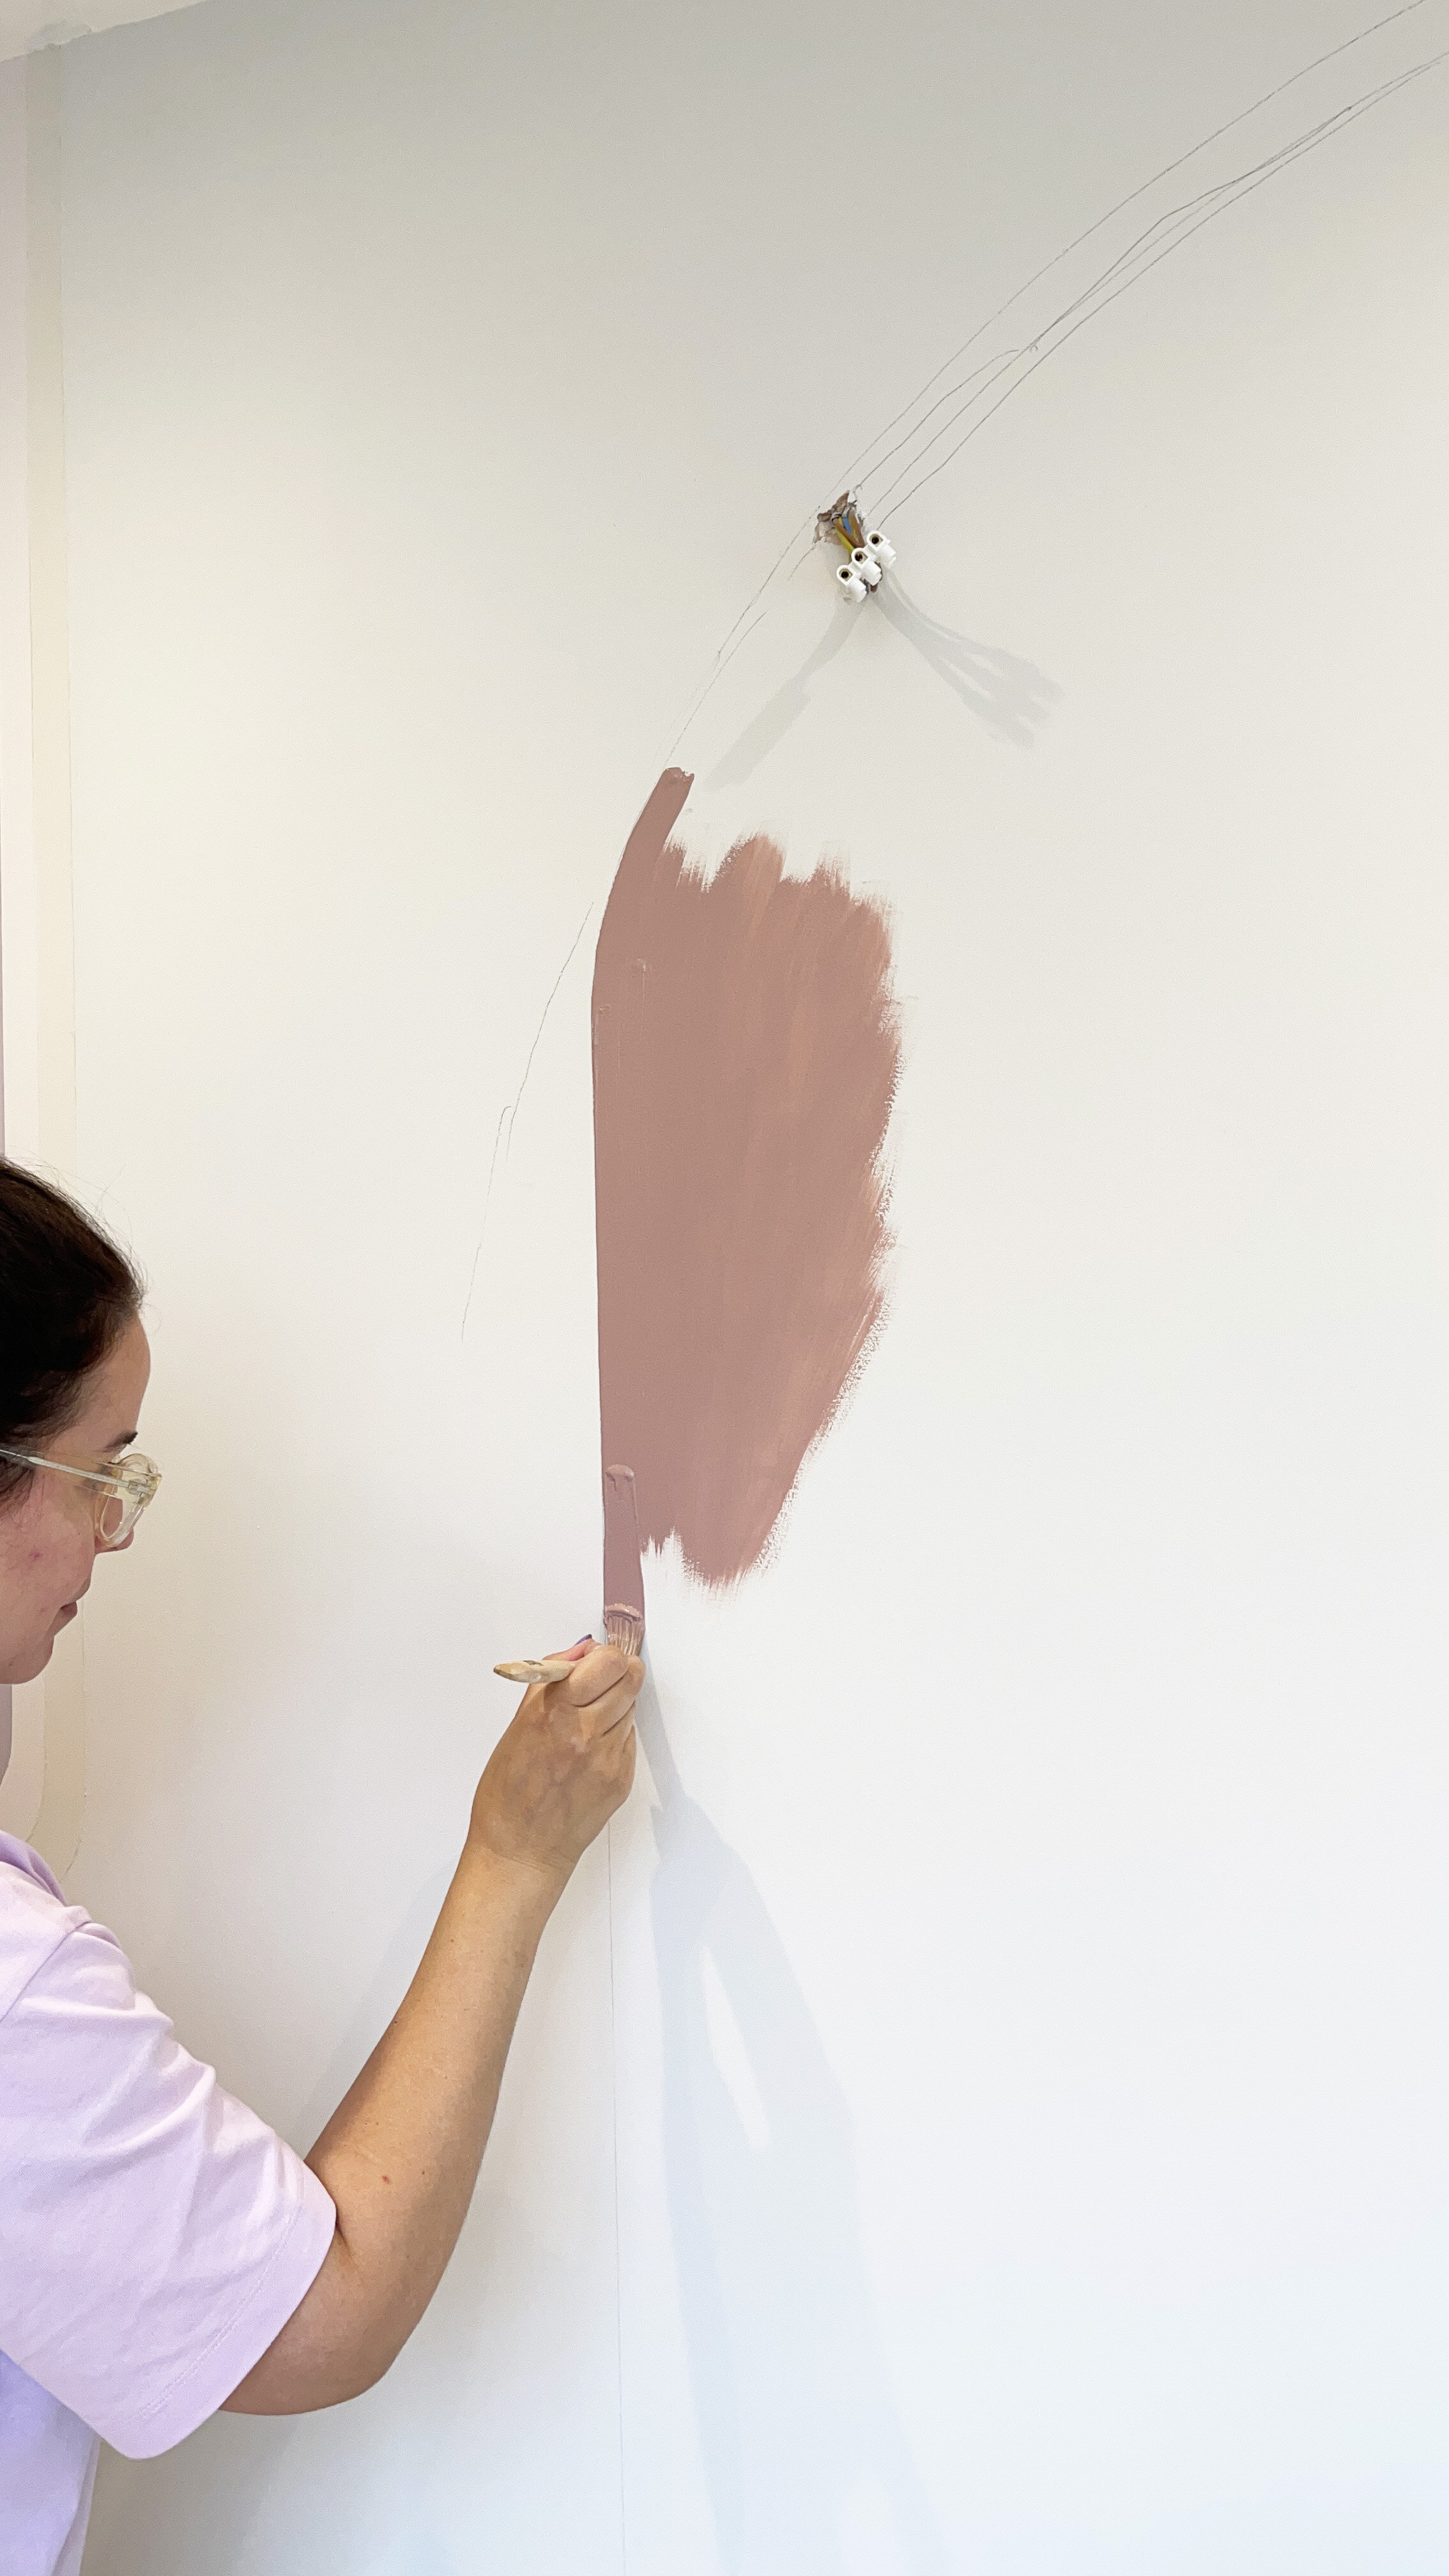
I then painted the arch by freehand, as I had already used a spirit level to draw the perfectly straight sides to the arch.

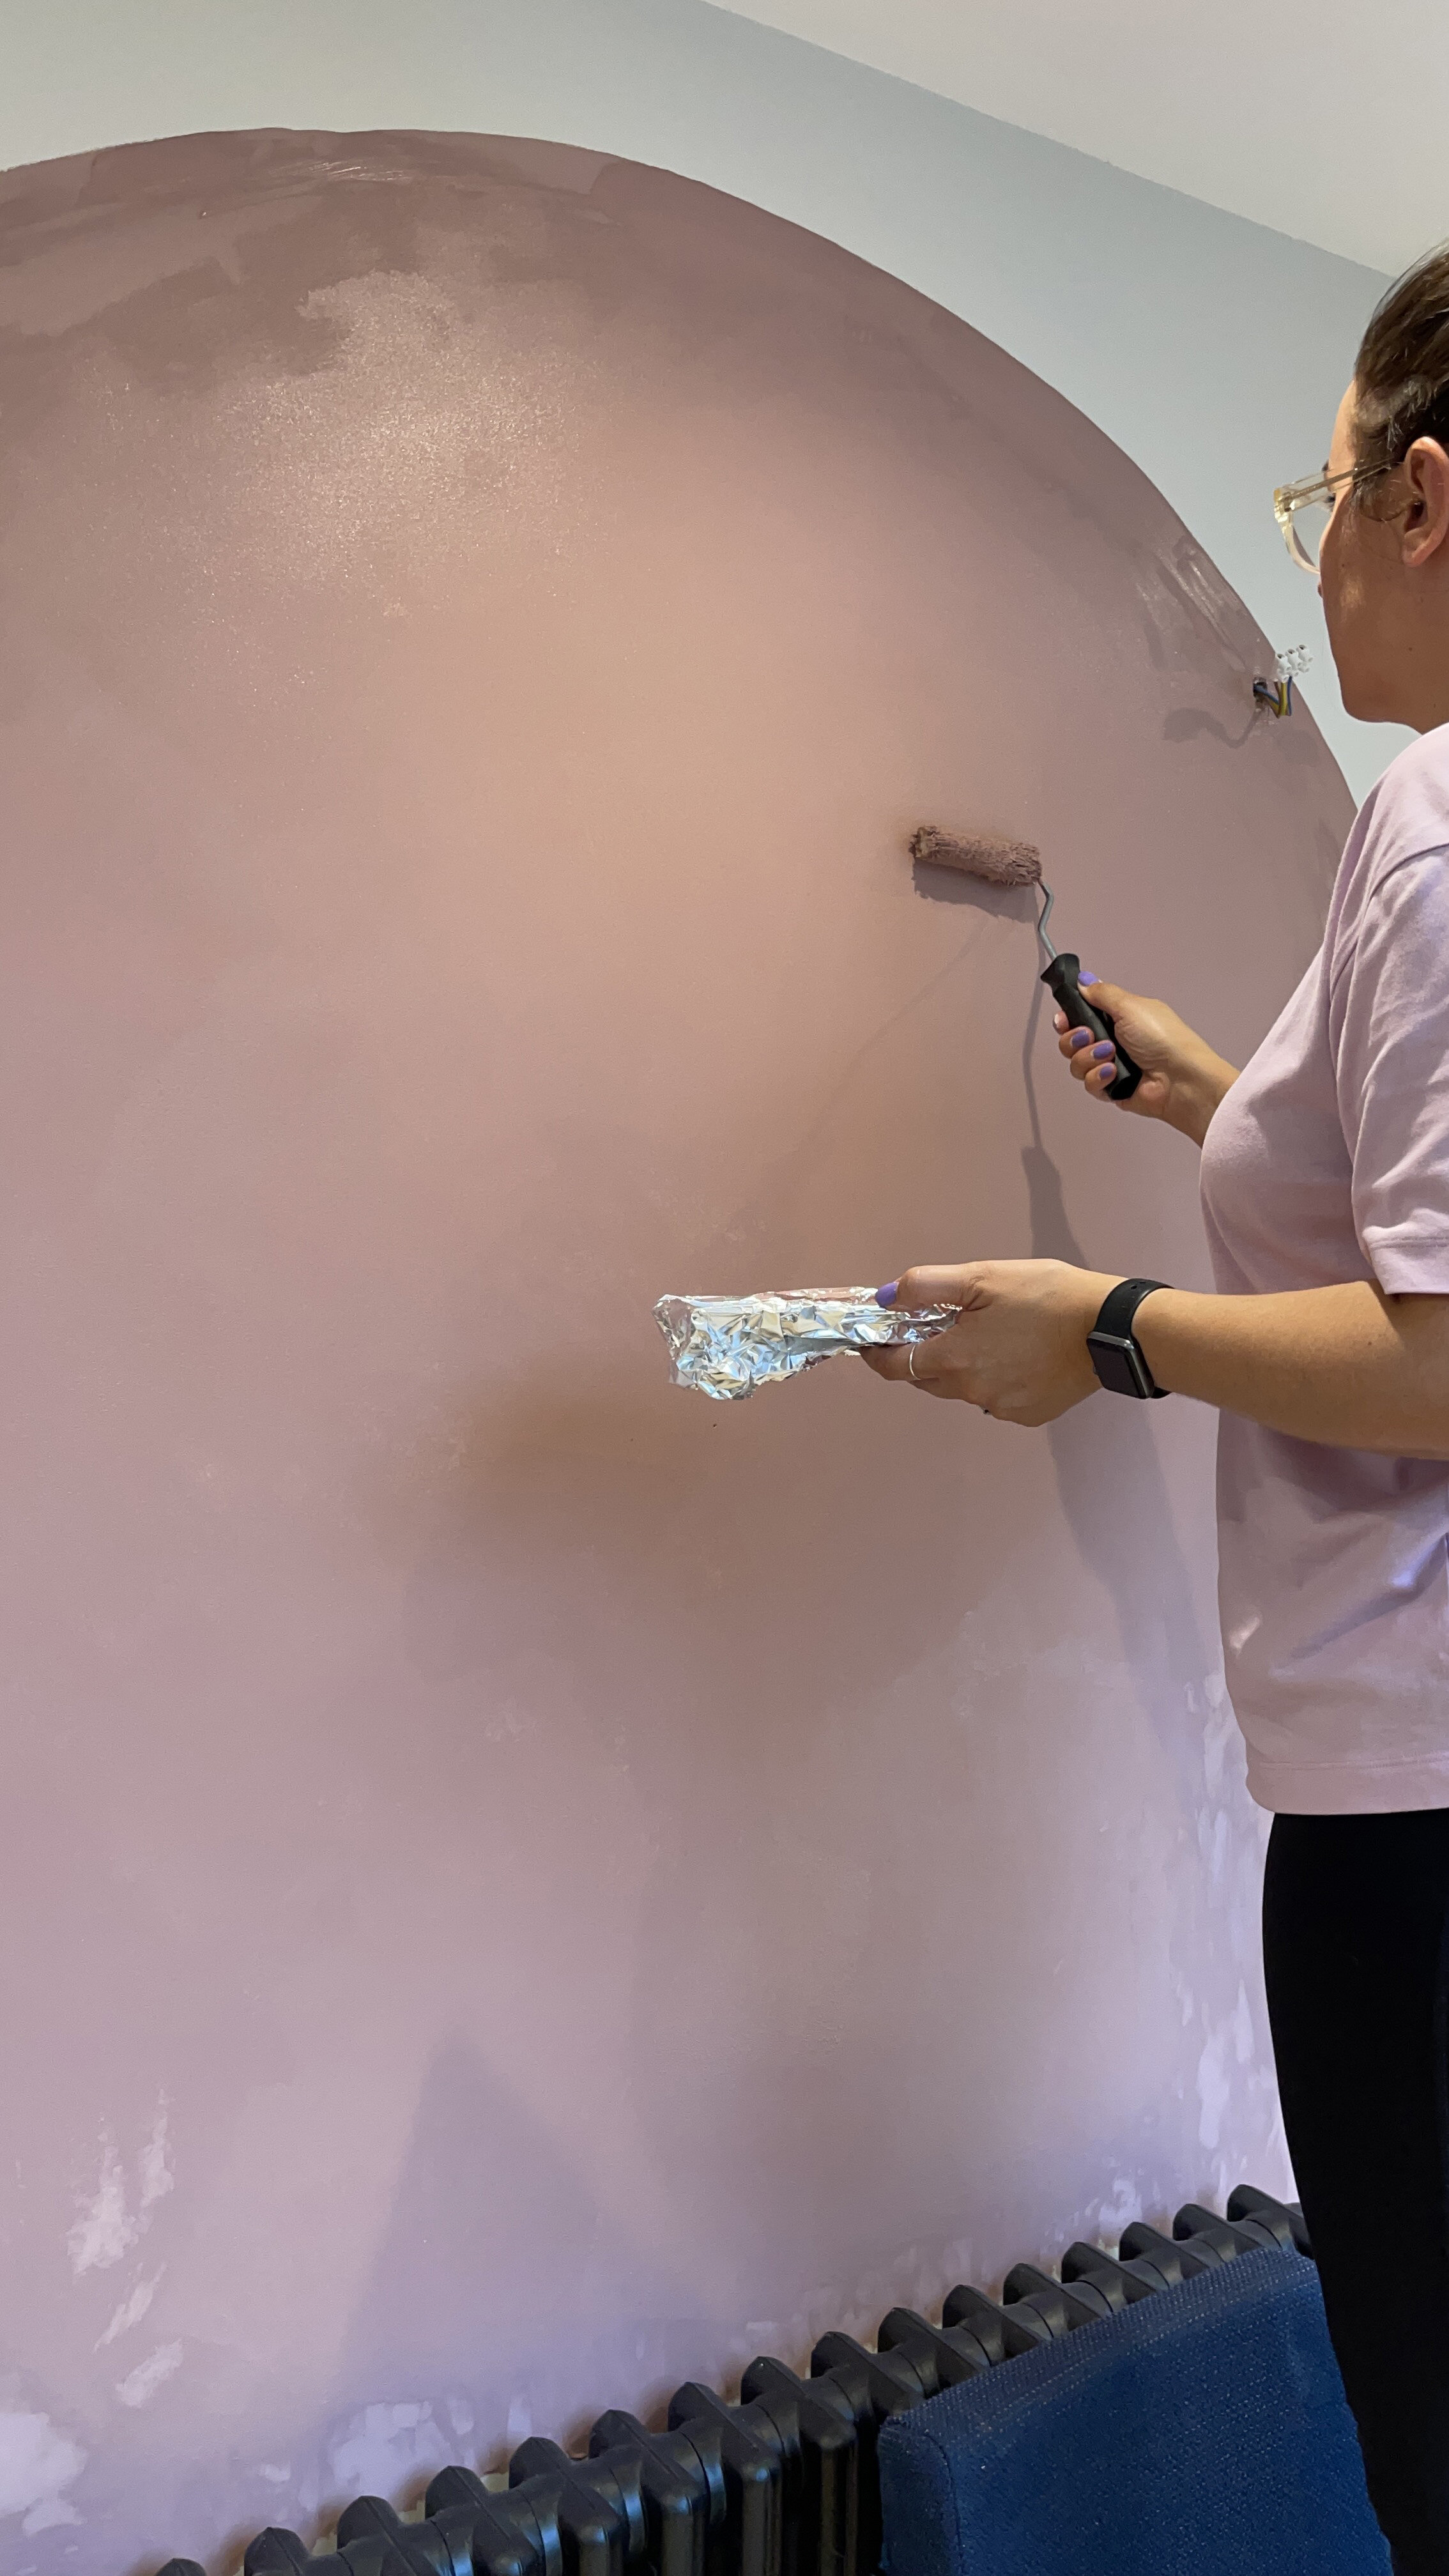
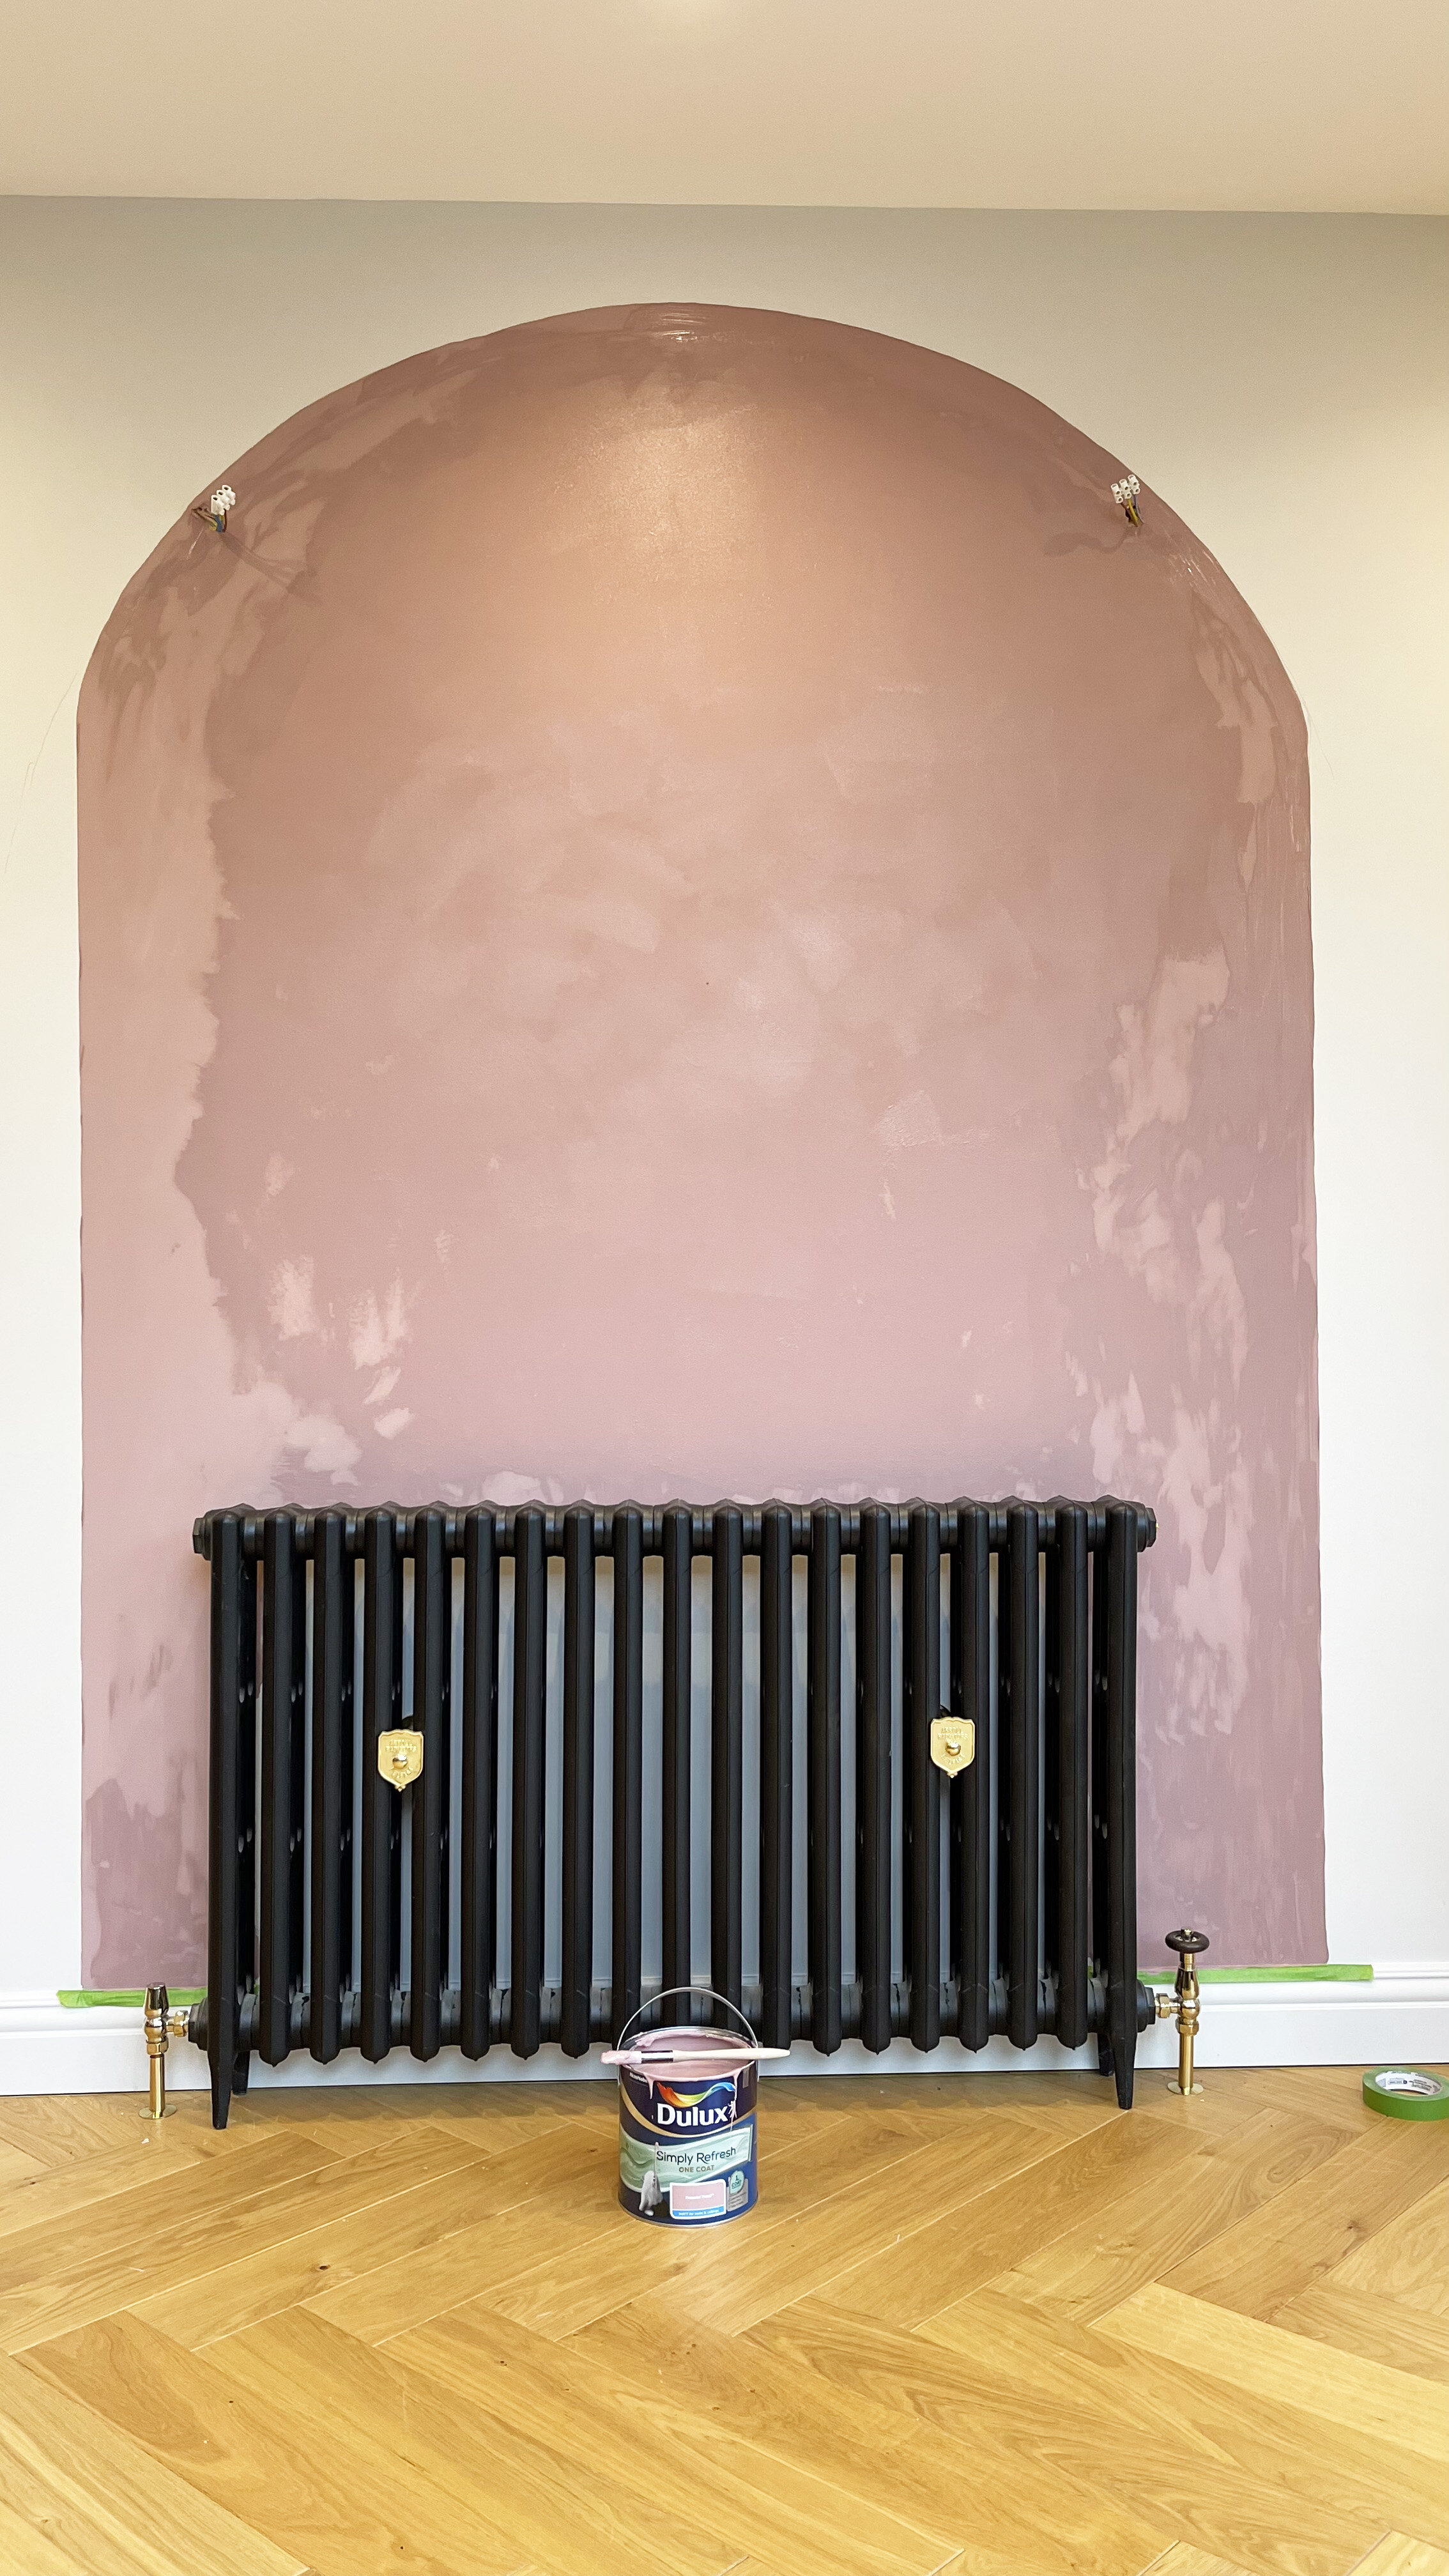
The photos below were taken as I was painting the arch in Dulux Simply Refresh One Coat in Pressed Petal when it still needed time to dry. I painted the edges by brush, and then used a roller for the centre of the arch.

Then once it the paint had dried I peeled off any remaining masking tape, washed my brushes and stepped back to have a look at my new fancy wall mural.

THE END RESULT

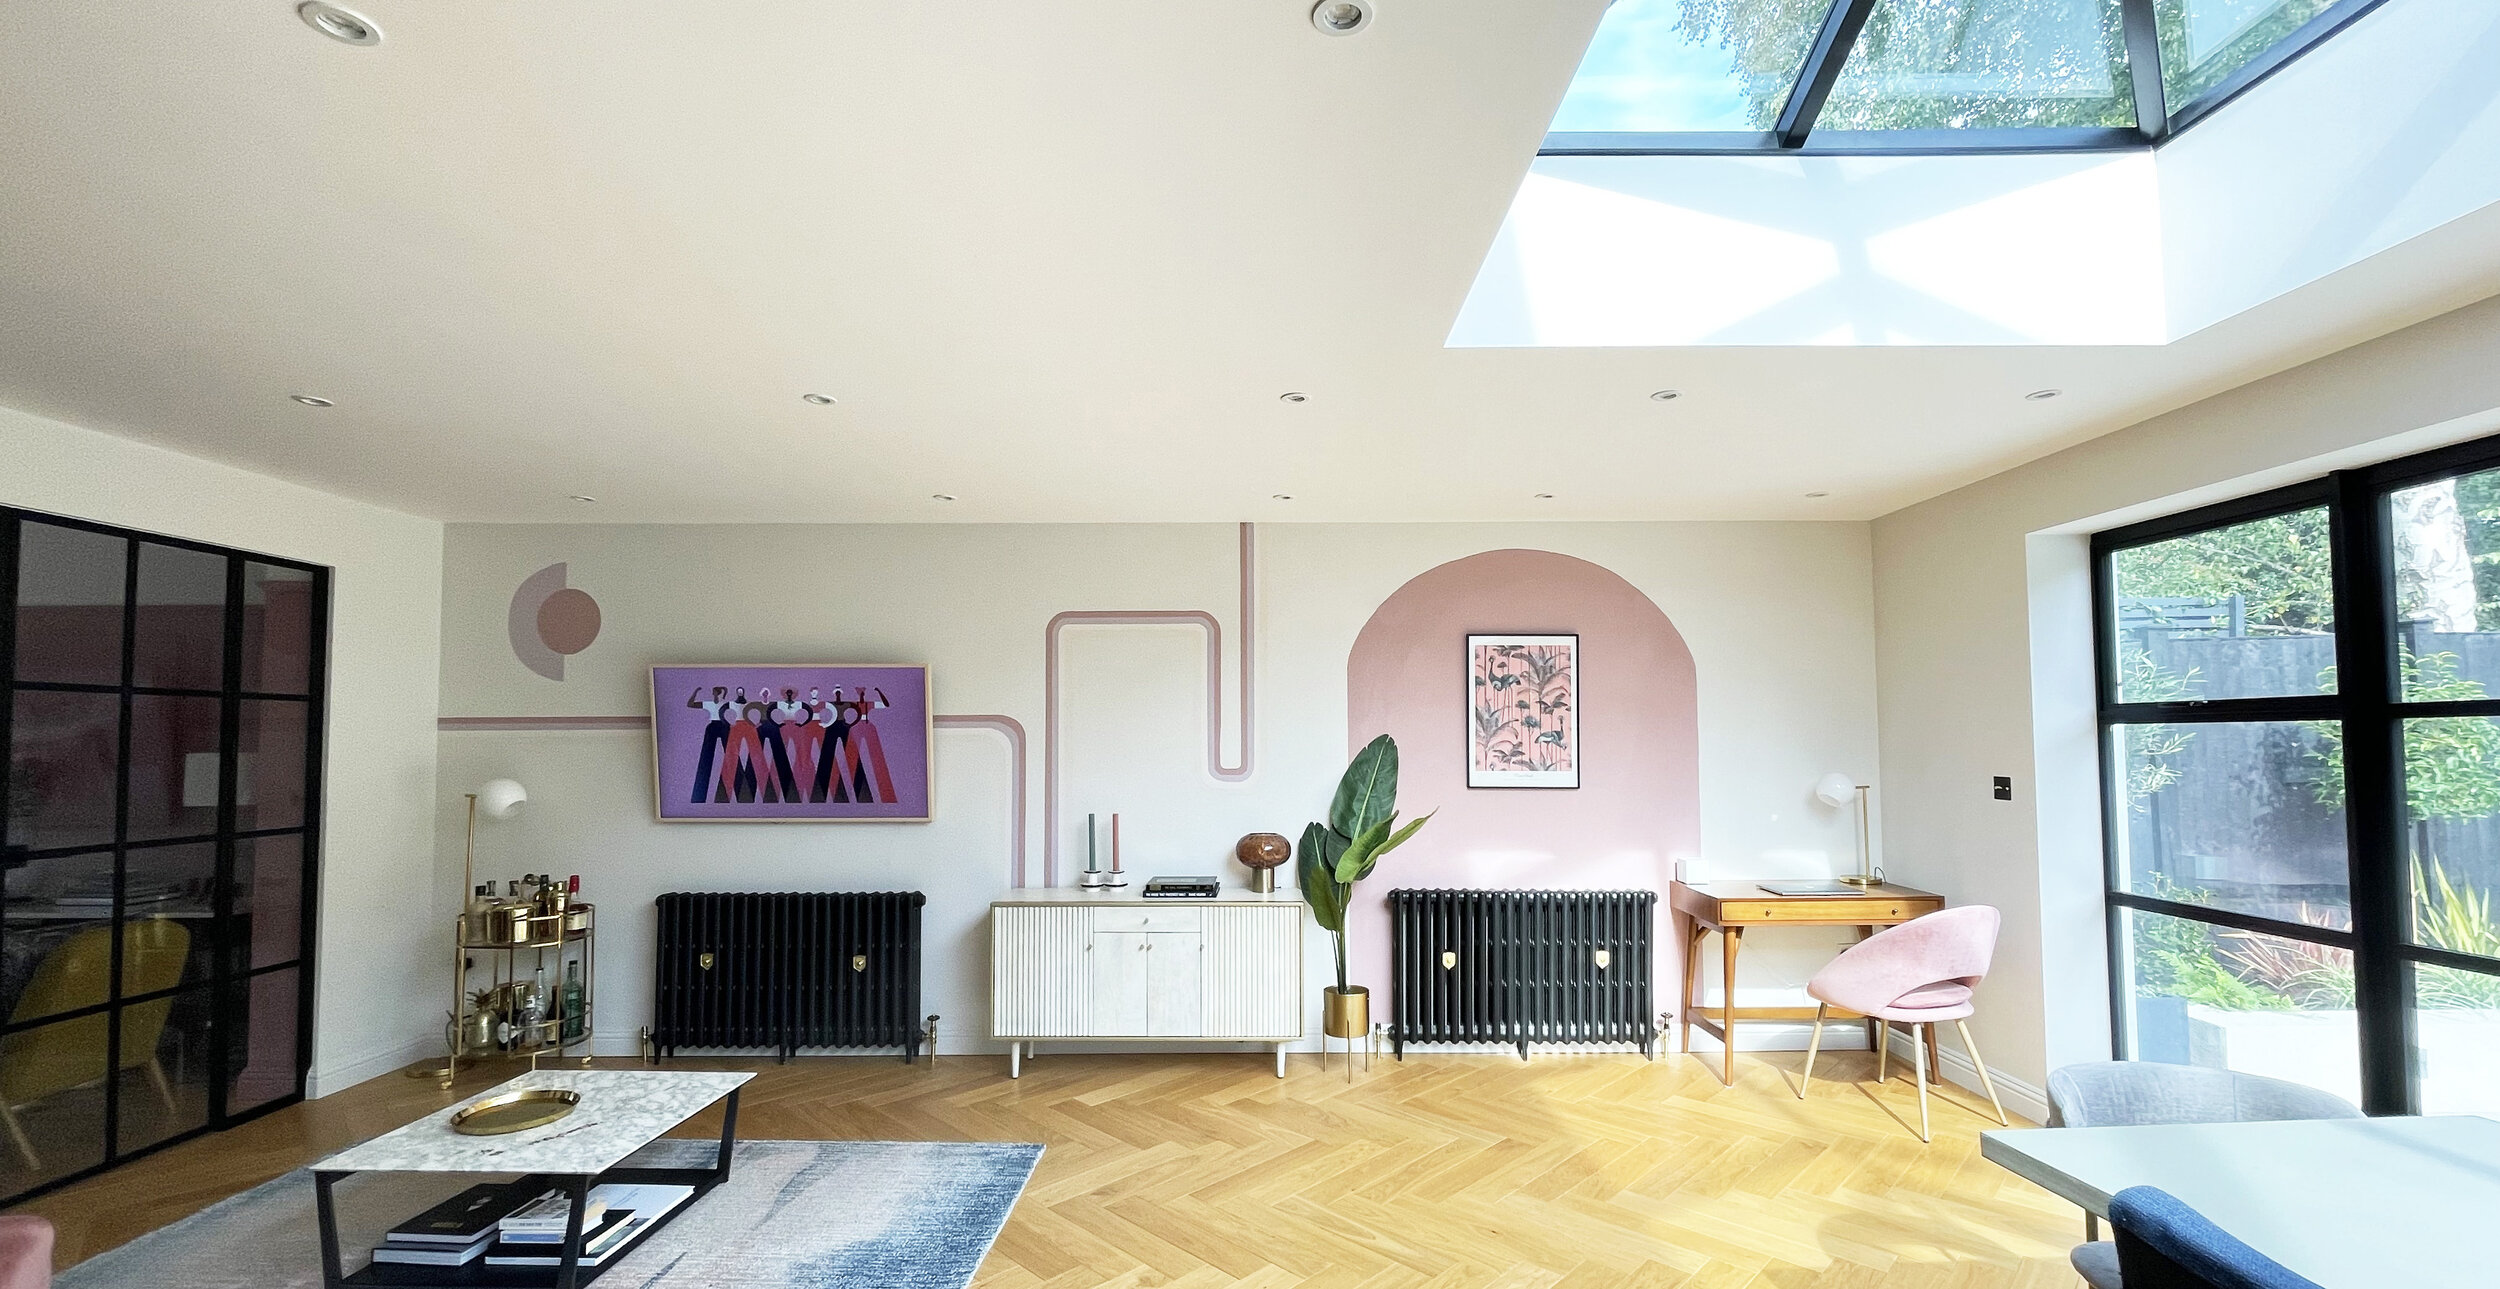
I’m really happy with the results. This took me just over one day to sketch out and paint, and its really transformed the space. I then shopped my own home by moving a sideboard from upstairs, down to fill this gap and re jigged a few bits around. I even changed the screen saver on my TV to match with the decor.

Pressed Petal painted curved arch, from the Dulux ‘Simply Refresh One Coat range.

Pressed Petal painted curved arch, from the DuluxSimply Refresh One Coat range.

I was really impressed with how thick the Simply Refresh One Coat from Dulux range was, and how great the coverage was. It really does go on in just one coat., so no need to hang around watching paint dry between coats, you can just get on with your project and have your room back in use in hours. A 2.5L tin will cover four walls of an average sized room.

What do you think? Would you be tempted to try out your own changing room wall mural?

HOW WE ADDED A REAL WORKING MARBLE FIREPLACE TO OUR 30'S HOME

AD/PR gift This blog post contains a fireplace which was kindly gifted by Stovax.

There’s something pretty special about marble. It’s timeless beauty makes it a design classic and it’s durable material means it will stand the test of time forever.

I’ve always dreamt of having a marble fireplace in our next home, no matter what period the house was, I was pretty certain I could make it work in any style as marble is so versatile.

It turns out that the next house (which is our forever house) is a 1930’s and the original fireplaces were not as desirable and certainly needed an update. There was no marble, no beautiful cast iron, not even wooden mantles. Instead we bought a house with brick fireplaces which would look more at home in my local Red Lion pub. Yes, they were original but they were not to my taste. I’m all for retaining original character, but not if it jeopardises creating the home you want, and at the end of the day it’s you who has to live there and be happy.

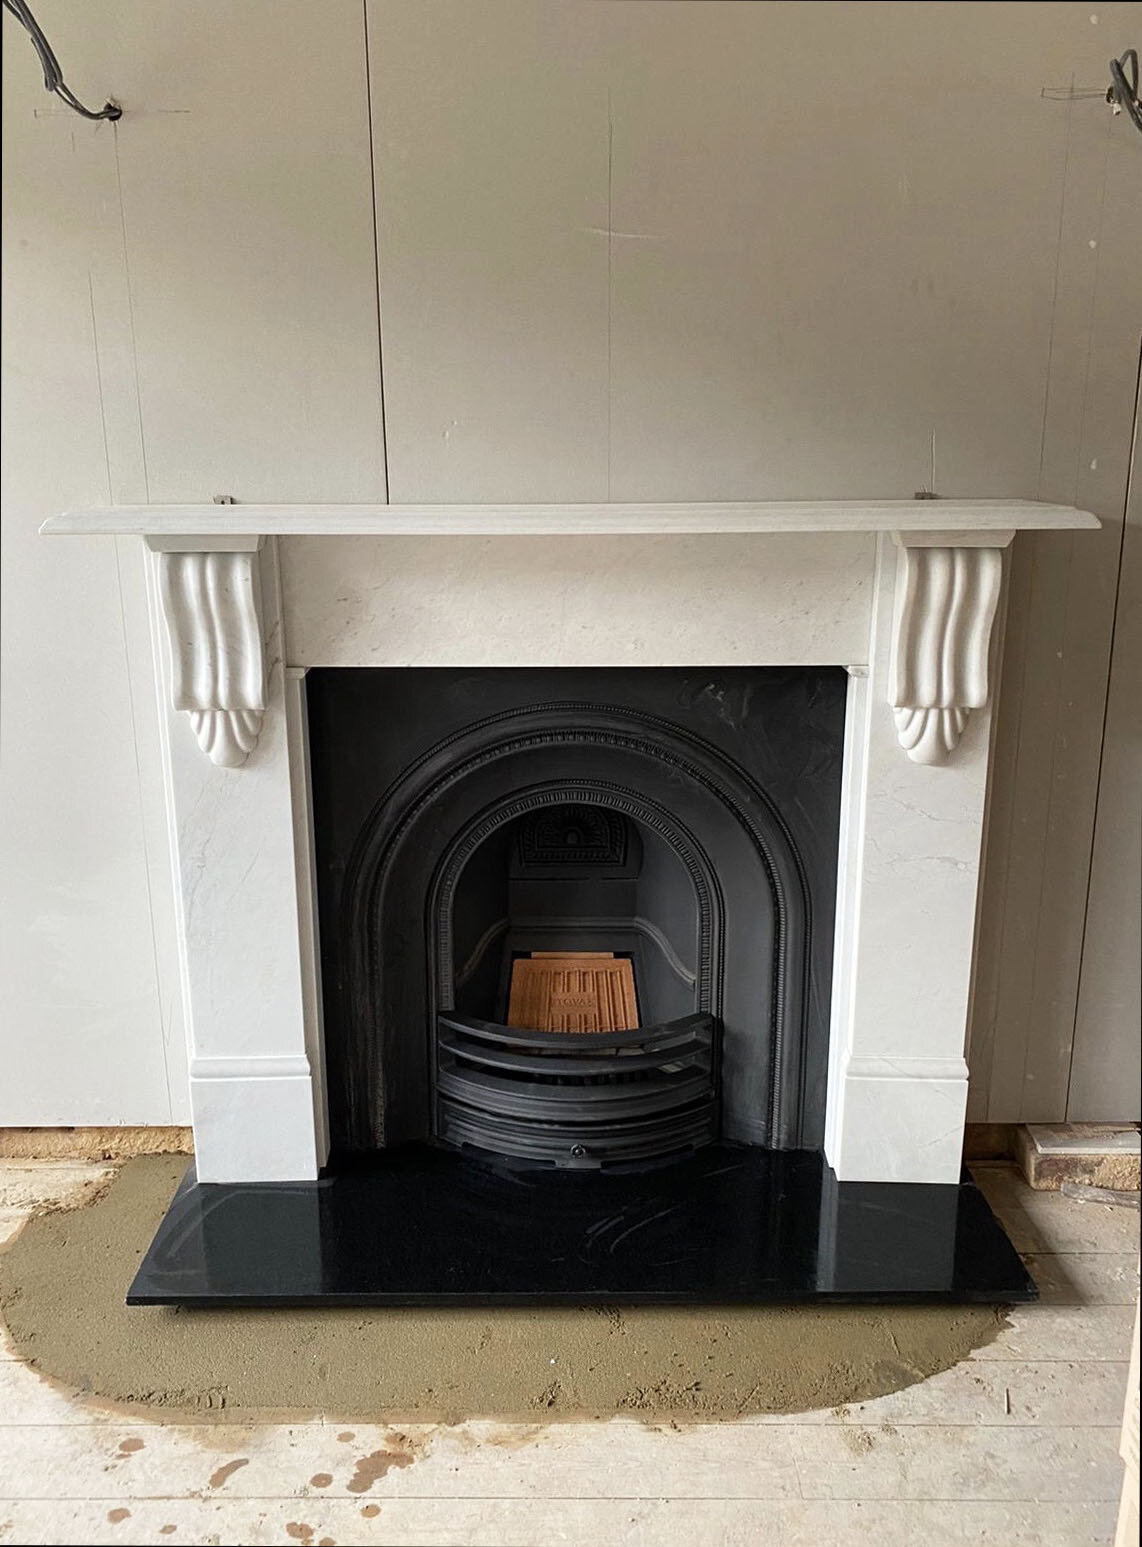
So, we made the decision that the main one in our lounge had to go. I had fallen in love with a Stovax Corbel Stone Mantel which I know should be more suited to a victorian property, but I don’t tend to stick to the rules when designing my home.

The veining and the corbel detail of the Stovax stone mantle was everything I had dreamt of. I opted for the Antique white marble, however it also came in a beautiful Natural Limestone which looked equally as beautiful.

I then chose a curved decorative cast iron fireplace which was also from Stovax to sit inside. It’s great that you can mix and match your cast iron inserts if buying from Stovax, or likewise choose to add a wood burner or gas fireplace instead of a working fire if you desire.

THE ORIGINAL FIREPLACE

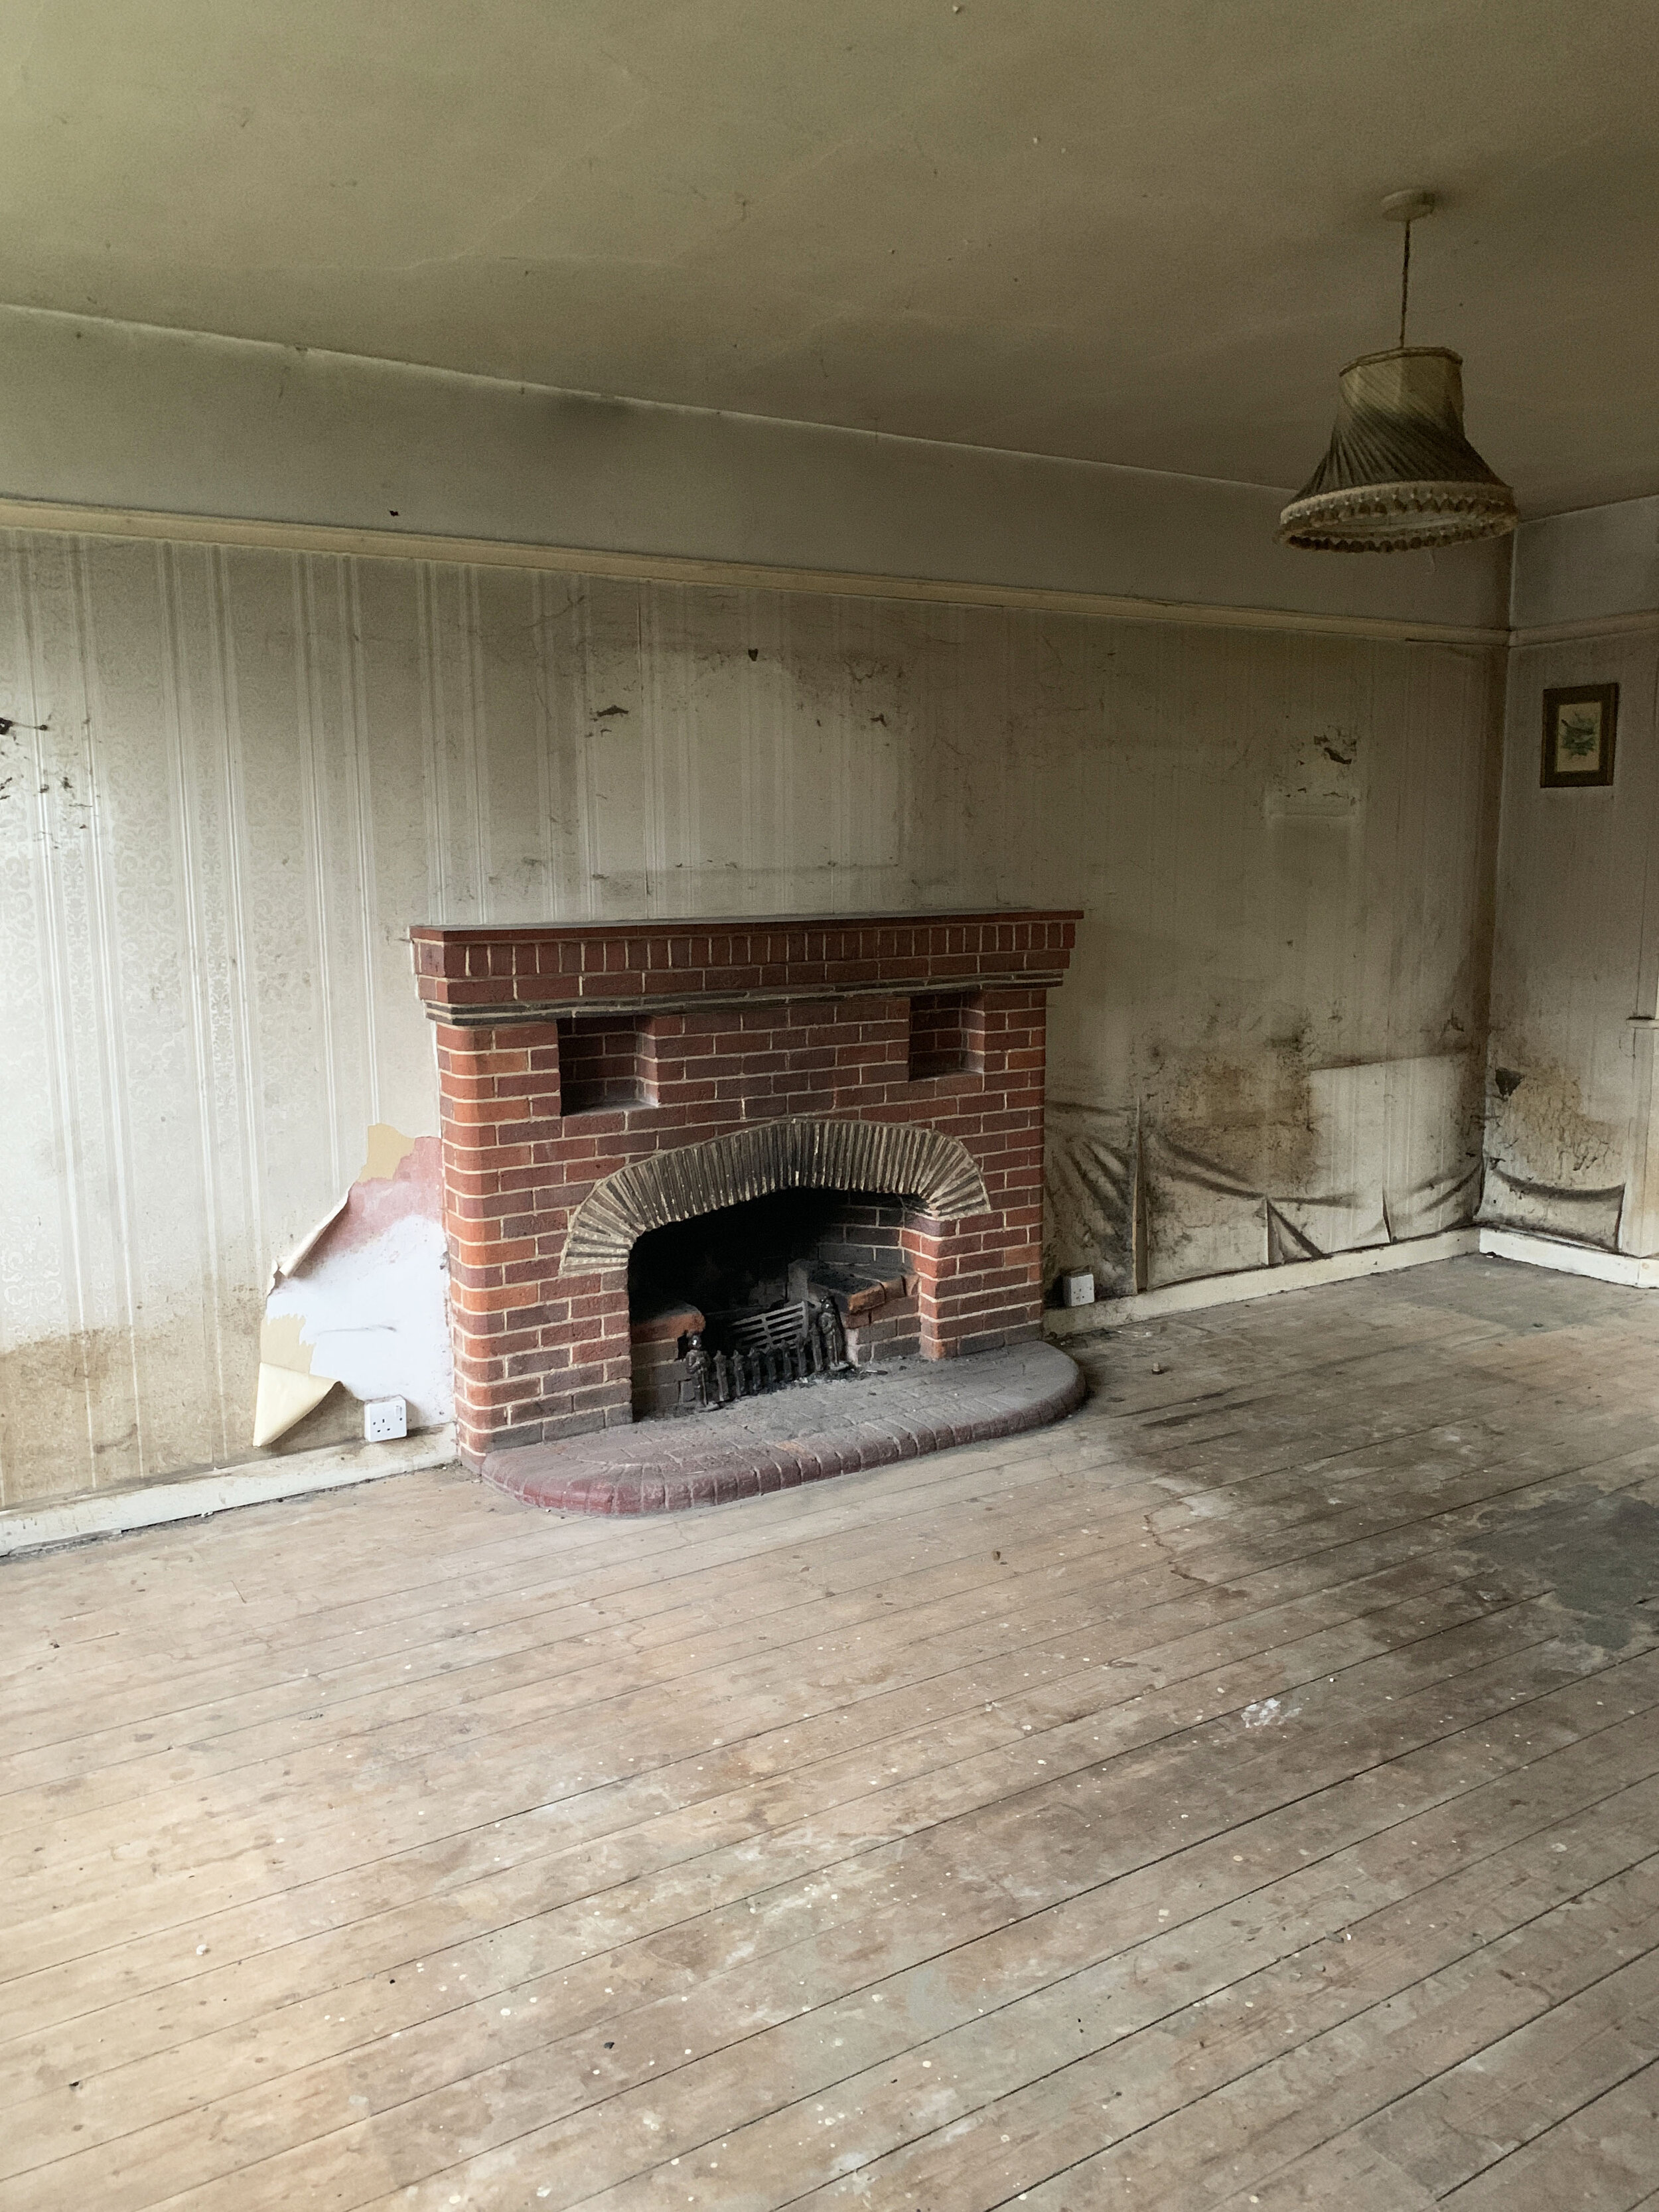
The good thing about this fireplace was that it was a working fireplace with a perfectly good working chimney, which meant removing and replacing the old one wasn’t too much trouble. It was a 1930’s brick fireplace, but other than that I didn’t know much else about it other than the fact it looked like it had eyes and a mouth and was looking at me every-time I walked past which I couldn’t unsee.

The house was in a pretty disrepair state when we bought it, and the original fireplaces altho they were original gave me the heebie-jeebies.

The original brick 1930’s fireplace

The original brick 1930’s fireplace

The original brick 1930’s fireplace

The original brick 1930’s fireplace

THE FITTING

All the original plaster was due to be stripped back to the brick, so we set to work on doing this and removing all the bricks of the fireplace. We then added a new lintel to the wall to support the new height of the chimney as this insert was taller than the previous fireplace.

We also had the chimney swept which is really important to make sure theres nothing blocking the chimneys when firing them up. I’d always recommend getting an expert in to do this.

We then fitted new plaster board and laid the new hearth which was was laid on cement so it was firmly fixed to the floor where the existing hearth was.

The cast iron arched insert was then fitted on top of the hearth, and then the marble stone mantle was built around it.

The walls were then fully skimmed in plaster for a smooth finish, later adding wooden trim to create wall panels.

We decided to make a feature out of the new stone fireplace even more so by adding lights above the fireplace from Pooky lighting. We chose some ’Firefly’ Alabaster wall lights with brass trim to finish the look off and painted the walls in Bobbi from Graham and Brown.

Stovax Corbel Stone marble Mantel with the Stovax curved decorative cast iron fireplace as a new feature in our pink lounge.

Stovax Corbel Stone marble Mantel with the Stovax curved decorative cast iron fireplace as a new feature in our pink lounge.

THE HEARTH

fireplace .jpg

We wanted something simple in black, so we went to our local stone yard and asked if they had any off cuts. Luckily they had a piece of black engineered quartz similar size to what we wanted, so it cost us less than £50.

I’d always recommend checking with your local stone yards if they have any off cuts first as you might get a bargain.

Stovax Corbel Stone marble Mantel with the Stovax curved decorative cast iron fireplace as a new feature in our pink lounge.

Stovax Corbel Stone marble Mantel with the Stovax curved decorative cast iron fireplace as a new feature in our pink lounge.

And it was as simple as that. The fireplace is very heavy, so I would recommend having 2-3 people on hand to help move the stone pieces of the mantle.

We also added in skirting which looked like the original 1930’s. We got ours from Skirting World.

We absolutely love our new Stovax stone fireplace and it makes our lounge feel all pretty and cosy and was exactly how I had envisaged this room looking.

Now, roll on winter when we can fire it up.

If you have any questions or would like to see more of it in work then please leave a comment below, or contact me on my instagram Houselust.

OUR RENOVATION JOURNEY: OUR GARDENS PLANS- PHASE 2 WITH TREX COMPOSITE DECKING- THE DECK BUILD

A few days ago I wrote about the second phase of our garden plans and how we were planning on adding a large deck to the bottom of our north facing garden using  Trex Enhance decking.

Being north facing we want to make the most of the evening sunshine down at the bottom of the garden, and we fell in love with Trex’s composite decking boards and in particular the Trex Enhance range due to the colour.

These board are not only super durable, but also, unlike timber, they won’t need to be stained or treated and will continue to keep their colour for many years to come.

This week things have started, and I am super excited to show you how much progress has already been made in building our dream deck.

Building the Trex, Sub structure Deck

In collaboration with Trex and Steve, our certified TrexPro installer; Steve from Living Landscapes, Steve has started to build the 8.5m x 4m wide substructure and has started to lay the Trex decking.

In today’s blog post I’m going to talk you through the building of the substructure which the composite Trex decking will go onto and what it entails to build and protect the structure so that it doesn’t rot in years to come. So, who’s ready to learn how it’s done?


Step 1 – Building the Framework 

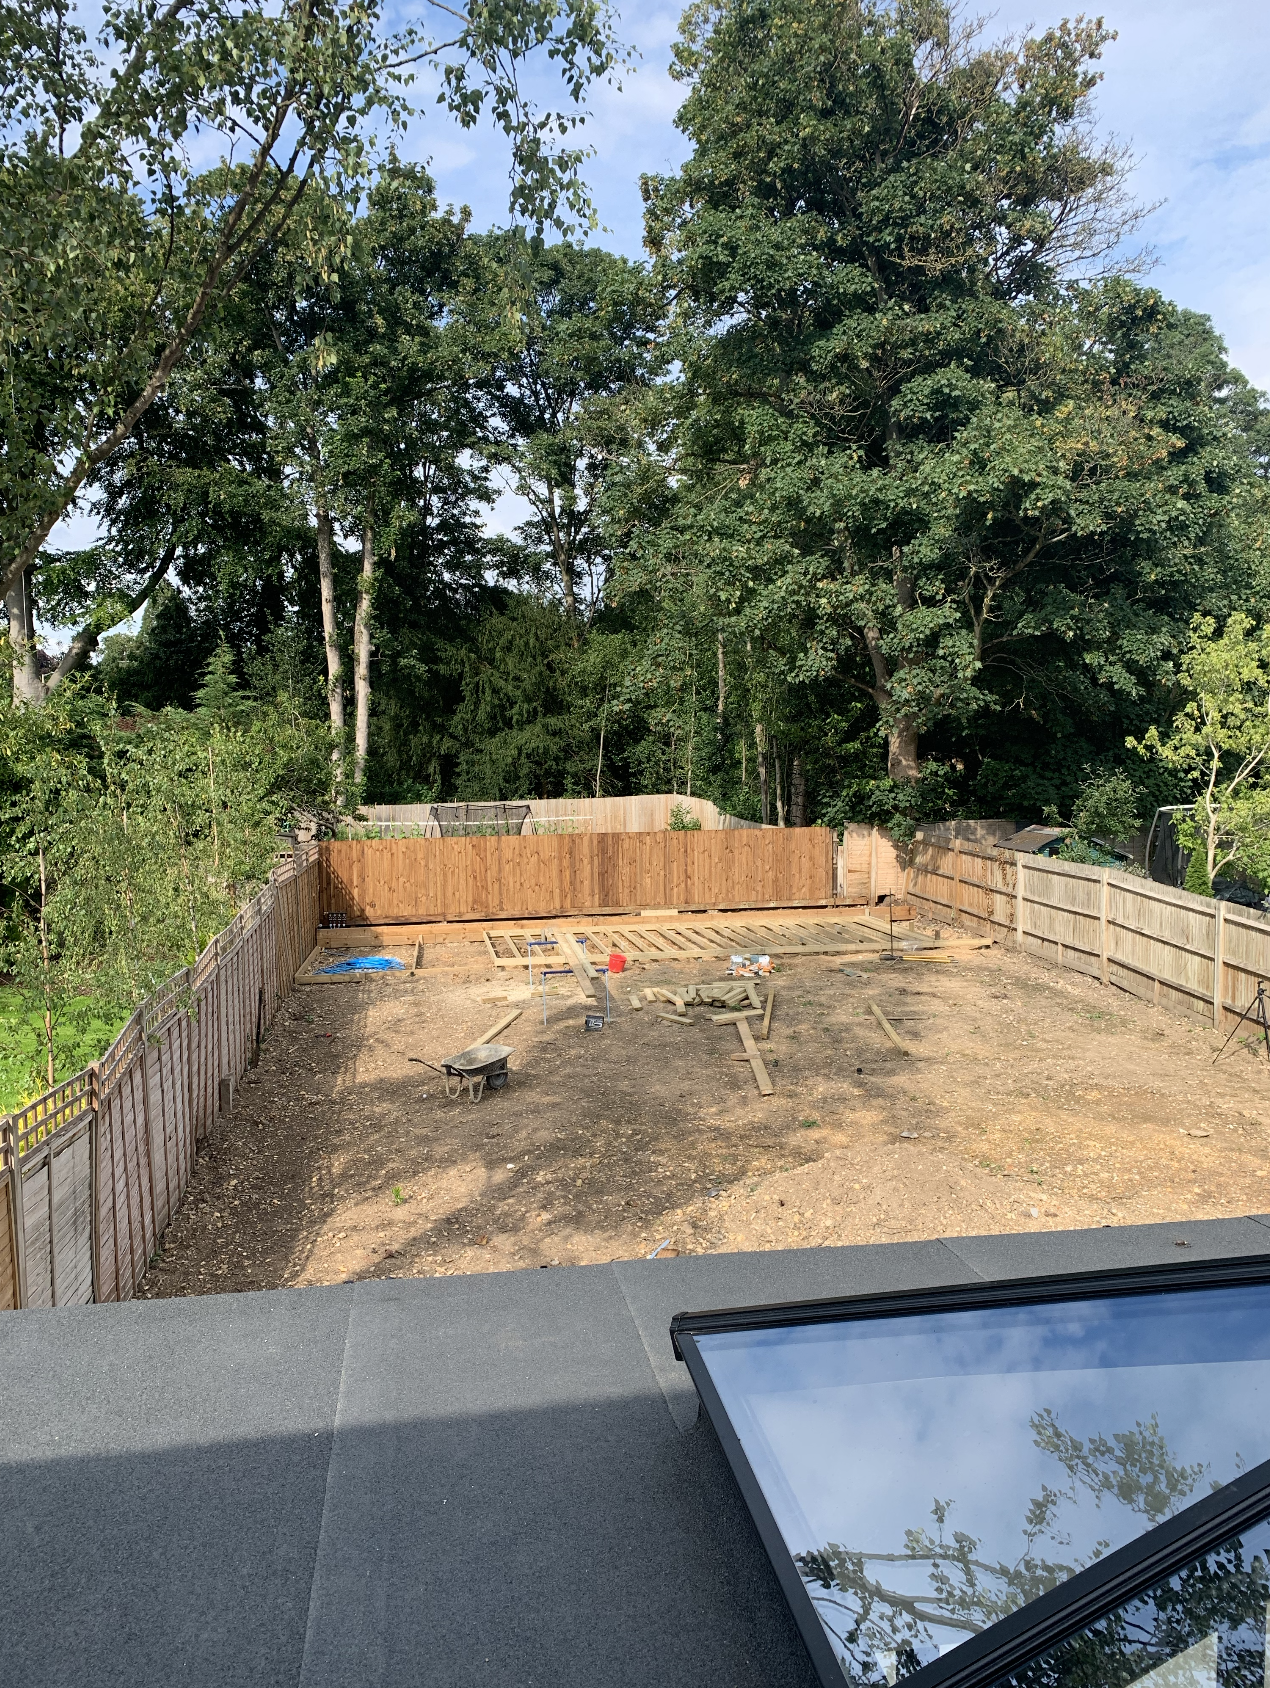
**In preparation of the build we had already levelled the garden**

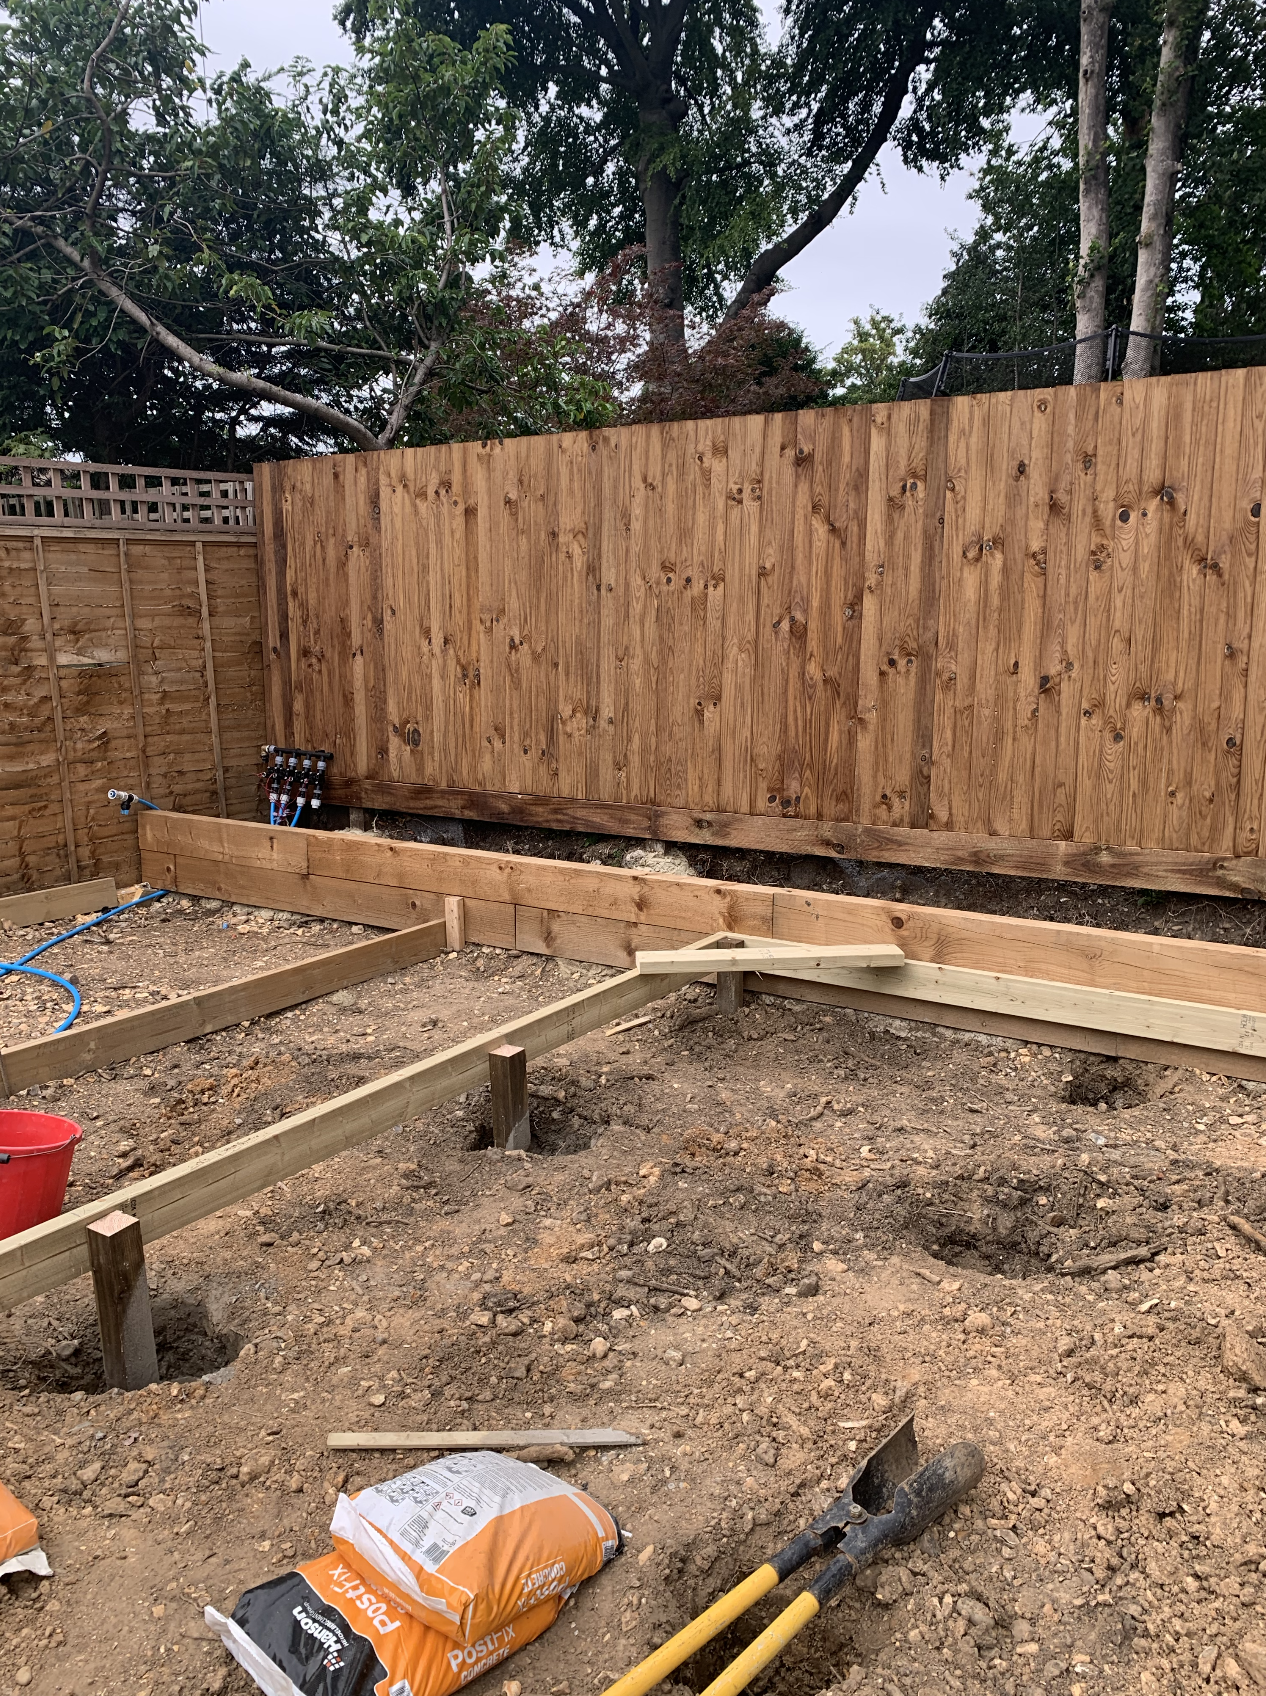
As we’ve never had any decking or any frame work where this is going, Steve from Living Landscapes set to work straight away to dig out holes in the ground which are then filled with quick-setting concrete to hold the posts in place.

Trex Decking - building a Timber Sub structure

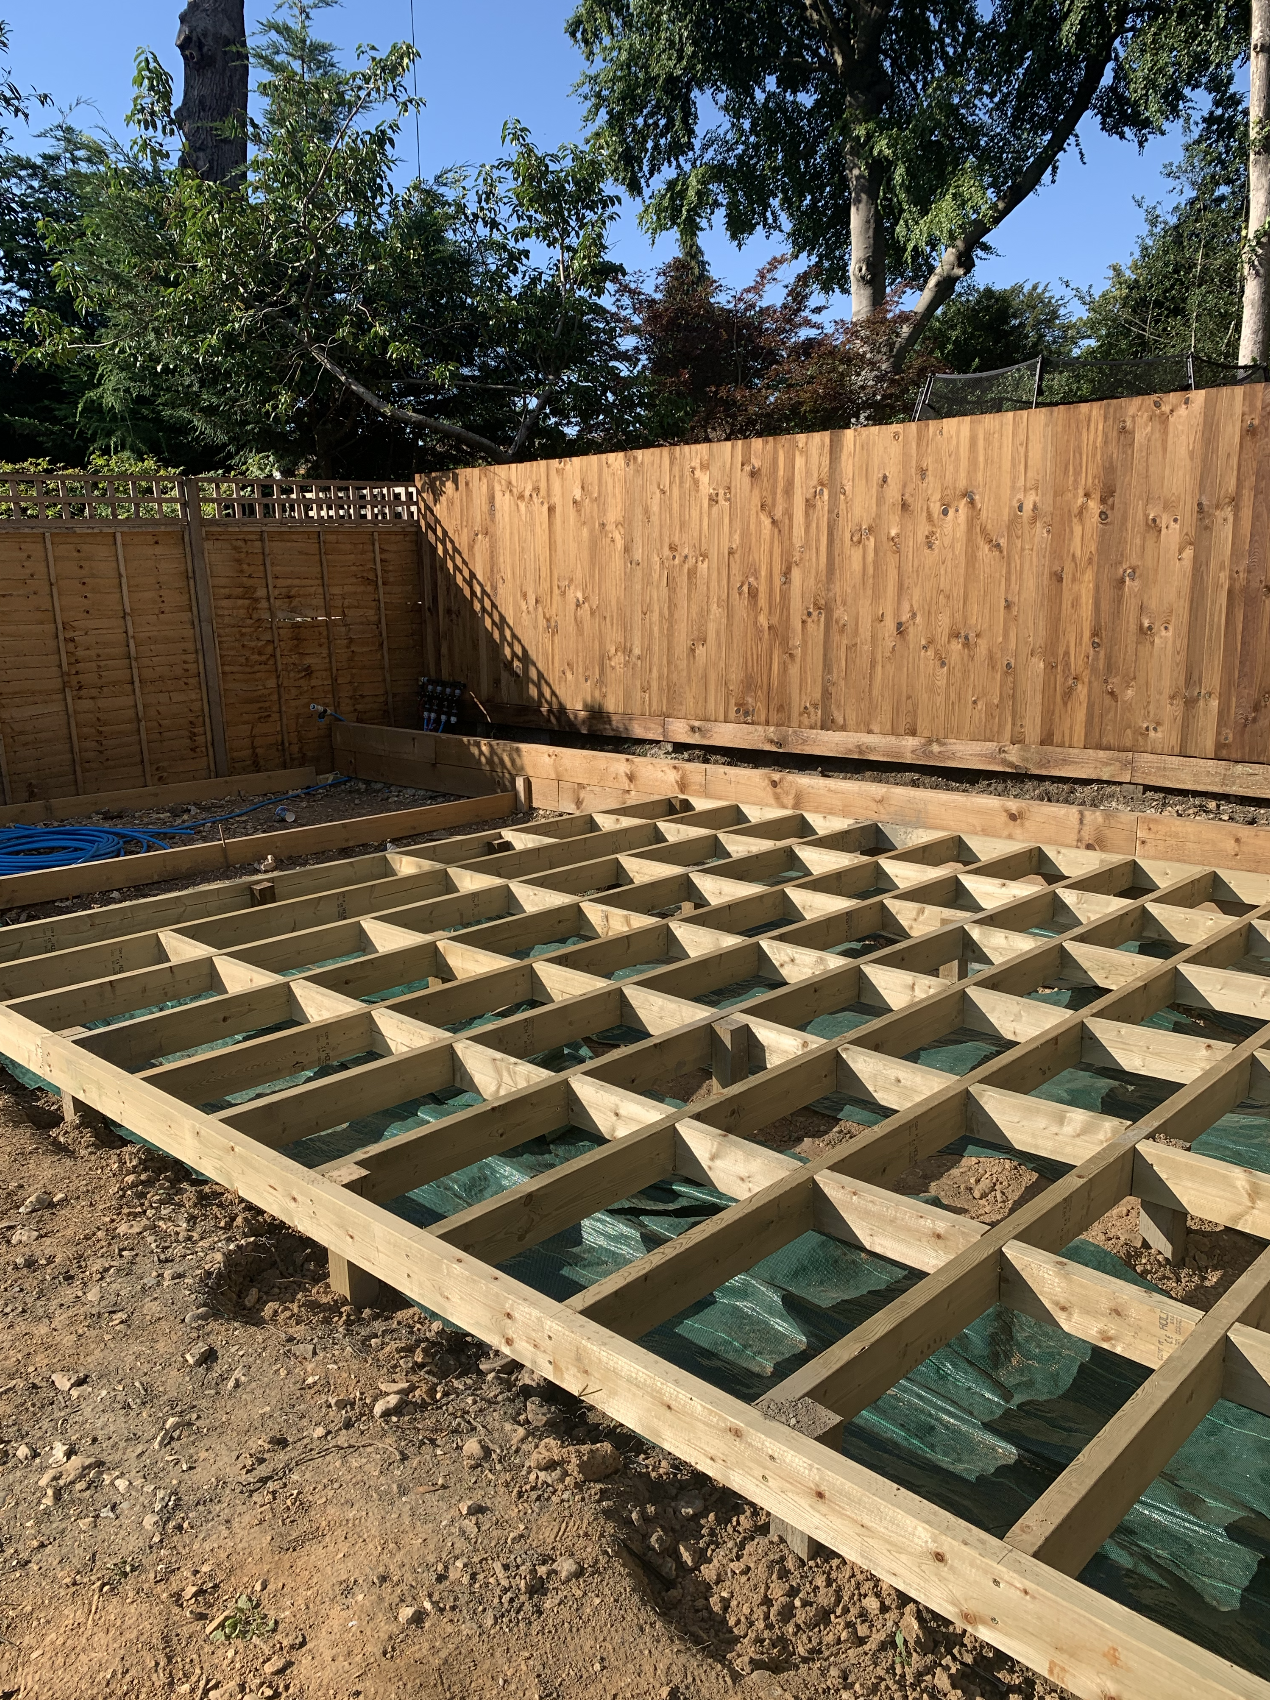
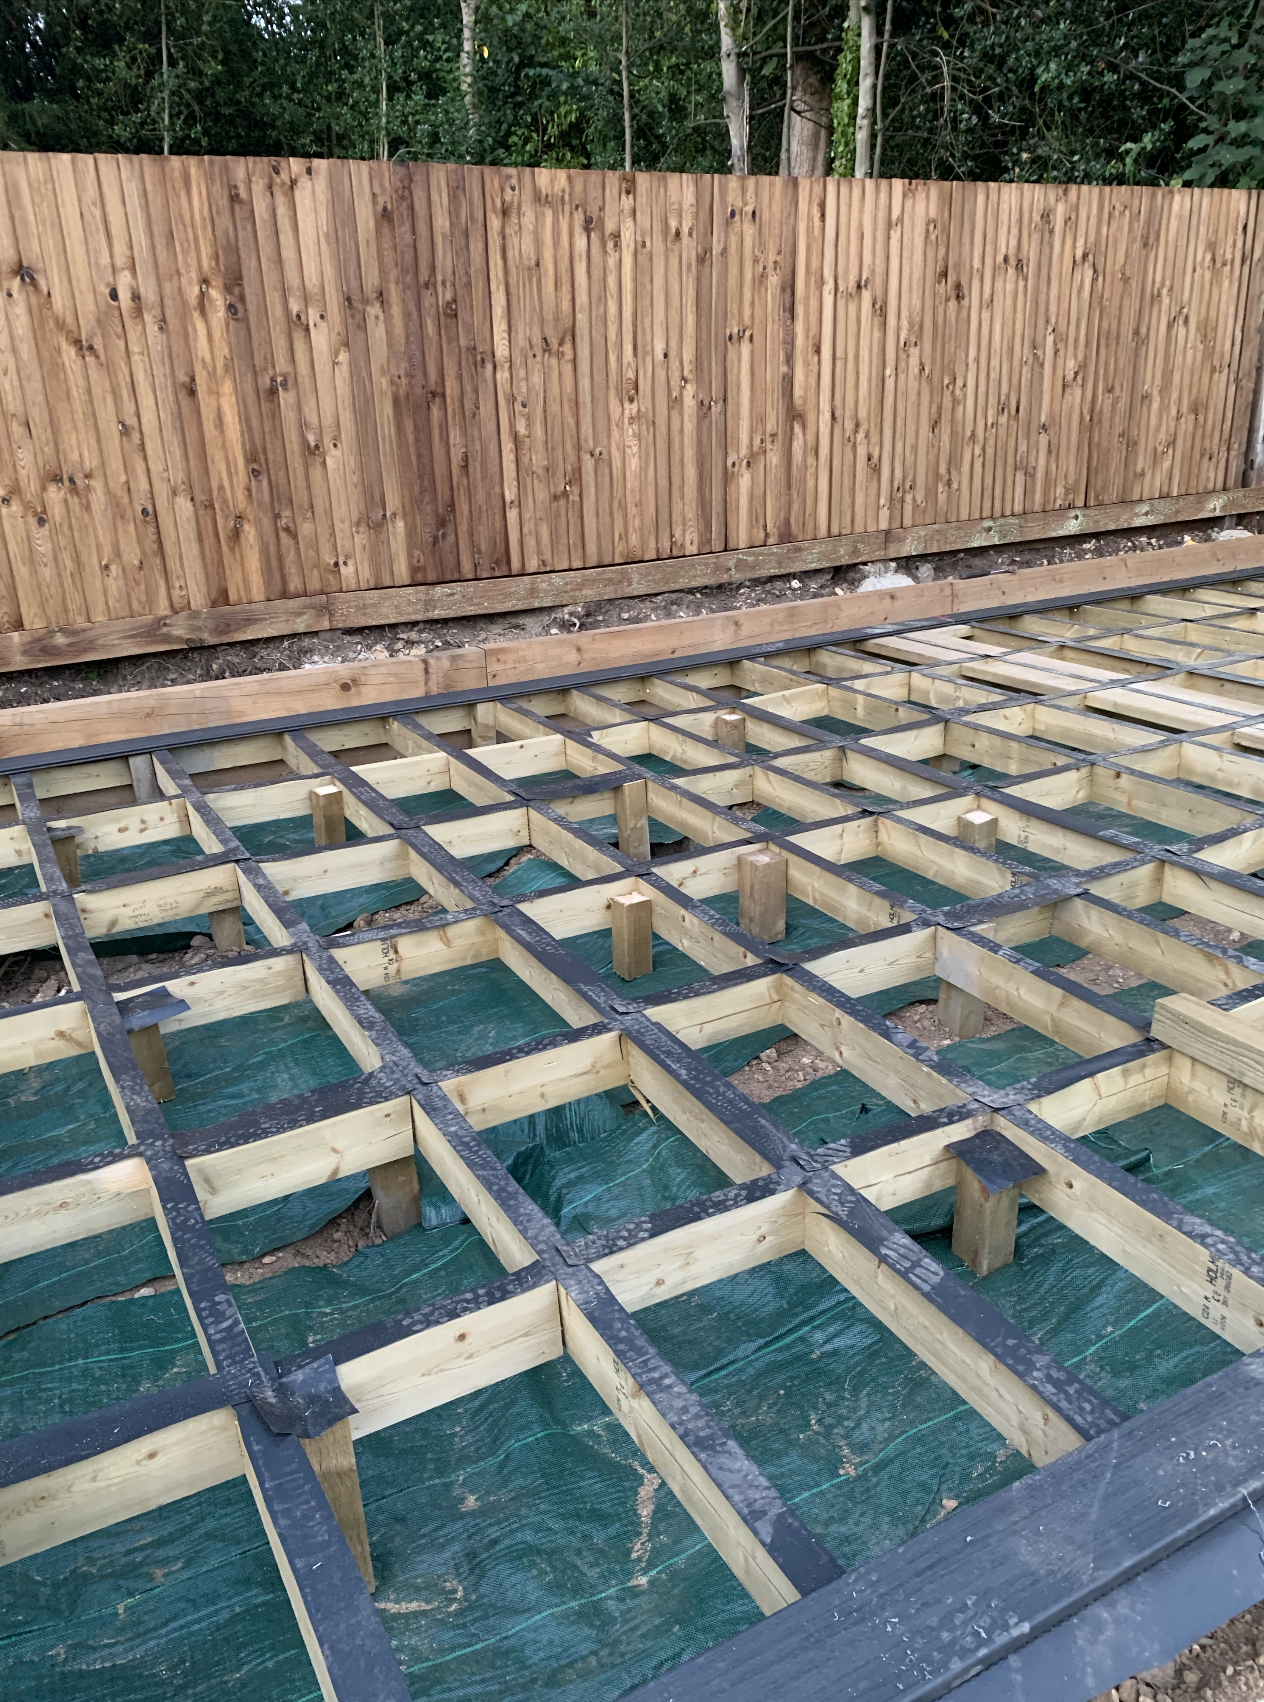
These posts will hold the substructure frame. The surrounding frame is built first, then treated timbers are laid vertical, whilst the smaller infill timbers are attached last. This creates a very pleasing grid formation from the treated timbers.

The most important thing at this stage is to ensure that the frame is structurally sound, and most important, is level.

Building the Trex Decking Timber Sub structure

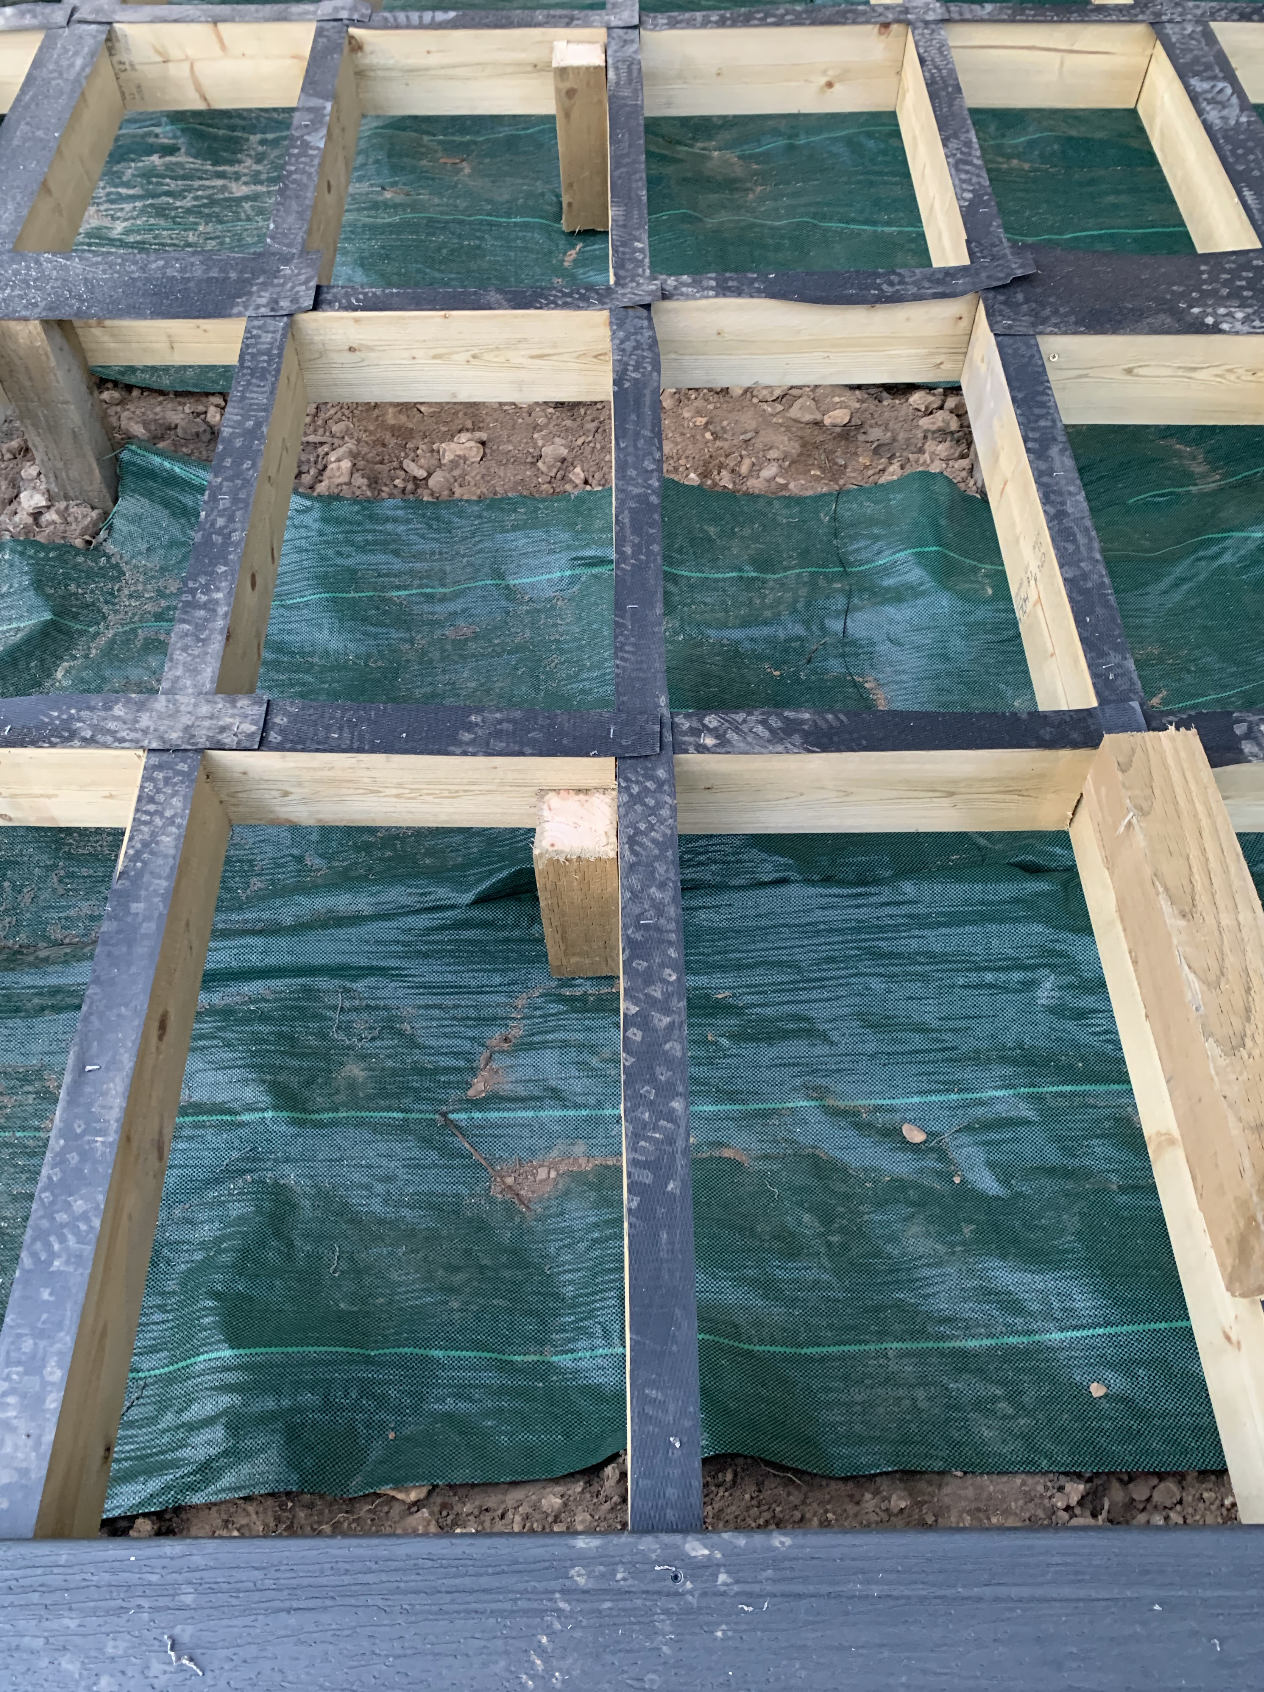
Steve ( Living Landscapes) also laid some anti weed matting underneath the substructure to prevent weeds growing through the deck.

Building the Sub-Structure Timber Frame for the Trex Decking

Building the Sub-Structure Timber Frame for the Trex Decking

 Step 2: Protecting the Substructure frame

Once the timber structure was built, Steve from Living Landscapes used Trex® Protect™ Beam and Joist Tape to protect the timber framework.

This gives an extra layer of protection to the wooden substructure,  which will have Deckfast® Fascia Screws in it from the Trex Fixing systems (this is what Steve uses to attach the Trex Enhance deck to the framework). When a screw is inserted into the timber through the tape, the tape will act as silicone, preventing any moisture or water from penetrating the timber, and preventing it from rotting.

Step 3. Laying the Trex Deck

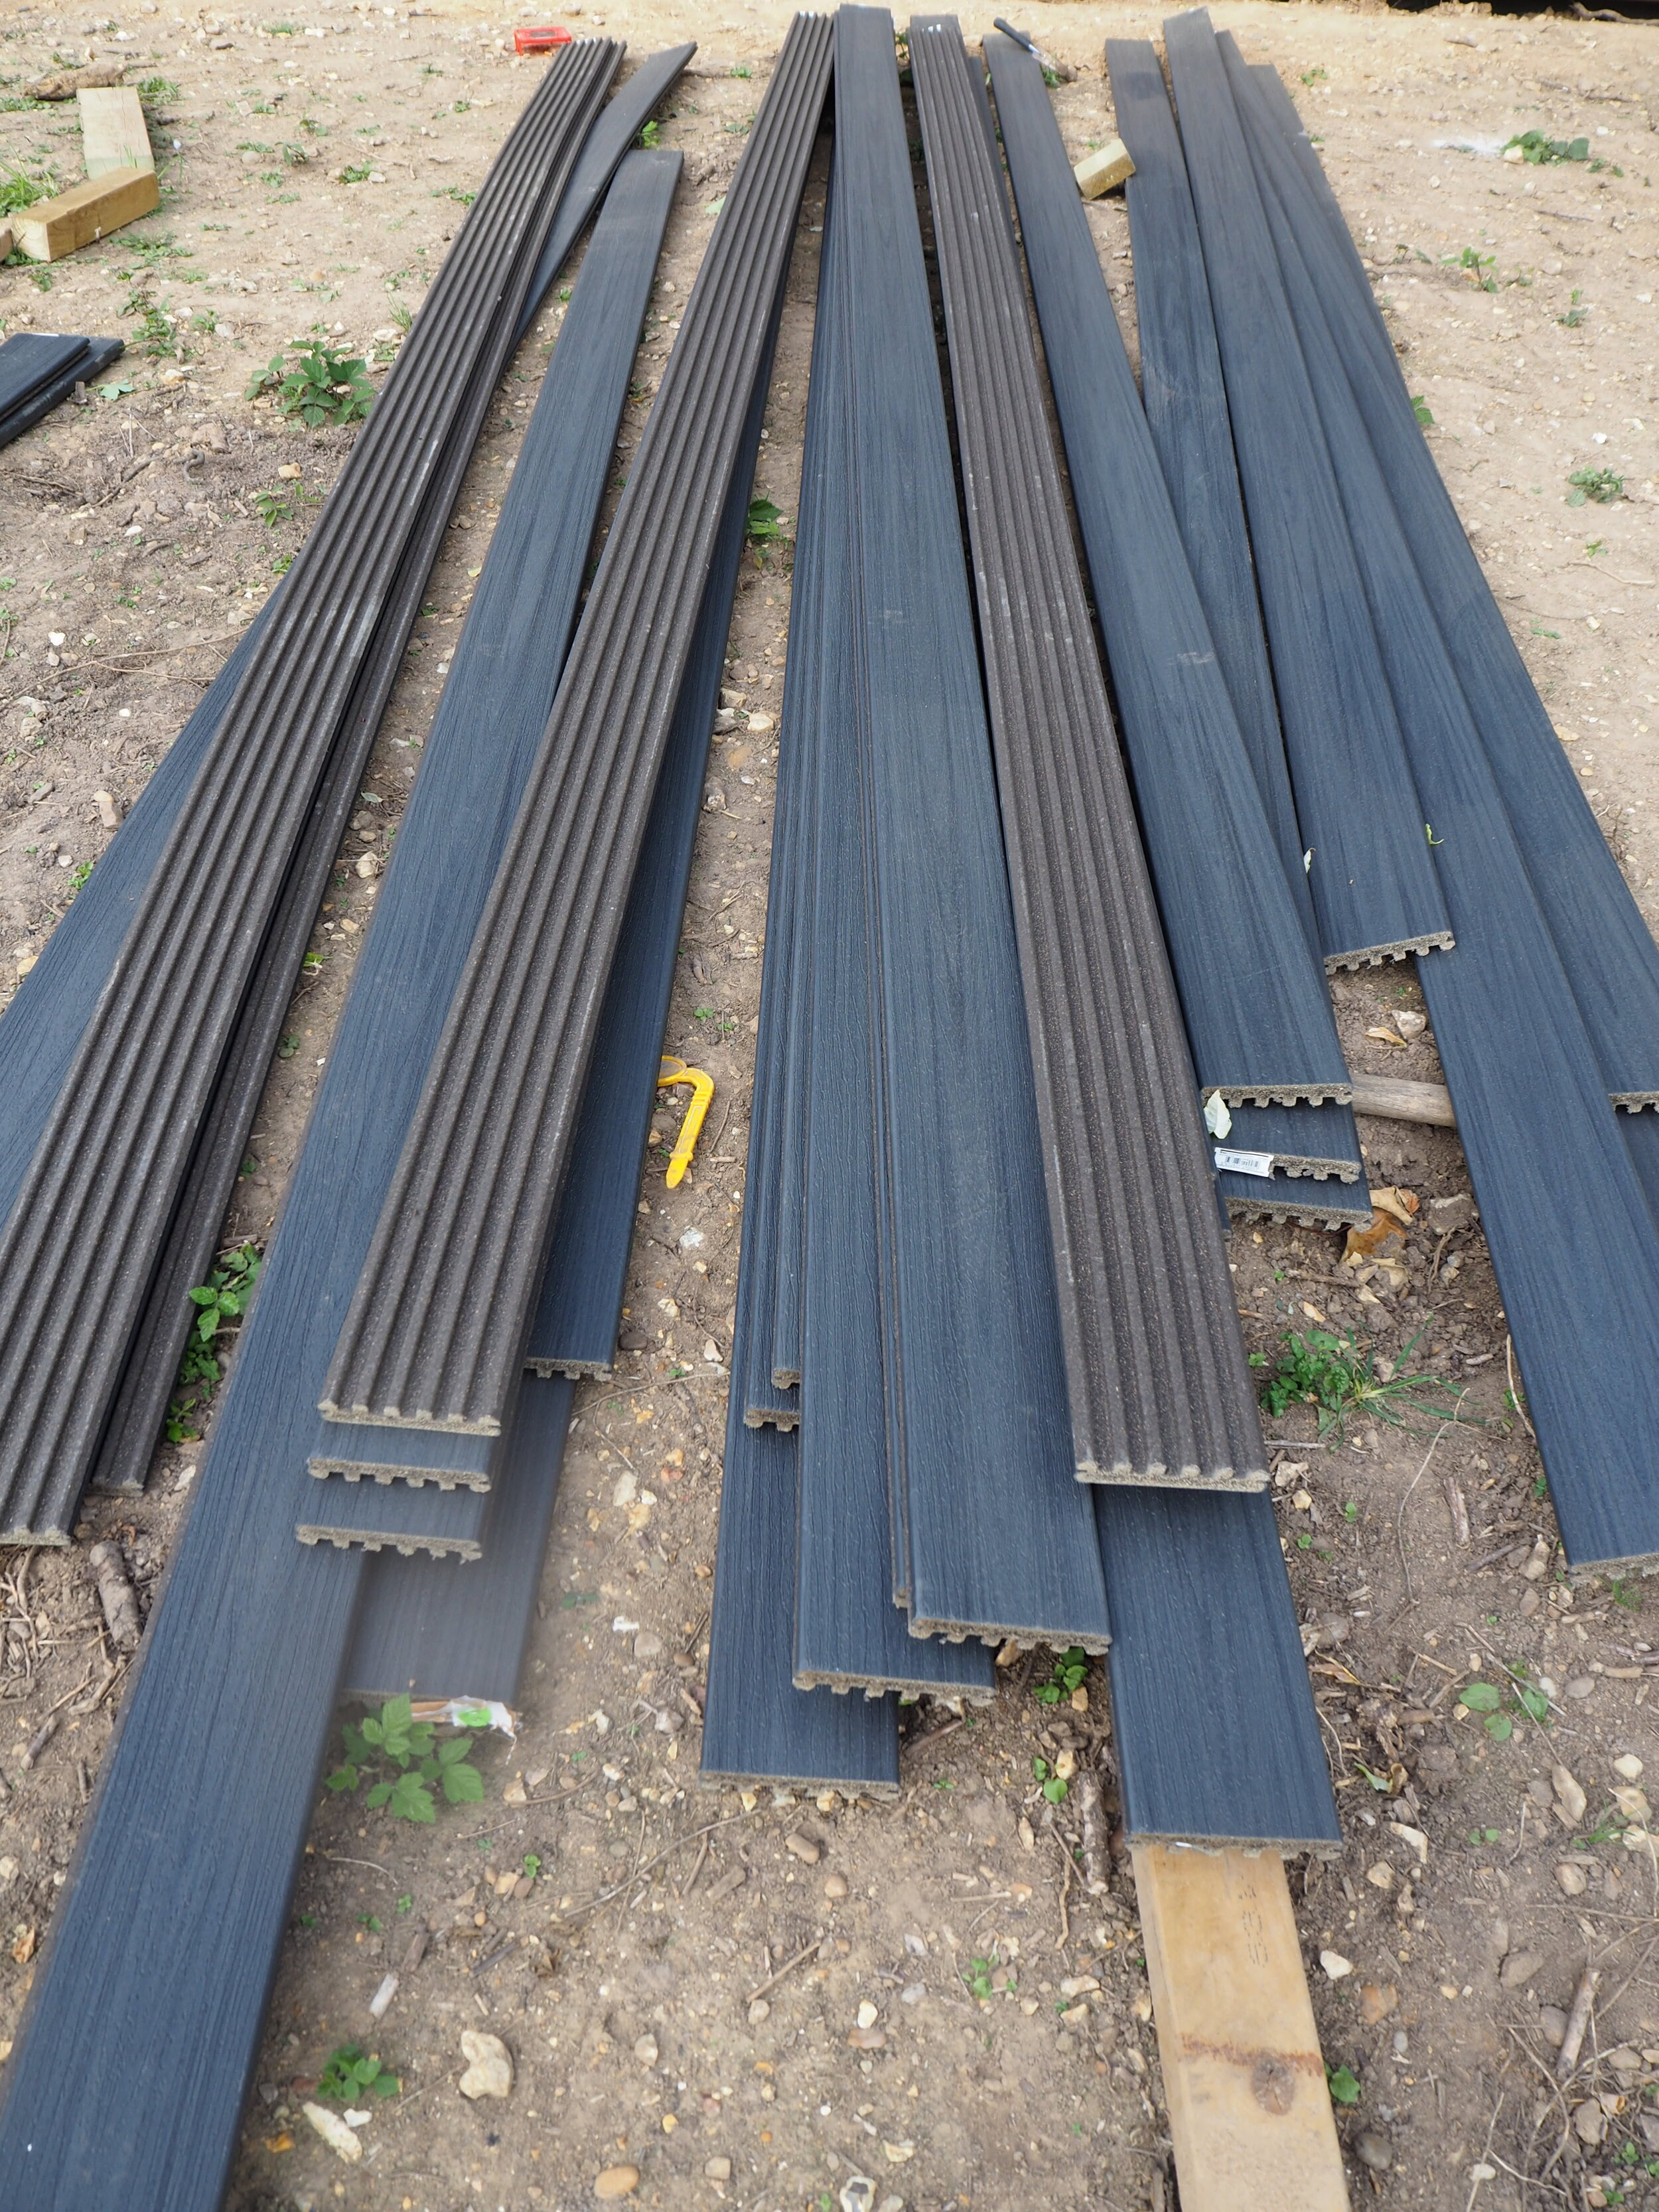
Once the framework was complete the Trex Enhance decking boards were delivered. I can’t tell you how exciting it was to see the ‘Calm Water’ Trex Enhance dark grey/blackish boards laid out in our garden ready to go down. Knowing that I’ll never have to sand or stain this deck is such a joy! Having a toddler and a full-time job means I haven’t got time to maintain the outside spaces, so having decking which is easy to care for will be a dream.

Trex Enhance Decking in Calm Water

Trex Enhance Decking in Calm Water

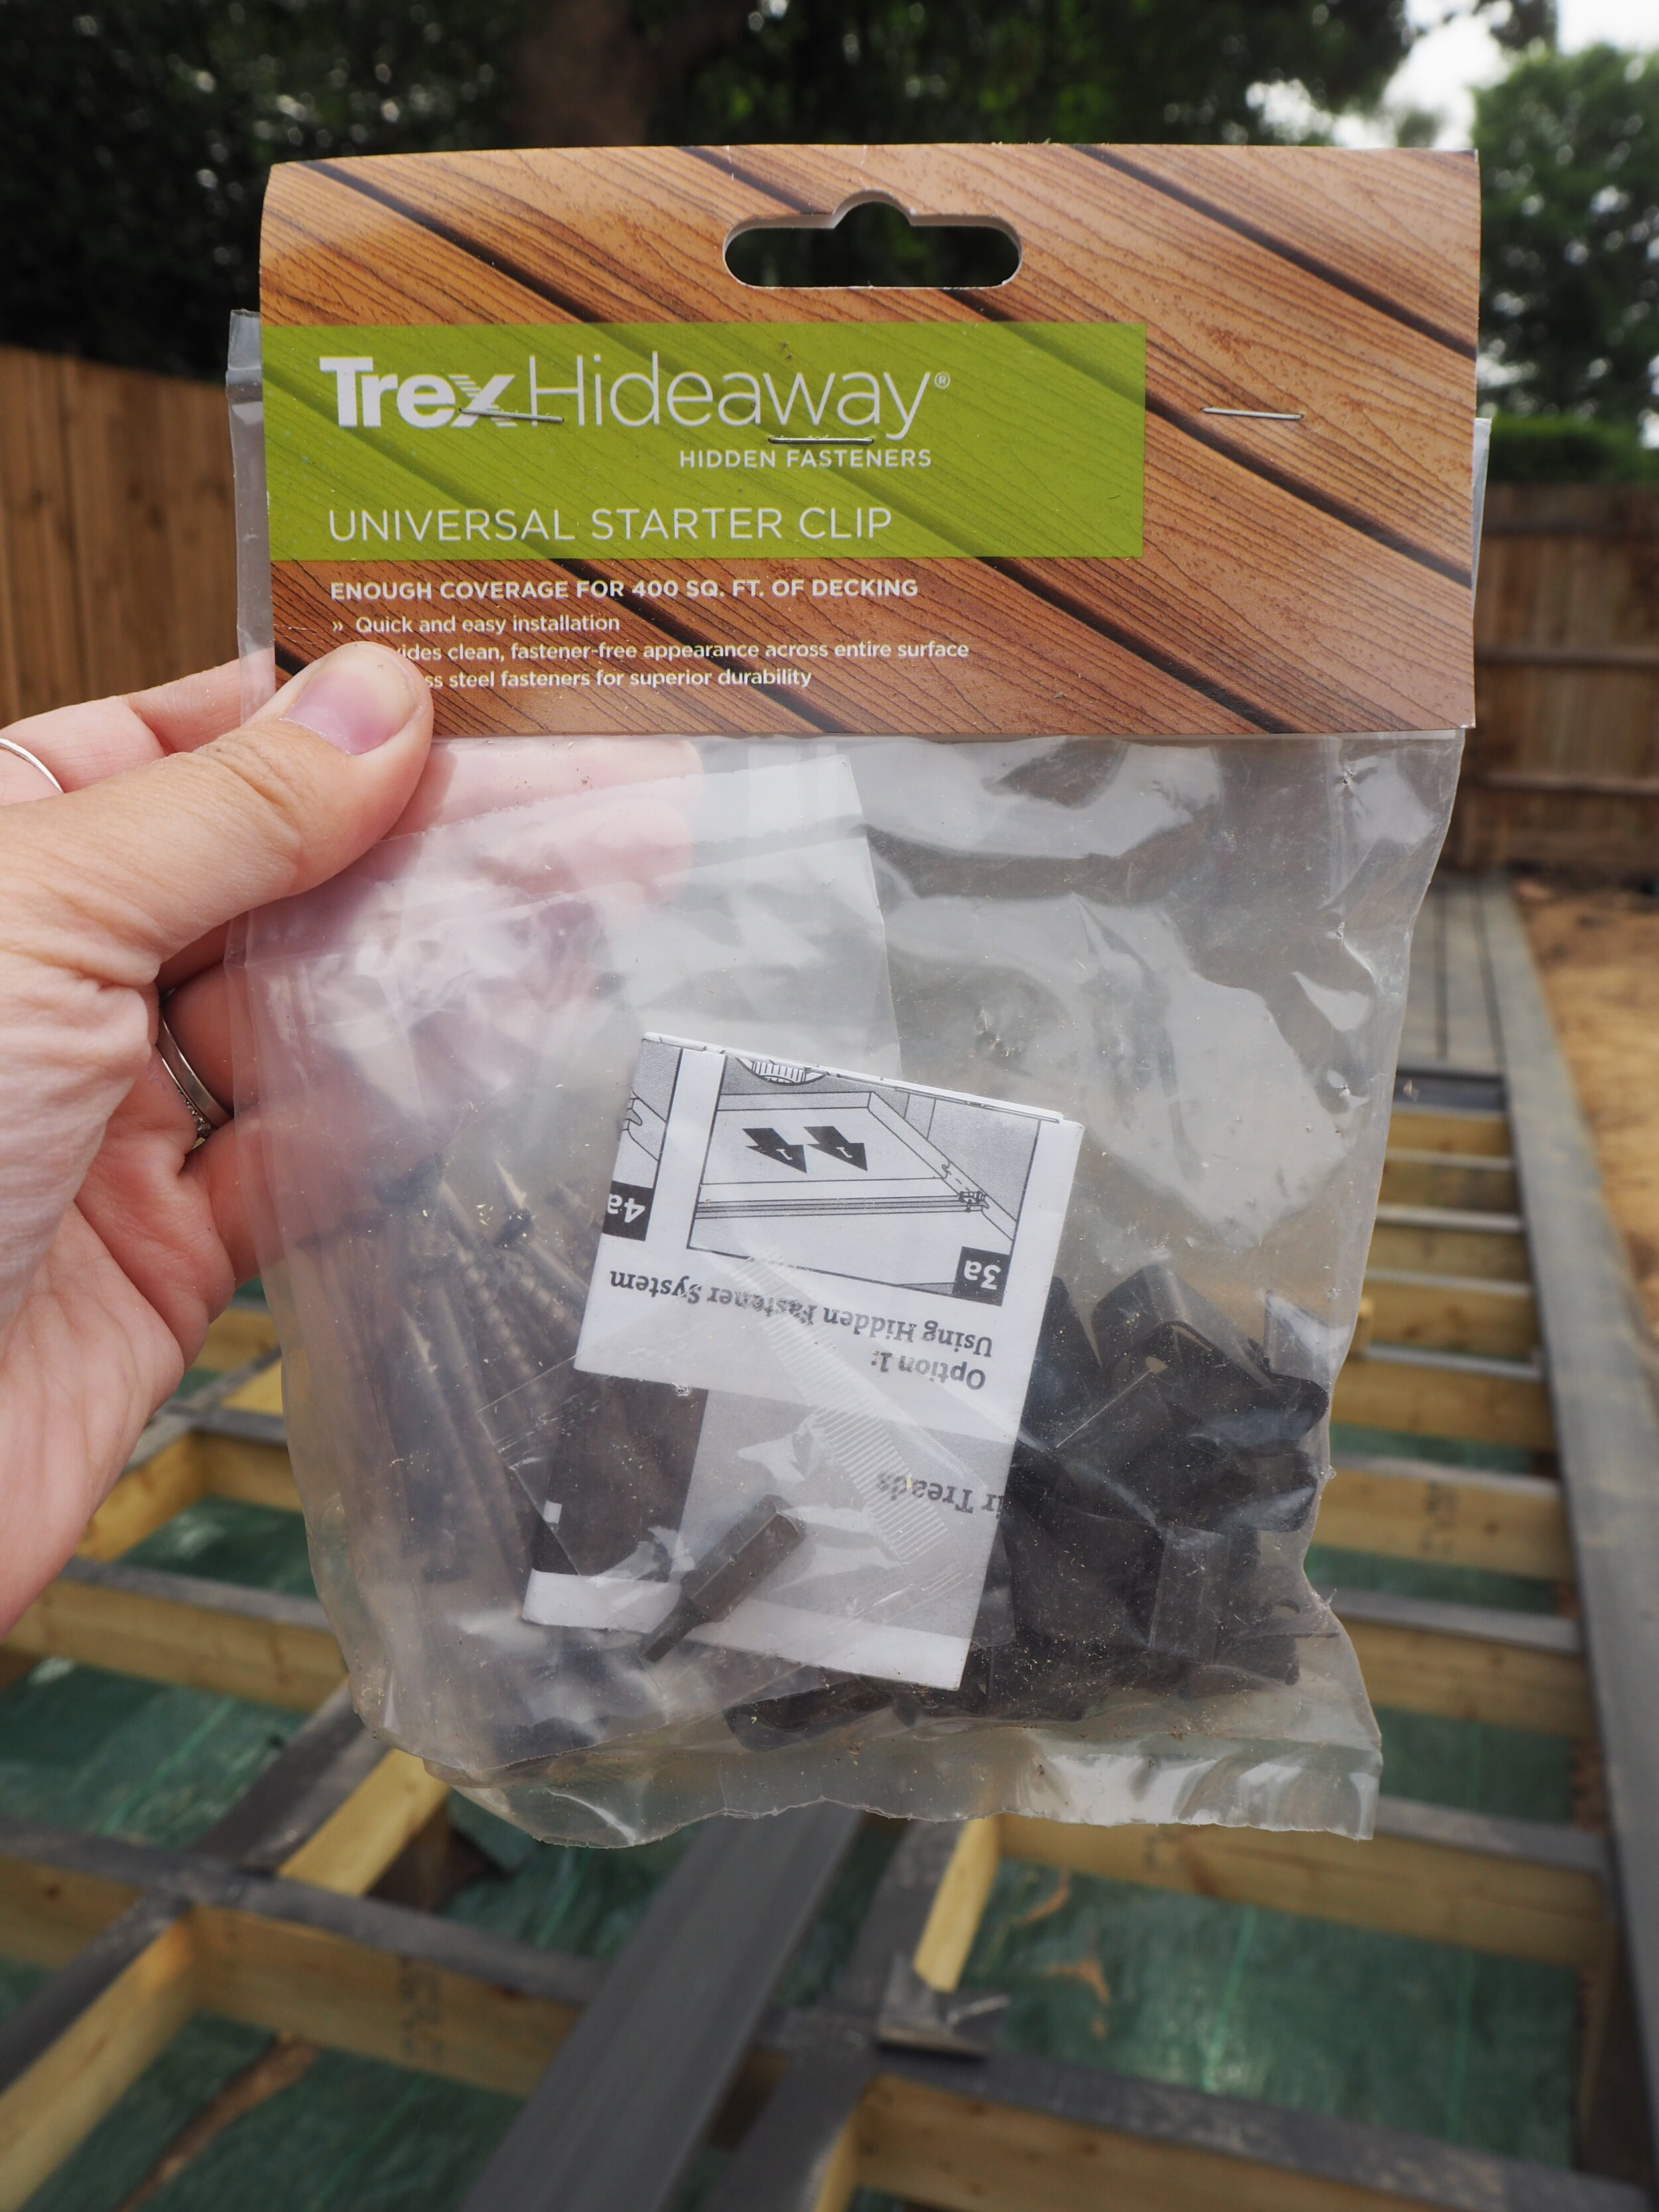
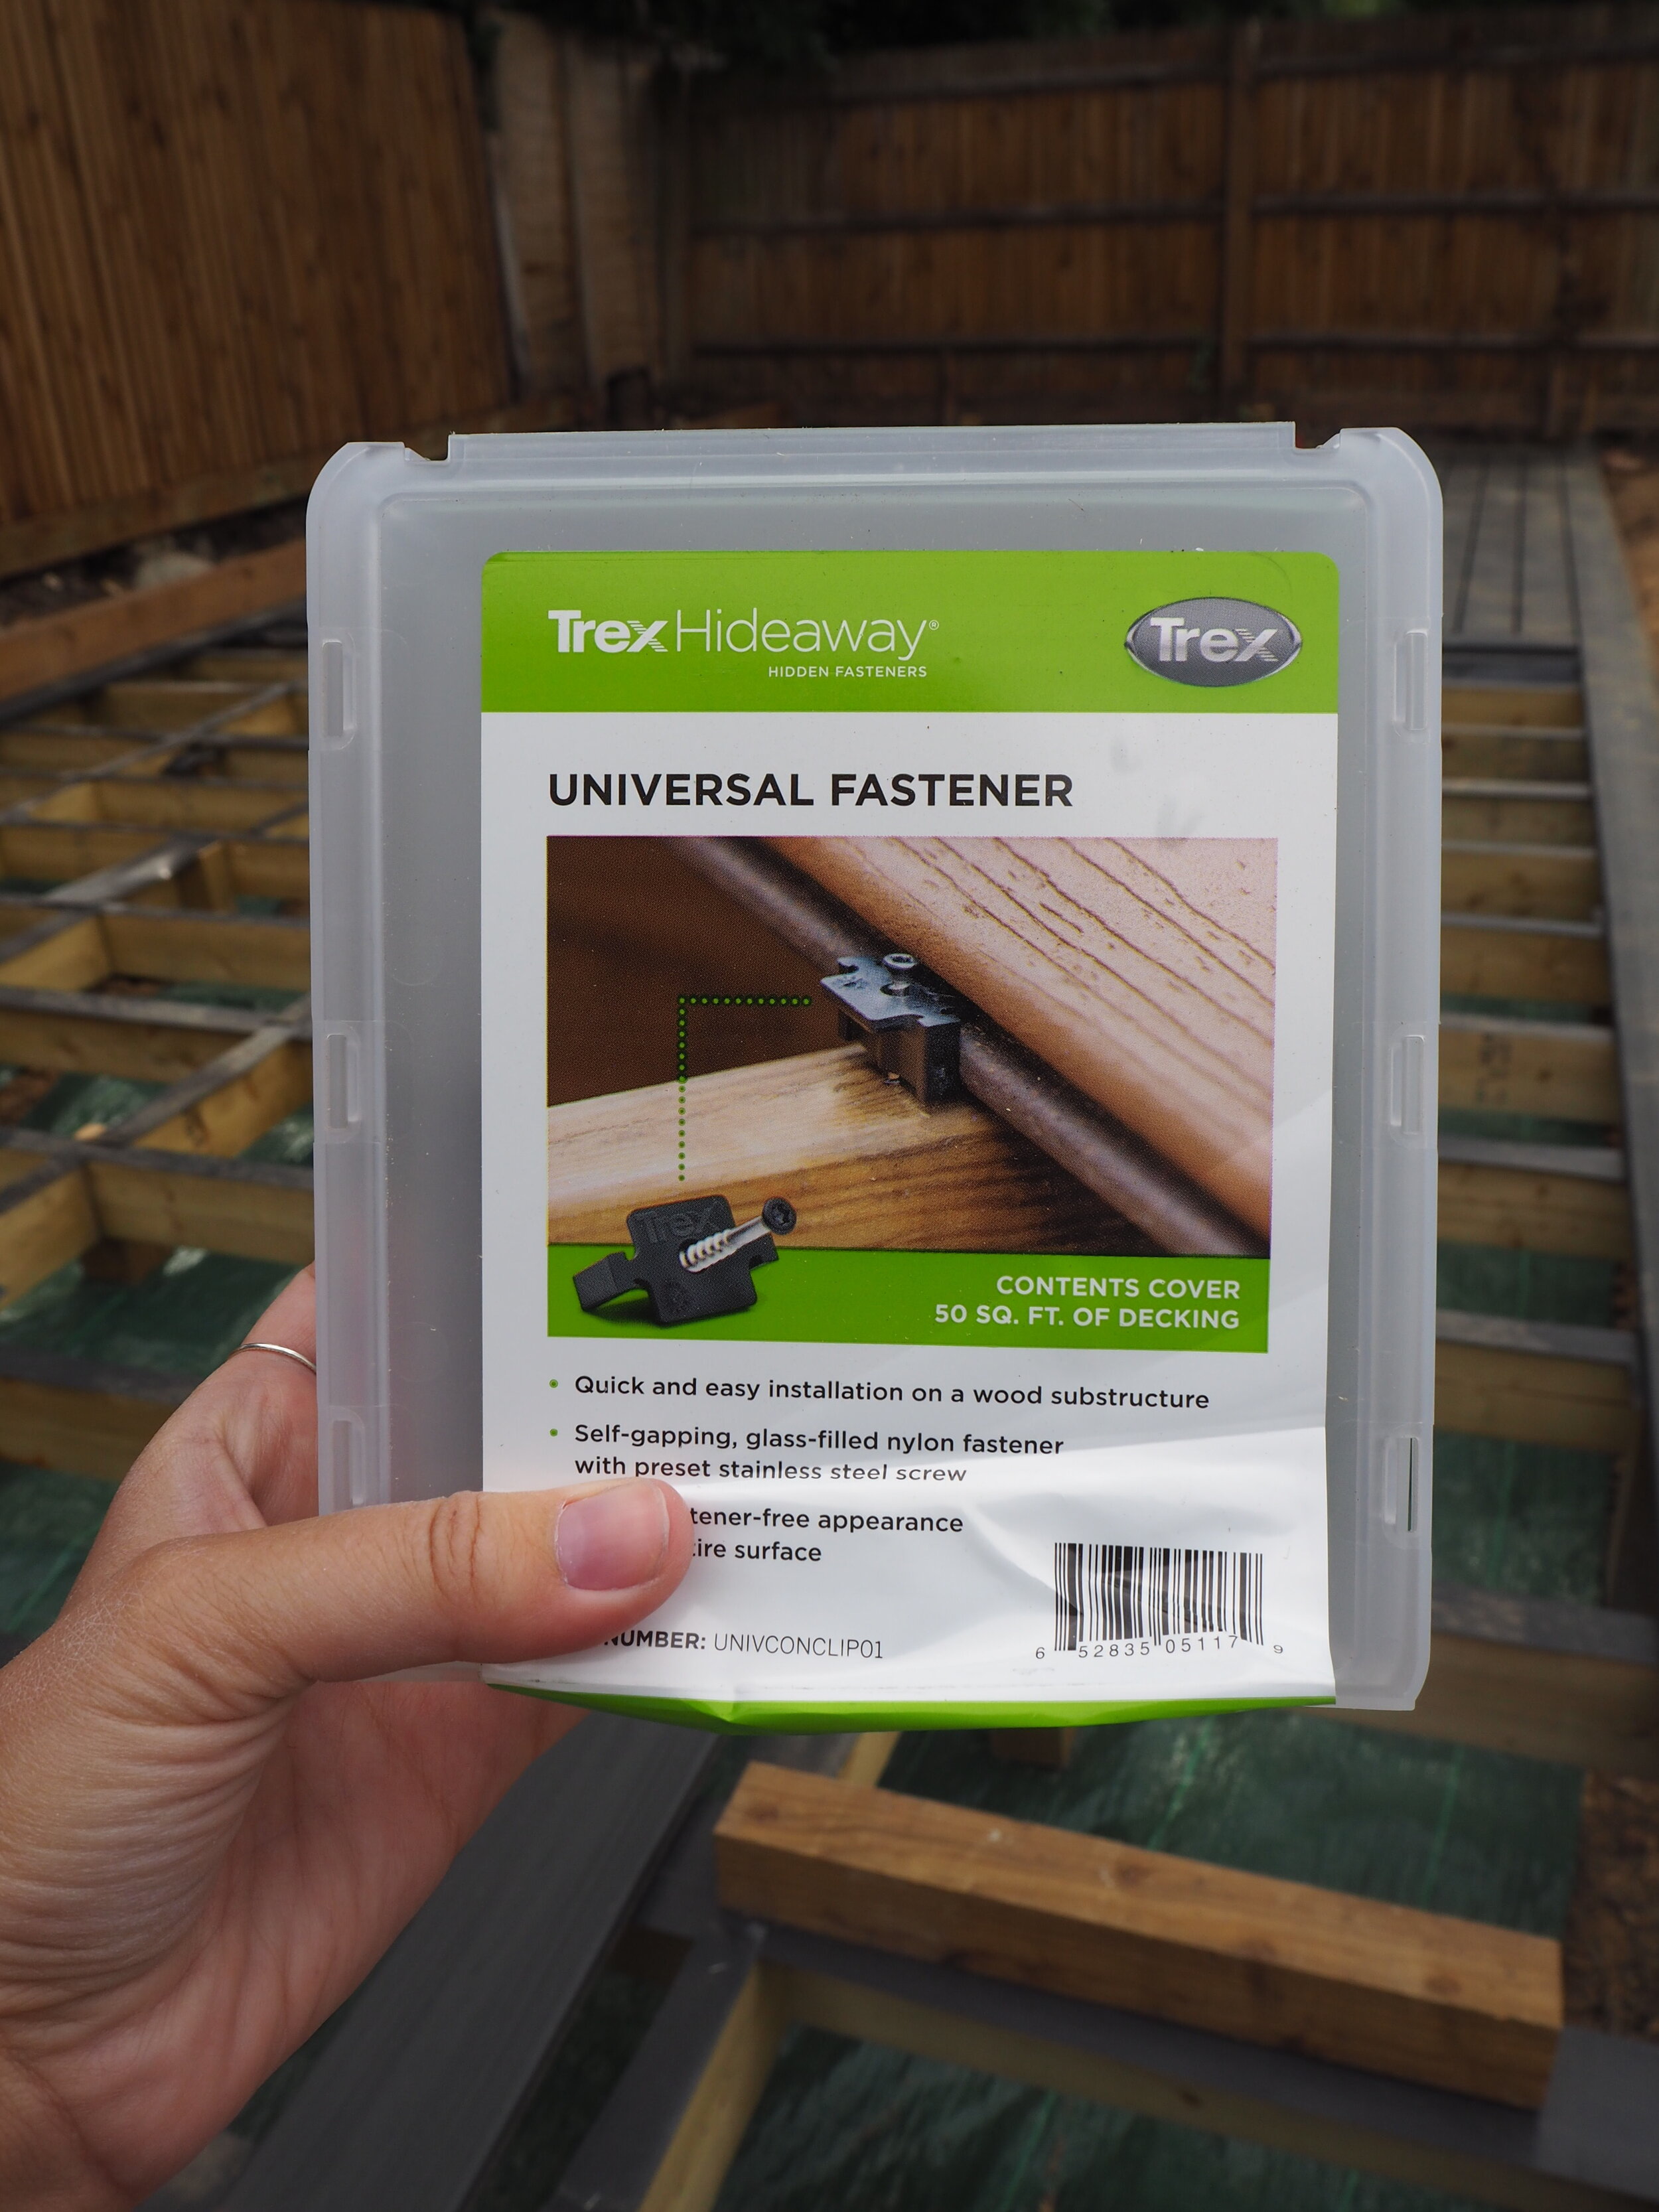
To fix the Trex Enhance decking to the timber, Steve is using the Trex Hideaway Universal Clips and the Trex Hideaway® Universal Fasteners which are part of the Trex Secret Fixing System which are used for grooved edge boards like the Enhance range.

The universal clips are simple-to-use self-gapping clips which attach two grooved boards together and achieve a screw-less finish alongside consistent spacing. Each features a pre-set stainless steel screw for increased durability. This method is only suitable for grooved boards on a timber substructure. See the photo below.

The starter clips are these black, stainless steel fixings which are used to install the perimeter deck boards. They are only required with grooved boards. Each features a stainless steel screw for increased durability.

Trex Hideaway® Secret Fixing System - for grooved edge boards.  These are the universal Clips.

Trex Hideaway® Secret Fixing System - for grooved edge boards. These are the universal Clips.

The Deckfast® Fascia Screws are colour matched screws which are designed to accommodate the expansion and contraction that can occur with fascia boards. They are installed using the pre-drilling fascia tool which is available separately – see the Fascia screws below.

Trex Decking Fascia System - Dark Grey fascia screws

It was now time for Steve (Living landscapes design) to set to work in laying the deck.

The Trex Deck halfway completed.

The Trex Deck halfway completed.

As the area is 8.5m Steve  (Living landscapes design) gave me several options for how we could lay the deck to accommodate the joins in the boards (The Trex Enhance Calm Water boards are available in 4.88 and 3.66m lengths). We decided on laying a board vertically down the middle of the deck so that the 6mm gap which needs to be left between boards joins will look more finished.

I love that even the Deckfast® Fascia Screws are colour matched so they don’t stand out.


Step 4: The finishing touches - Fascia boards and flower bed

All that is left is to finish the other side with the decking and then add the frontal fascia board and build the raised flower bed on the right which is also being made from Trex Enhance decking.

Then it will be ready for its big reveal.  Stay tuned to see the finished deck and second phase of garden makeover.


* This post is sponsored by Trex who are very kindly collaborating with me on the transformation of my garden deck space by providing all materials and labour in exchange for promotional activity. 

IMG_8730.jpeg

HOW TO ADD CHARACTER INTO YOUR NEW EXTENSION

When we were planning our loft extension, I didn’t want the new extension to feel like an ‘extension’. I wanted it to feel like it had always been there and flowed with the rest of the house. Of course the exterior would always look slightly different and more contemporary, since slate cladded boxy dorma’s weren’t exactly a trend back in the victorian era. But, what was important to me was that the fixtures such as skirting and architraves all matched (or at least the best they could) to add that beloved character back into the new extension.

So here’s my guide on how you can add character into your modern extension..

Skirting Boards

Our lounge had the original deep victorian skirting boards when we moved in, the 195mm kind, so this is something we wanted to replicate across the rest of our house as we started our renovation project. In hindsight we probably should have ripped the original ones out at the beginning, as we ended up sourcing the almost the exact same ones in MDF from skirtingworld and the time we spent sanding the trillion layers of paint off the originals could have been better spent on pinterest or in the pub. But, never mind. Lesson learnt.

And something which is a huge bug bear for me is that when we had our flooring laid, we had to have a horrible beading edge trim the old skirting boards to hide the expansion gap. Unlike the new skirting boards, which could sit ontop of the new flooring and hide these gaps. But unless your a pro DIY-er, how would you know these things!?

For the record I chose the 324 Skirting board in size 195mm from Skirtingworld.

Loft landing. Rug Runner Wayfair £113.00, Wallpaper- Divine Savages Deco Martini , Plant Stand - Matalan, £6 - shop here for similar , Paint - farrow and Ball- Railings.

Loft landing. Rug Runner Wayfair £113.00, Wallpaper- Divine Savages Deco Martini , Plant Stand - Matalan, £6 - shop here for similar , Paint - farrow and Ball- Railings.

Architraves

Does your home have the original architraves? Or are you starting from scratch? It was the same story for us. Original architraves on the ground and first floor, which again had accumulated layers of thick paint over the past 100 odd years.

This is also something that can easily be ripped out and added back in if you have a good carpenter, and can still feel very much ‘characterful’ if thats a word. If you already have original ones and feel as though your monster to rip them out, I feel your pain, however you are NOT a monster. However having flush closing doors and beautiful architraves which emulate your houses period style is the way forward.

I chose the Victorian 1 MDF Architrave in 95mm width and 18mm thickness for our loft extension as these matched the old ones the best. If I could start the house all over, I would have these everywhere. But that’s another story for another day.

Dado Rail

If you know me, then you will know this is something I’m passionate about. We added a dado rail into our hallway to break up the wallpaper and paint. See previous blog post to read more on that. Top tip, choose a dado rail that looks most similar to your architraves to keep in with your homes period style.

Loft landing.

Loft landing.

Coving

If you can afford it, and again its in fitting with your homes period, why not add that beloved coving back in. Find local coving/plaster specialists in your area who can make a mould to match your original.

Ceiling Roses

If you have the head height in your new extension, and the room calls for it, add a ceiling rose to your extension. But only if its appropriate. Many modern extensions have skylights, and feature lights which might not work with a ceiling rose. However, it’s something to keep in mind if you want to add in.

Victorian style ceiling Rose in our lounge, with original victorian coving.

Victorian style ceiling Rose in our lounge, with original victorian coving.

Spindles / Handrails

We had lovely spindles on our original landing/banister. They weren’t the original ones, but they were beautifully shaped and fitted with our homes victorian style. When the new stairs went in for the loft we needed new spindles, so made the call to replace them all. This is something I would completely recommend. At the end of the day, consistency is key in any home, so choose new ones and choose ones which emulate your homes original period.

Brick Slip Tiles

When planning our loft we talked about keeping the original brick chimney breast wall as a feature. However, once the stairs went in, and I saw the original walls in all their jagged and dusty glory, I changed my mind. We did however consider using these old stock style brick slip tiles from UK feature walls though to achieve the same look. But in the end, we went down a different root and kept the walls plastered and painted.

Brick slip tiles are a great way to add character back in to create that old cottage, or loft apartment look without having to chip the plaster off the walls. The texture is just like real bricks and if you use a traditional mortar mix, the end result will look like its always been there. And, did you know you can also use brick slips on the outside of your home too? So you can say goodbye to the pebble dash/ plastered exteriors, and hello to old style bricks again. It’s definitely something to bare in mind if you hate the exterior of your home.

Image credit from Pinterest

Image credit from Pinterest

This post was sponsored by UK Feature walls and Skirting World. Everything written is 100% my opinion.