
OUR PATIO TRANSFORMATION
/Who knew gardens would prove to be so important in the year 2021. They have become our escapism to the turmoil of 2020/21 and a space for us to feel safe away from the chaos of the pandemic. I know we are incredibly lucky to have a garden, and it’s something we never take for granted.
This week we are back on the renovation bus, now focusing on getting our garden transformed ready for some fun in the sun.
When we did the major house renovation works we decided to prep the patio for the future so that the space was safe and usable for our toddler for the forthcoming year, whilst we saved for the next phase.
We built a retaining wall, added two steps up to the newly laid lawn, prepped the drainage channels and put down copious amounts of cement so we weren’t constantly walking mud into the house, whilst also prepping the base for the next phase. THIS PHASE.
BEFORE


We have decided to take the porcelain tiles all the way around the side of the house and up to the side gates which is approx 92 sqm of patio of cover. As you can see from the before pictures, we didn’t quite prep the entire side return and stopped short just before the back door - which means, you guessed it… more concrete!
It’s also given us the nudge to finally change our water pipe which was something we had been meaning to do to increase the water pressure to the house. 20mm Blue poly pipes are the building standard, but as our house was a 1930’s we had the original lead pipe. By changing it now, it means we shouldn’t have to dig up the tiles in the future and ultimately we’re future proofing us.
THE PATIO TILES
Because our house render is painted white and the windows, doors and fascias are all in black at the back of the house, I wanted something monochrome to suit the style of the house. We also have painted black fences down the sides so I chose to opt for a light grey rather than a more neutral looking tile.
I also wanted tiles which were easy to maintain, ie easily jet washed year in and year out and that would last the time and wouldn’t need to be replaced for at least another 10+ years.
I looked at the CTD outdoor tiles as we had used their marble effect tiles in our bathroom renovation, and saw that CTD had a huge range of internal and external tiles which you can see here for inspiration and ideas.
I chose the Burlington Silver Outdoor porcelain Tile from CTD which are 900x600x20mm. I wanted a bigger tile as the patio space to cover is 92sq meters, so it made sense to go for something bigger and have less grout lines to fill with dirt and at almost a meter wide these tiles were just what I was looking for.

I chose the Burlington Silver Outdoor porcelain Tile from CTD which are 900x600x20mm.
These Burlington Silver Outdoor Tile from CTD have the characteristics of aged slate with a riven texture, and are also slip resistant and easy to maintain. As the Burlington Silver Outdoor Tile is inspired by natural looking stones, it has shade variations on each tile for a beautifully realistic slate look, but with having the ease of porcelain to keep them clean.
THE PROCESS

Laying the tiles was pretty straight forward as the concrete base was already prepped in 80% of the patio, and the later could be done once we replaced our water pipe. The tiles were laid on a mixture of sand and cement, and once dried they were grouted with ProPave Grout in colour Storm Grey, which I bought from CTD tiles.

We used ProPave Grout in colour Storm grey which I bought from CTD tiles.
AFTER
We K Rendered the brick retaining wall, then painted it in a Farrow and Ball masonry paint in the colour : Purbeck stone. We also used the same CTD Burlington tiles to make steps up onto our lawn, by cutting them down to size.
We added two types of drains, one larger which leads to our soakaway which is located under our lawn, and the second by the house which is a slot drain which leads to our rain water drainage. It’s important to think about drainage when you’re doing your patio as you ideally want water to drain away from your house- especially if your external flooring is level with your house.
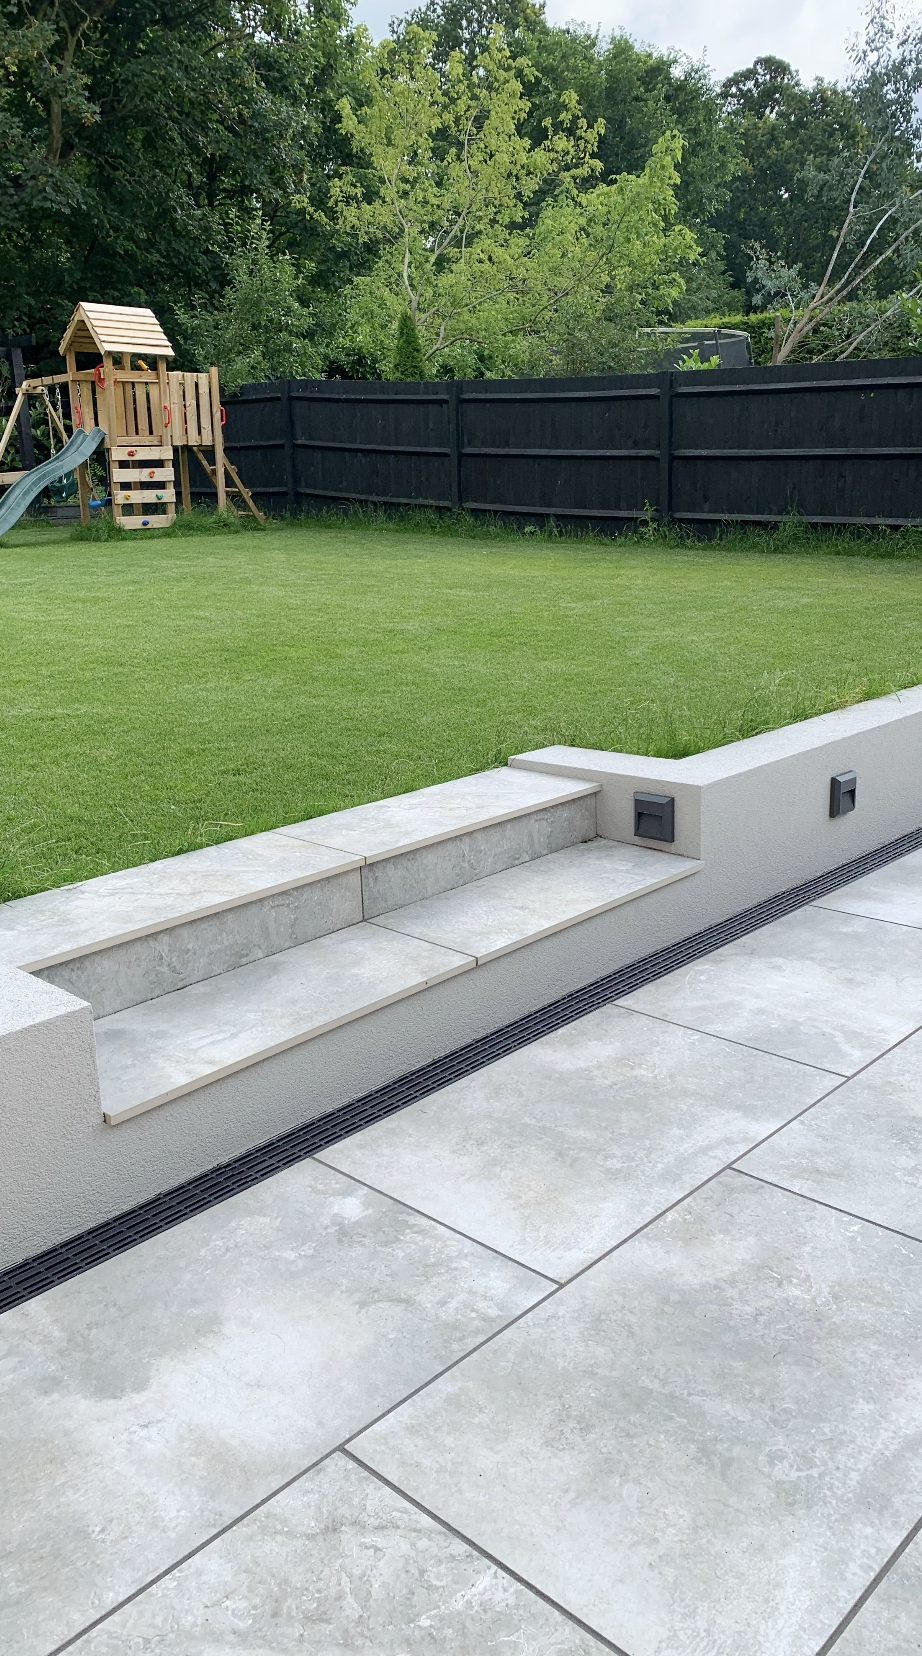
The Burlington Silver Outdoor porcelain Tile from CTD which are 900x600x20mm.
We also bought some external outside wall lights which were from a local lighting shop.

The Burlington Silver Outdoor porcelain Tile from CTD which are 900x600x20mm.

Then to accessorise the new patio we got some planters from Getpotted where I planted some olive trees, ivy and grasses to add texture to our patio.

The Burlington Silver Outdoor porcelain Tile from CTD which are 900x600x20mm.
We wanted to add an outside kitchen, but decided to wait until next year now. But have added the electricity in so we’re ready to add an outside fridge if we want too.
We’ve also added storage units down the side of the house to house all the outside cushions and gardening equipment until we build a bigger shed down the bottom of our garden.

The most commonly asked questions that I get asked on instagram about our tiles are '“ Do they get slippery when wet? “ . I can confirm that they don’t get slippery when wet. Having the textured surface and being R11 rated makes them ideal for external use in wet conditions.
Another question I get asked a lot is “Do they get hot in the sunshine”. I think Porcelain can get hot, So if your surface is in an area that gets a lot of direct sunlight- ie south facing, then choose a lighter colour tile to avoid burnt feet as the the darker tiles absorb the heat more than the lighter. This is why we went for these silver grey porcelain tiles.
Overall we’re delighted with our new patio, it’s made a huge difference to how we use this outside space as a family and it happened just in time for the summer which was an even bigger win in our eyes.
For more information or help with choosing your outside tiles, you can visit CTD Outdoor tile guide for more helpful hints and tips.
AD/ PR GIFT : This post is sponsored by CTD tiles. They have supplied me with gifted porcelain tiles in exchange for content. However, I wouldn’t write about anything that I didn’t love and wouldn’t want to recommend. I have paid for all works to be done including labour and extra materials such as drainage, sharps sand and cement and concrete.


