Natural Interior Design: How to Incorporate the Trend into Your Home

The natural Look has taken the interior design world by storm; neutral colour palettes, environmentally friendly furniture in rattan, bamboo and wicker and a focus on sustainable fabrics has meant that nature has never been so on-trend. With so many of us looking to ditch the plastic, it’s no surprise that investing in natural fabrics as opposed to man-made fibres is proving so popular, with a whole host of benefits. Natural fibres tend to last longer, meaning they don’t need to be replaced as often. They also biodegrade more easily and require less treatment when being processed, meaning less environmental pollution. And whilst the environmental benefits are huge, the trend itself is also having a serious moment, you only need to take a look at #homeinteriors on the likes of Instagram and Pinterest to see beautiful decor in shades of green, beige, brown and cream. The trend is so popular that it actually has its own name, being dubbed Biophilic Design, which means surrounding oneself with nature and natural materials in order to feel a connection with the outside world.

Natural Interior Design: How to Incorporate the Trend into Your Home

Natural Interior Design: How to Incorporate the Trend into Your Home

Rattan Furniture

Rattan furniture has really increased in popularity over the years and is a beautiful way to get the natural look at home. Both light yet hardwearing, rattan is being used in bleached neutral tones and organic designs and makes for a fantastically stylish alternative to your everyday wooden furniture. This trend originally made popular back in the 1970’s, screams bohemian style and is particularly popular for bed frames, storage and chairs. In fact, H&M home (which is a particular favourite of mine for home inspiration!) recently released a rattan furniture line which comprised of drawers, a chair and table which proceeded to rapidly sell-out, quickly becoming cult pieces within the home interiors community.

Rattan Bed

New Botanicals

The trend for green and leafy certainly isn’t a new one, but 2020 has seen a new form of botanical interiors being introduced. Leaf, floral and insect prints are all huge, with bee adorned soft furnishings and leafy wallpapers all featuring in the most stylish of homes. To really nail the trend, look for delicate patterns and subtle hints to the trend, I love the Sophie Allport bedding collection as it features a selection of botanical animals and insects, with everything from bees to flamingos adorning the accessories.

Sophie Allport Bedding

Sophie Allport Bedding

Japandi

We’ve loved the simplicity of Japanese style, along with the relaxed nature of Scandinavian style for many years, but now the two trends have merged to create the ultimate in cool-living, Japandi styling. The basic premise of this trend focuses on natural colour palettes; replace a bright white wall with a more chalky shade as your base, such as Farrow and Ball Slipper Satin, before building out your muted furniture in shades of green, blue and pink. That being said, the trend also dictates the use of darker, more moody tones to create a contrast, so look for accessories in shades of charcoal, emerald green and black to nail the trend.

Japandi style

Japandi style

House Plants

Indoor plants are a great way to bring the outdoors in, with many home renovators looking to incorporate foliage to really nail the natural design trend. To hit the trend within your own home, mix up a selection of hanging and potted plants for a three-dimensional space which is sure to transport you from home to a far-flung jungle destination.

House Plants

OUR RENOVATION JOURNEY: THE GARDENS PLANS- PHASE 2 WITH TREX COMPOSITE DECKING

It’s been two months since we had our garden levelled and cleared; all the old tree stumps and debris were removed, and we now have a pretty good blank canvas of a garden to start with.

Since I last posted my husband (with the help of our builders) even managed to fit an irrigation system in with pop ups located in the corners and centre of where the soon to be laid lawn will eventually go.

I mentioned before that since our garden is north facing, we want to add some decking to the bottom part of the garden as it’s a bit of a sun trap and so we can enjoy both spaces near the house and at the end of the garden, whilst watching our little boy play on the lawn.

This month I’m going to be working with composite decking brand Trex to help us on our way to creating our dream family friendly garden.

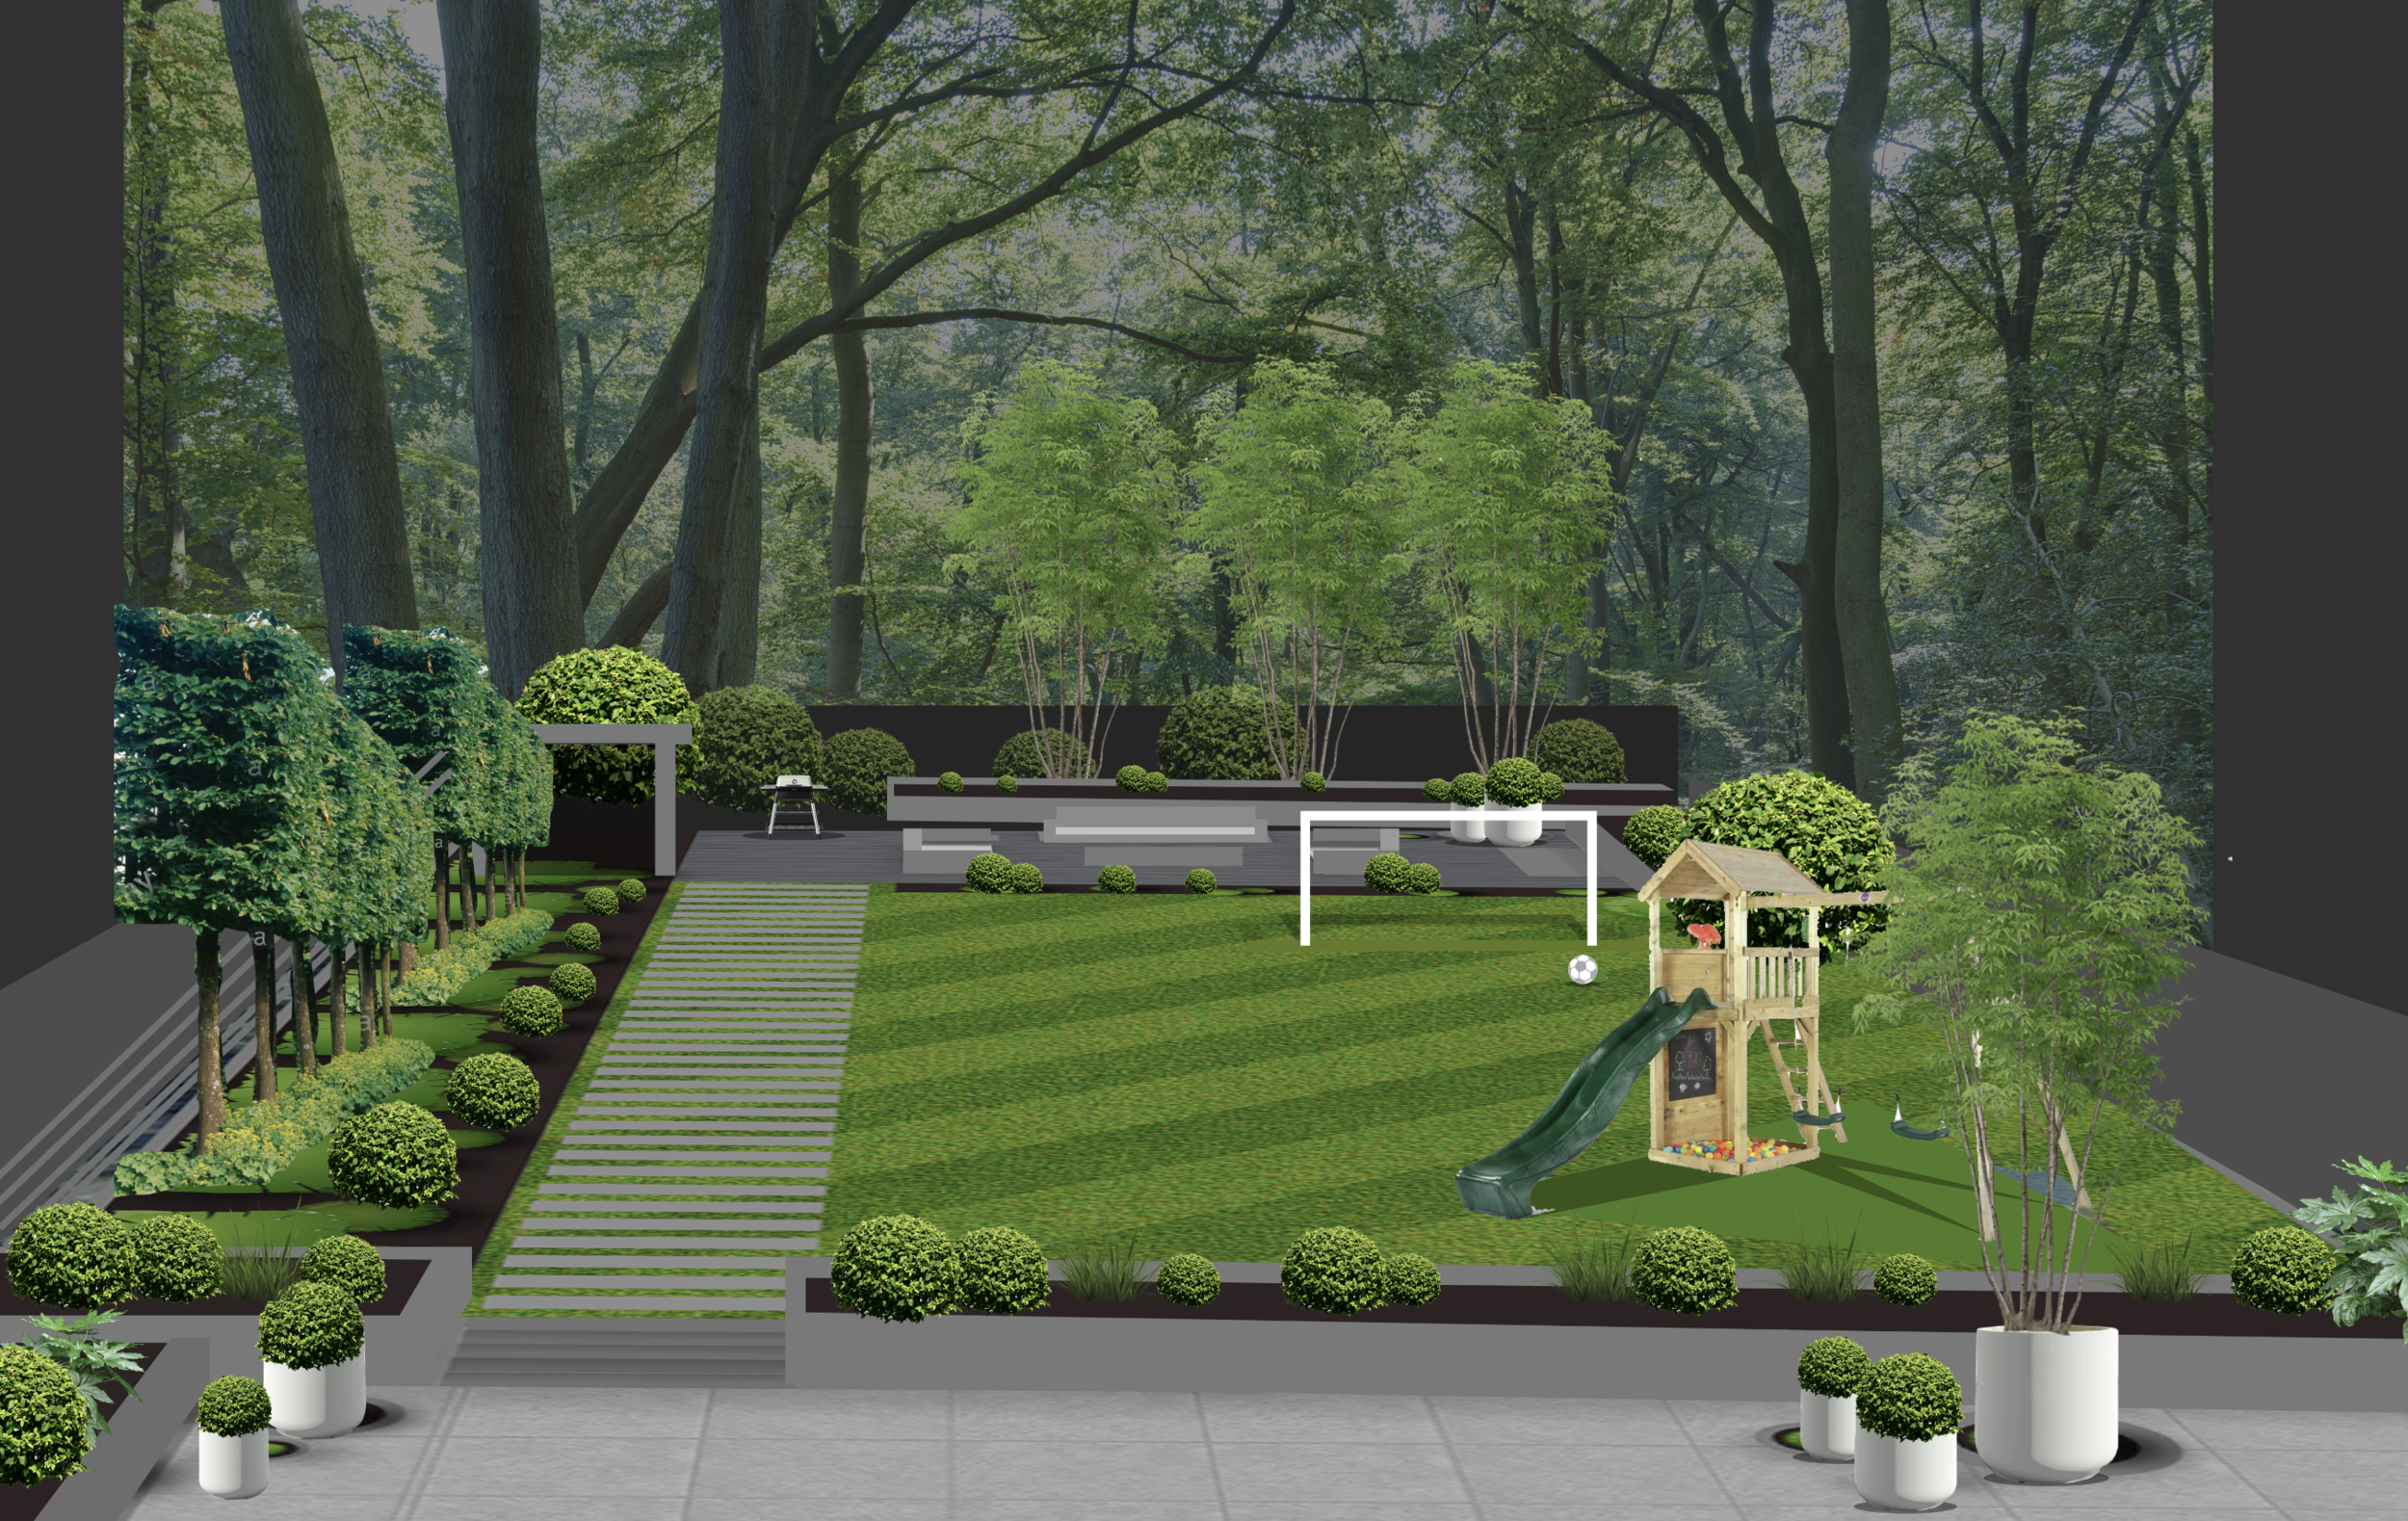
Together with Trex and their Trex approved fitter Steve from Living landscapes, they will be building a substructure from timber, which will then be wrapped in Trex® Protect™ beam and joist tape and then installing  8.5m x 4m of composite deck boards at the end of the garden with a 1m wide raised flower bed on the right also from decking.  You can see my vision below.

The garden plan is to have Trex Enhance composite decking area 8.5m x 4m wide at the back of the garden for lounging and for a bbq area.

The garden plan is to have Trex Enhance composite decking area 8.5m x 4m wide at the back of the garden for lounging and for a bbq area.

I’ve chosen colour ‘Calm Water’ from their Trex Enhance Naturals collection which is an almost black shade which will complement our soon to be painted black fences, I also love how greenery pops against black backgrounds and think with the trees behind it will look really dramatic. 

This is how the garden looks today before the decking work starts.

This is how the garden looks today before the decking work starts.

Ordering decking from Trex was super easy as they have an online calculator which is super easy to use and will give you a clear idea on how much the decking will cost before you factor in the labour. This is if you’re going to get someone else to do it for you.

Trex calculator

Theres also an easy – find a merchant /stockists and installers and even a button to help order some samples, so you can find someone local who is already Trex approved.

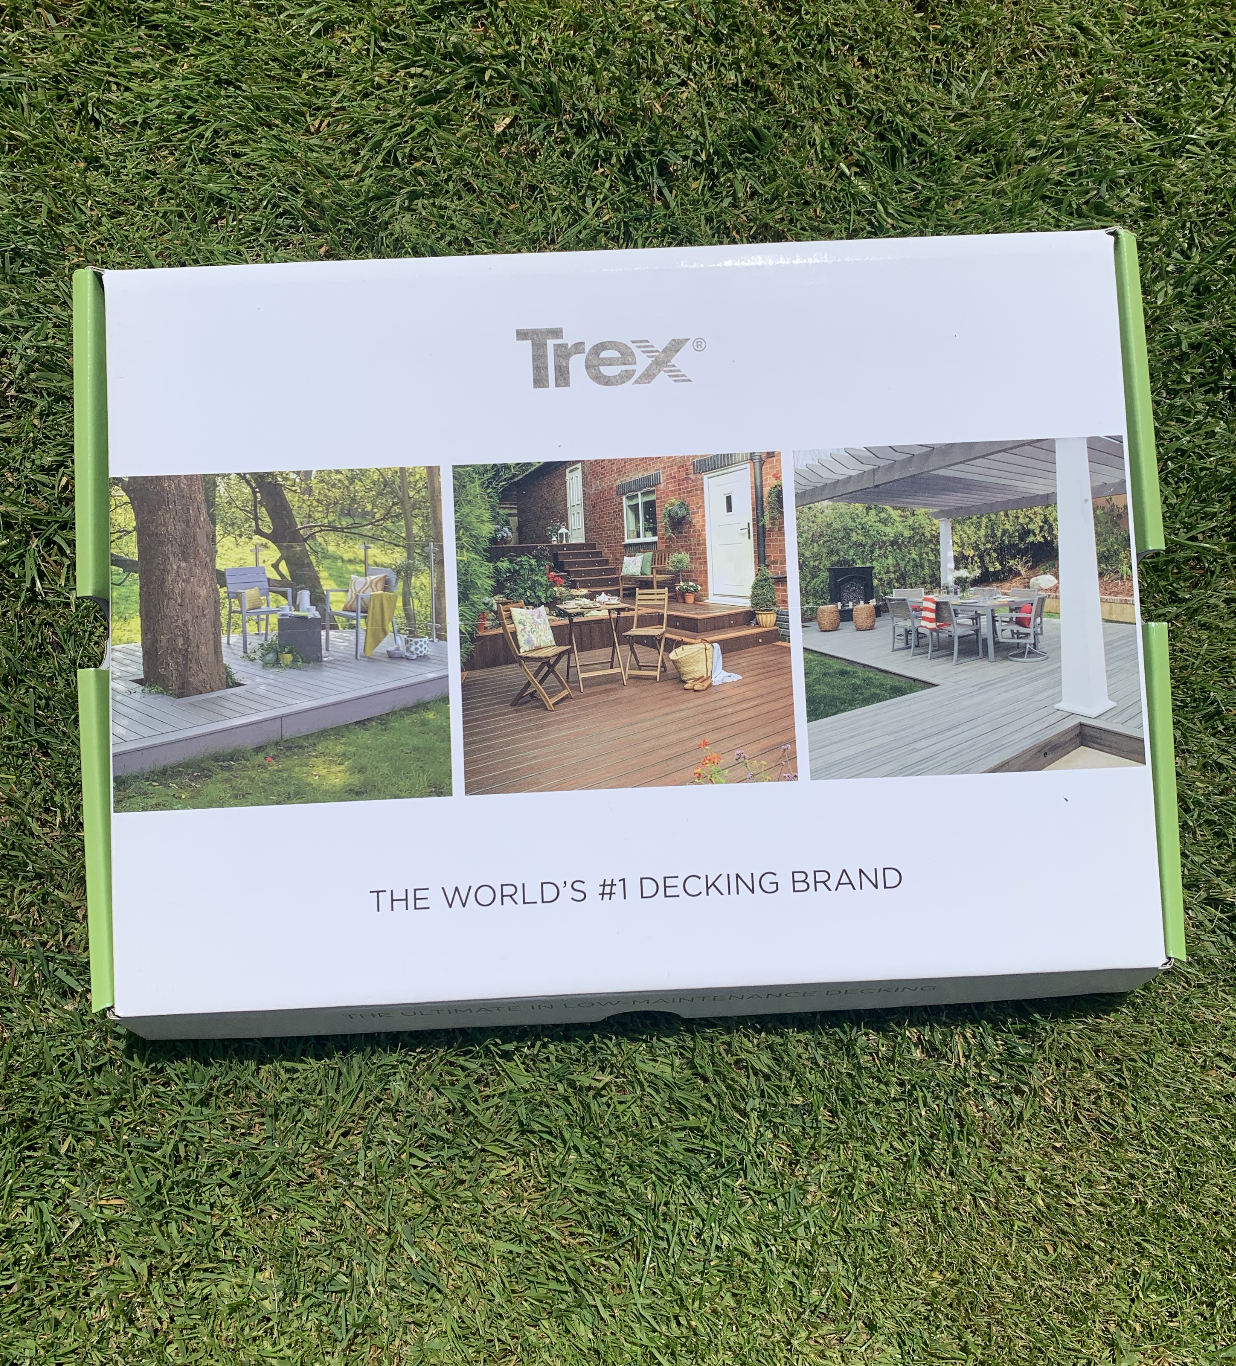
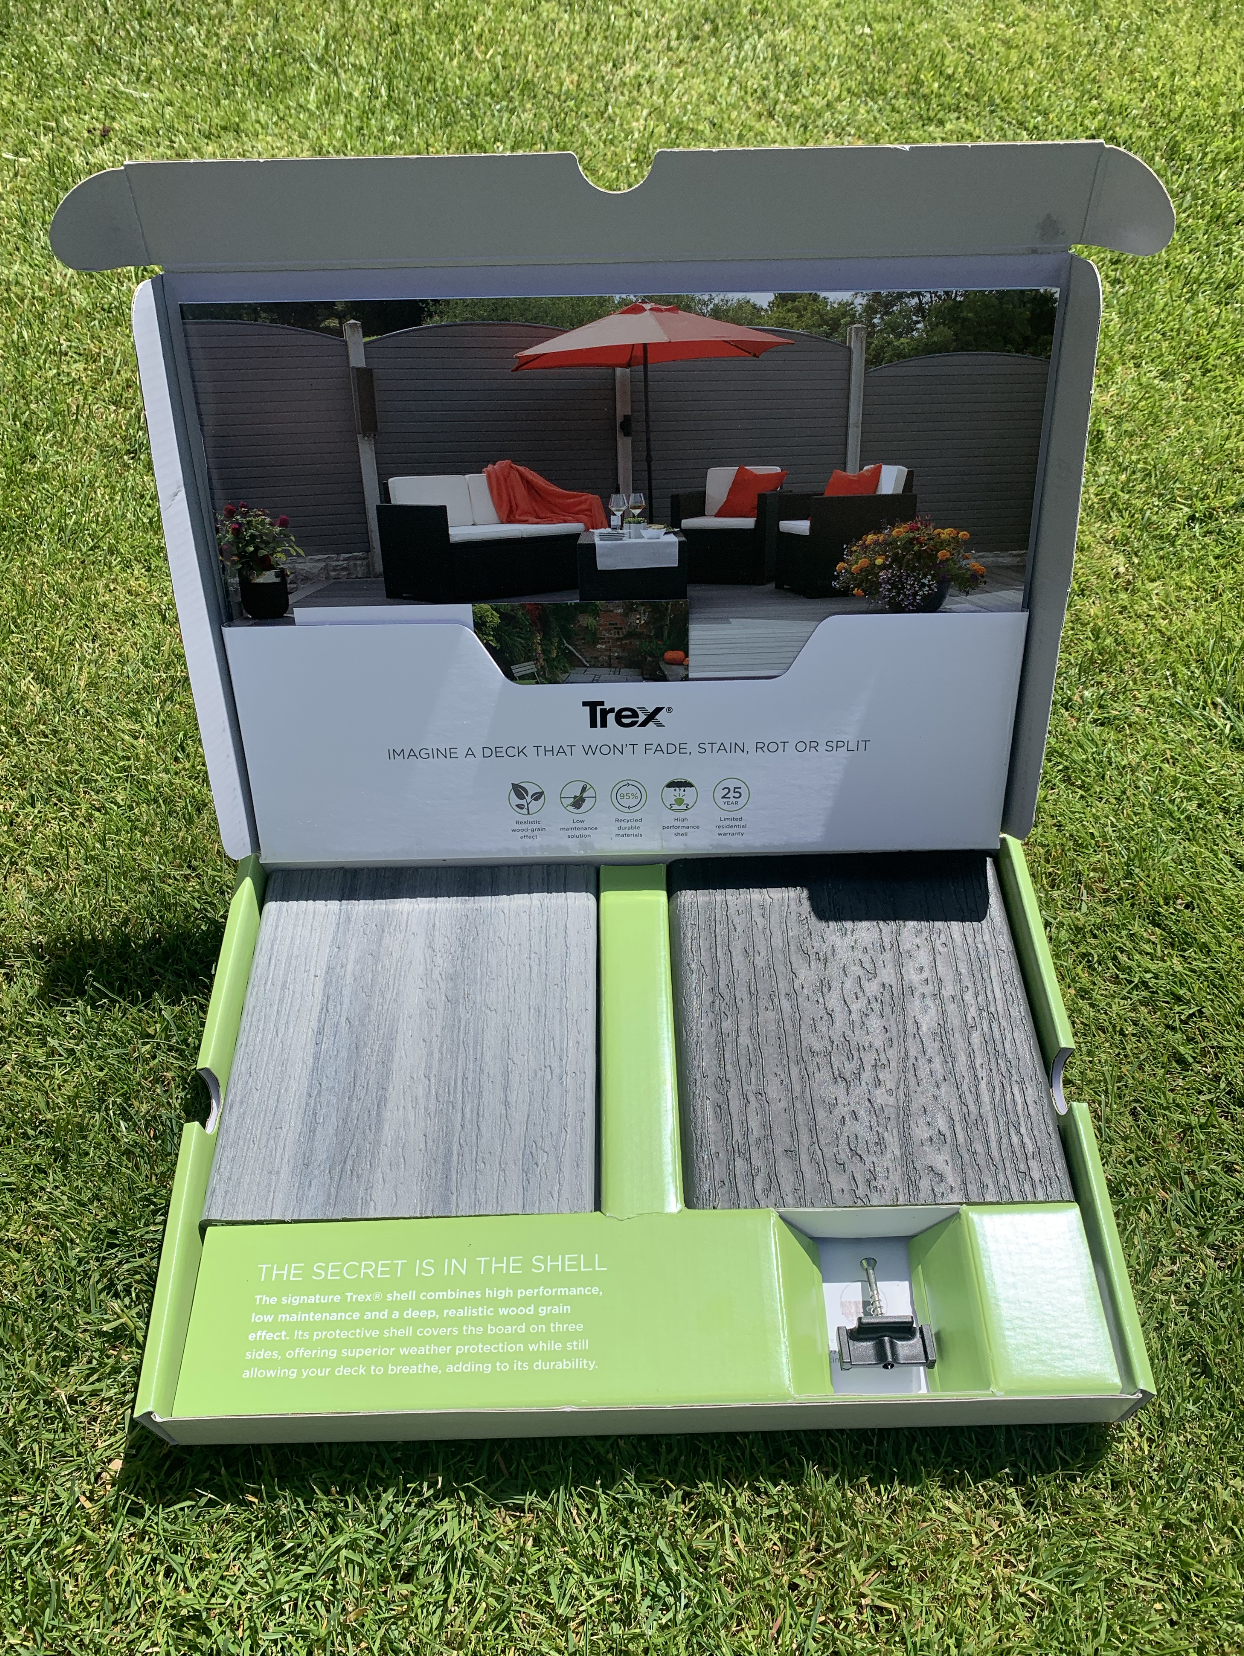
The samples even come in a very lovely well packaged box which you can see here.

Trex sample ordering is really easy

But why Trex? Well to be quite honest I have done A LOT of research on composite decking and Trex just ticked every box for me.

Their boards are low maintenance as they have perfected the perfect wood – alternative to decking meaning it never needs painting, oiling or staining.

It comes with a 25-year warranty (10 years if it was a commercial property), and lastly it’s made from 98% recycled materials. Their decks are made from 95% recycled sawdust and plastic packaging.. Additionally, Trex uses some of the most earth friendly manufacturing processes available, reclaiming factory waste and eliminating the use of harmful chemicals and Trex have never felled a single tree to make a deck board.

So really it was a no brainer. It looks great, will stand the test of time for durability and is eco-friendly and sustainable.

Who’s ready to see it being built? Stay tuned for more Trex decking updates throughout this following week

This post is sponsored by Trex decking. I am receiving gifted decking in exchange for my honest and real opinion.

OUR RENOVATION JOURNEY : THE PLAY ROOM/ DEN MOOD BOARD REVEAL

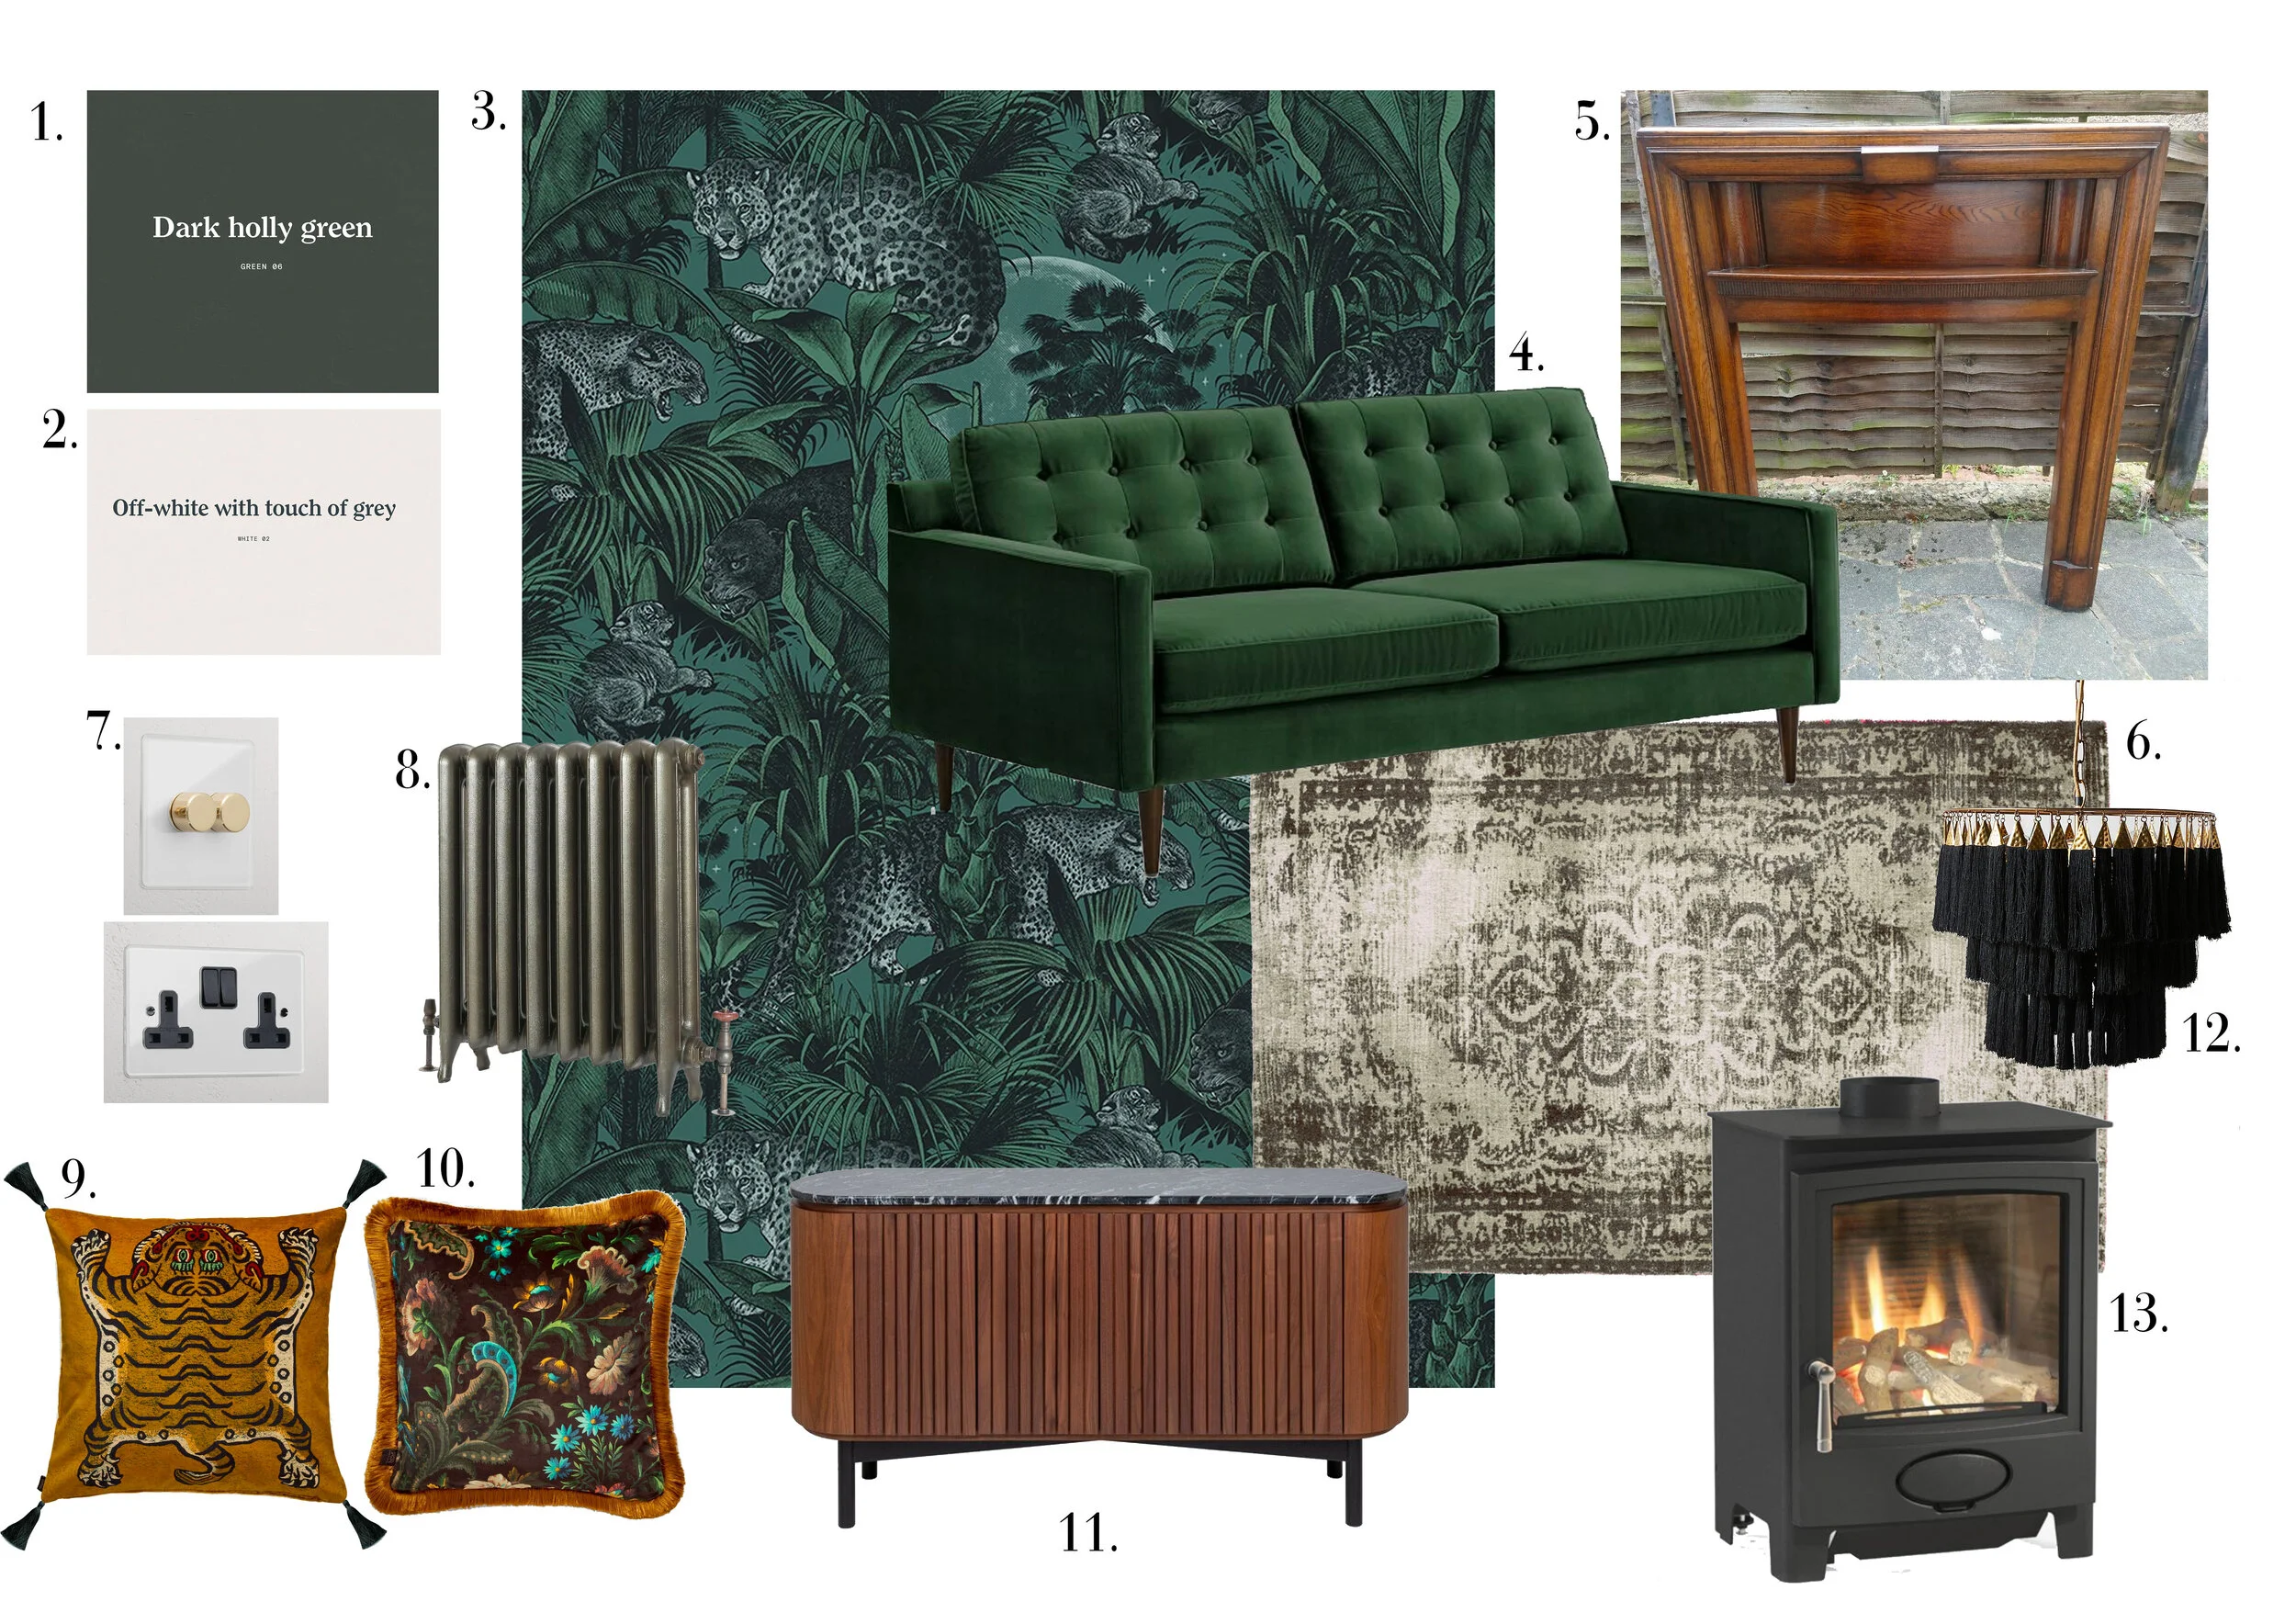
Jungle room play room moodboard

As we reach our sixth month anniversary of building work over at the ‘Rat House renovation’, I thought it was about time I shared one of my mood boards for our first room reveal.

Today I’m talking about our playroom/ den.

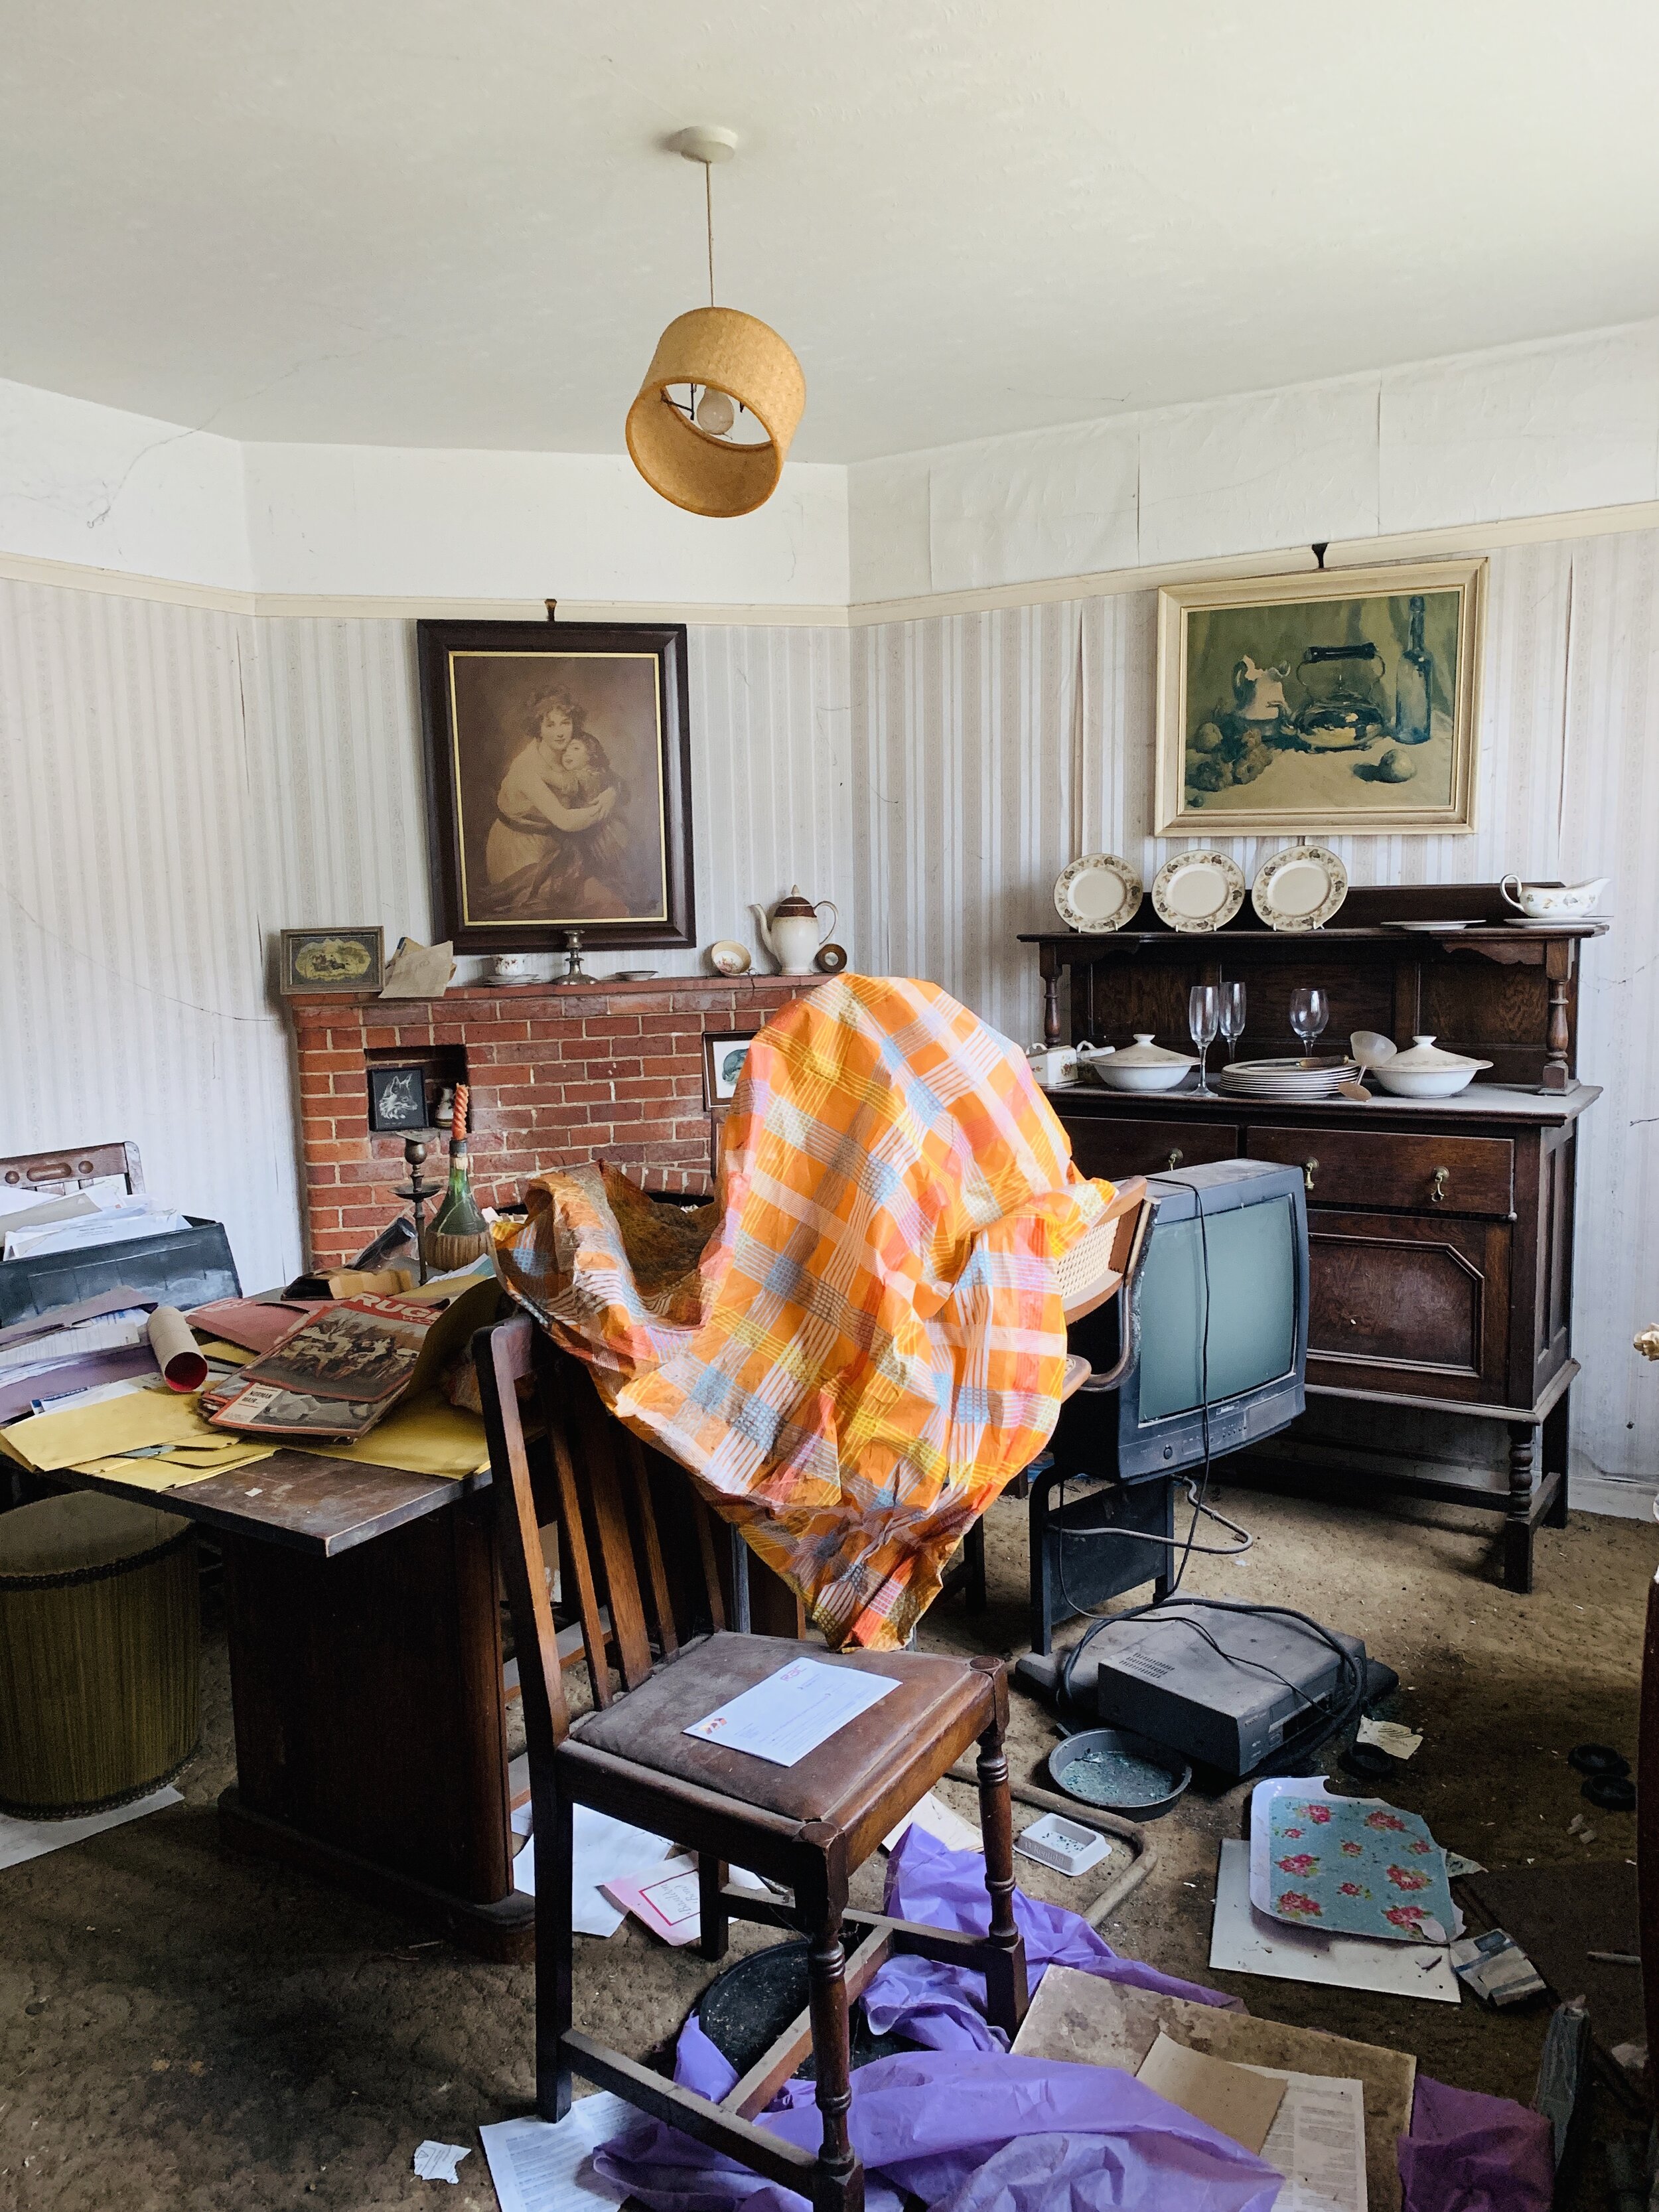
Located on the right side of the house on the ground floor, this room was previously used as a dining room by the previous owner. It was filled with antique furniture and a lot of rat poison (I’m not exaggerating- at least they were aware they had a problem), it had been left pretty neglected and hadn’t seen a duster or a hoover in a long old time, although it was easy to see that it must have looked beautiful in its former life.

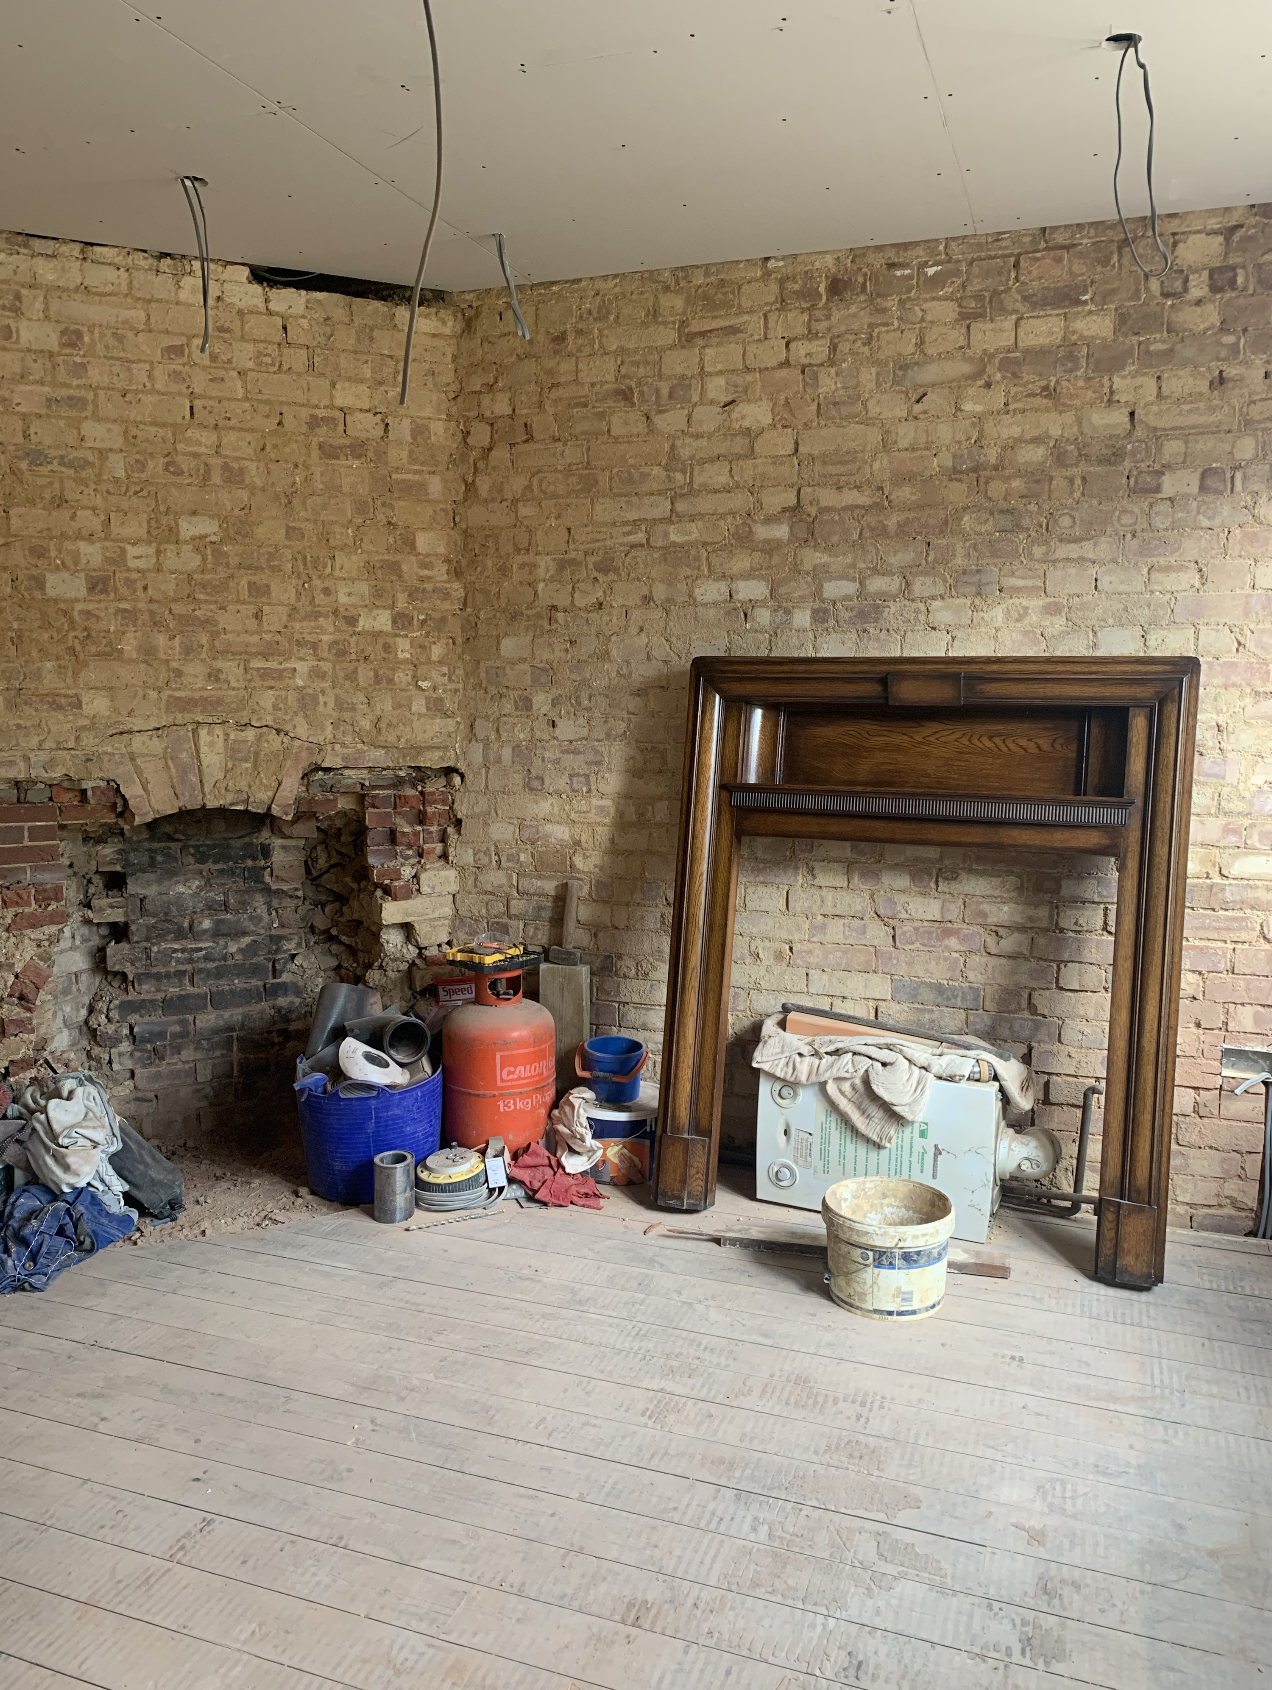
The evolution of the playroom

This room is now going to be used as a playroom for our little boy during the day, and a cosy den for us Adults in the evening. A space for us to retreat in to watch a movie whilst having the eco wood burner on from Arada stoves (I’ll talk about this more soon).

Although we will have a lounge across the hallway from this room, we love that this room is completely separate to the kitchen/ dining space and you can shut yourself away and have more privacy. Aka, when I have my mates round and we’re drinking Prosecco in the kitchen my other half can lock himself away with a tv and a cosy wood burner and escape from the cackles.

 We want the space to feel fun and imaginative for Otis, but also grown it up and quirky in the evenings once the toys are packed away. I’m envisioning this room becoming a musical room one day in hope we might own a piano for our son, and then will evolve into his X box room, and then one day his pre drinks space with his mates. Ha, yes I am already thinking that far ahead! And although I’m sure I will have decorated this room a trillion times by then, I’m hoping I won’t want to change it for at least a few years (he’s only 2 so I have plenty of time until then).

I still need to research storage, but I’ve got my heart set on a large sideboard for our grown up lounge across the hall and would also love something practical and hardy for storing toys inside in this room. For the playroom I don’t want it to look too childlike, but it also needs to pass the toddler durability test. I saw a beautiful sideboard at a Heals press event which I literally dream about day and night, but sadly its out of my price range (even in the sale), and I’m under no illusion that this would work for a playroom, but I’ve still stuck it on here anyways as you should all see it.

We will also have a tv on the wall, away from little hands, which will also be handy as it will take up less space.

 But back to the wallpaper, and the theme. Because let’s face it, that’s why you’re all here.

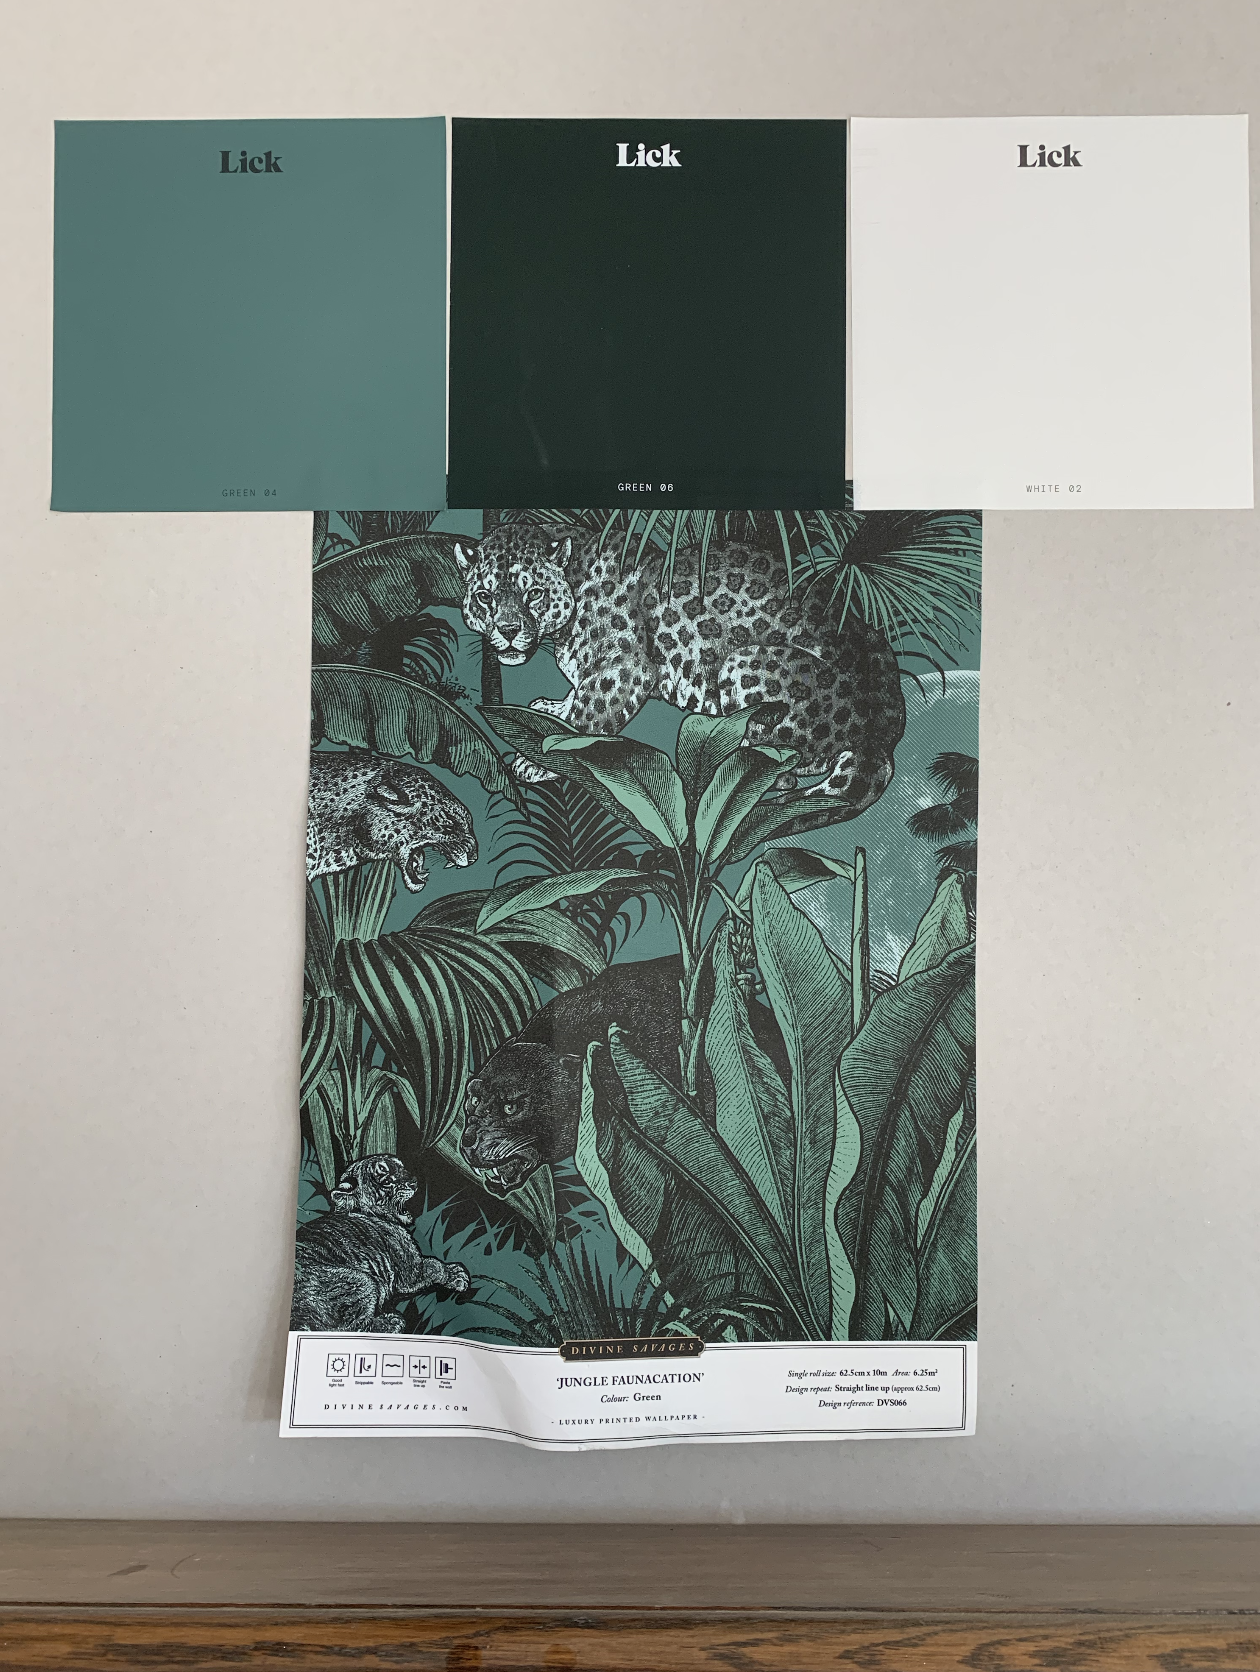
If you haven’t guessed already, we’re going for a subtle jungle theme in here. As you know we’re big fans of jungle prints, so it was inevitable that we should continue this theme into our new home. Plus, being a massive fan of Divine Savages and their beautiful wallpaper and prints and having had their Deco Martini wallpaper in our previous home I was super excited to see that they had launched a new colourway of their Faunacation print into the jungle greens, so it seemed like a match made in Rat House heaven.

And yes, I know what you’re thinking. I said I wasn’t going dark… I just like to keep you on your toes *wink. What I probably should have said is that I’m not going to have any Railings paint in our house which was a bit of a trademark paint colour in our old home. So much so, I wish I’d got ruddy shares in the stuff we had so much of it. But it’s time for a change, and this time I’m also giving some new paint brands a whirl to see how they stack up as I think it’s time for some new kids on the block.

We’re putting picture rails back up and will be wallpapering up to the picture rail and then painting above it in new paint company Lick Green 06 in Matt, then using Lick Green 06 eggshell on the woodwork and using Lick 02 white on the ceiling. Lick are a new paint brand which I discovered in lock down and I’m excited to see how their paint compares.

We’re getting some gorgeous new cast iron radiators from Best Heating for this room and for our grown-up lounge across the hallway- these are the Milano Tamara oval column in antique brass from Best Heating and are just stunning.

 We’ve removed the old brick fireplaces that used to be in this room and the main lounge and we have replaced the fireplace in this room with with a beautiful eco burner from Arada Stoves for extra heat, and I’ve bought an original 1930’s deco wooden surround  on ebay for a bargain £150 which I want to leave in the wood to contrast with the wallpaper and side board. And even though we have stripped the house back to the bricks and removed the original features, we’re hoping it will still have bags of character from what we put back in.

To furnish it, we will be super excited to be reunited with some of previous belongings which will fit nicely into this space, including our West Elm Drake green velvet sofa and Distressed Arabesque wool rug in steel for this room, and layering some of my favourite House of Hackney cushions which have accents of gold and teal to being some new colours into this space.

 I’ve also found some beautiful lacquered brass transparent light switches and sockets which are amazing to go over the top of wallpaper from Corston Architectural detail. They’re clear so let the wallpaper shine through whilst still being practical and having a pop of brass which I think will look amazing in this room.

 That just leaves me with deciding on a light and curtains. I’m hoping for something with a bit of drama like the attached Anthropologie Victoria tassel light or something similar.


So what do you think? Was it pretty obvious that we’d go jungle somewhere? You never know, the giraffe might even make an appearance in here at some point. You’ll just have to watch this space.

JUNGLE DEN ROOM MOOD BOARD
  1. Lick Paint Dark Holly Green 06 in Matt for the wall above the picture rail ( £38 for 2.5L)

  2. Lick Paint Off White 02 in Matt - for the ceiling (£38 for 2.5L)

  3. Divine Savages Jungle Faunacation wallpaper (£140 a roll)

  4. West Elm Drake sofa in Green Velvet ( £1,099)

  5. 1930’s original wooden surround purchased from Ebay £150

  6. West Elm Distressed Arabesque Wool Rug in Steel and £449

  7. Corston Architectural detail switches and sockets from the £28

  8. Best Heating Milano Tamara - Oval Column Cast Iron Radiator - 760mm Tall - Antique Brass from £229 

  9. House Of Hackney Saber cushion £195

  10. House of Hackney Florika cushion £165

  11. Heals Remi sideboard - large £2,639

  12. Anthropologie Victoria tasselled light £298

  13. Arada stoves eco burn from £879

I’ve also done a bit of research on beautiful sideboards as I’m currently looking for two and have become sideboard obsessed.


sideboard research

OUR RENOVATION JOURNEY : THE GARDEN PLANS - PHASE 1

Taking on a home renovation is one thing but being ambitious enough to start a garden overhaul alongside it is another. Throw in a lockdown and a global pandemic and some might think I’ve completely lost my mind.

But the truth is, and if you know me then you’ll know this already, I’m pretty stubborn and even though our last house took years to get it how we wanted it, we didn’t have a two-year-old toddler in tow back then. Everything’s now ramped up to make our home as safe and secure as possible before we move in, because it won’t be long until we move in and have a little person wanting to use the outside space. Plus, with the emphasis on staying at home more, we want to be able to use our garden how we intend to from the offset.


I recently wrote a blog post about building work and all the extra costs which no one ever talks about and keeping money back for the garden was high on my list. It’s ironic really, as even though I know this, I haven’t taken my own advice and our garden budget is dwindling and I’m starting to spend the garden budget on tiles and taps, which for me are essential right now. Building work is tough as it is, extra costs can creep up and the garden is often neglected even though it’s never been so important now we’re in lockdown.

This is why I’m keen to crack on with it regardless, even if we do it in phases.


When we bought the house, the garden had been hugely neglected. This is no exaggeration; it was an actual jungle. Huge trees, brambles and no sign of a fence either side or at the back. We only ever walked through it once we had completed on the house which was probably pretty stupid as we didn’t even know how big the plot actually was. (You can view the jungle garden here on You Tube as my friend flew his Drone over it).


We had the trees chopped down straight away (luckily no TPO’s on our plot), mainly because they were dangerously big, too close to the house and one was split with a high risk of falling down. We then had the rest of the garden cut back and cleared.

It was great and it enabled us to start our building work once we got our planning permission. However, all the tree stumps remained and even worse, the tree roots were unseen underground, which left the garden pretty wonky and uneven.

Screenshot 2020-05-23 at 22.38.01.png
1588660330236489 2.JPG


But we have BIG plans….


House Lust garden design

Our plans involve laying a large 4m deep patio across the back of the house and a 4m deep decking area at the back of the garden (it’s north facing, so this way we can enjoy some sun all day long). As the garden isn’t even, we need the tree roots removed, and the garden levelled as much as possible.

We need to build a retaining wall next to the patio to compensate for the slope of the garden, add drainage near the house for the patio, add concrete bases for the patio and the shed/ studio, lay paving slabs and then lay a luscious lawn. Down the line we would eventually like to add a studio/shed as I mentioned, down the bottom of the garden which will need electricity -so we’re adding the pipe for this now to future proof ourselves.

As well as all that, we’d also like to replace a fence down the left side, plant new trees and plants and cut boarders in and have some rendered flower beds for more plants.

House Lust garden design.

With all that in mind we have decided to do the garden in phases so we can manage our budget appropriately.

I always recommend getting at least three quotes per job so you can compare prices, and we did just that and decided to use a landscape gardener from Hoppy.co.uk to do the job.

Because we’re in a lockdown and in the middle of a global pandemic it did make getting quotes harder but because the garden is separate to the house build which is on-going, the landscaper and his team of labourers were able to work in isolation to the other builders.


So, this is phase 1 of our garden plans… (Time to do- approx. 5 days)


Days 1 -3   

The team of landscapers arrived, armed with diggers and dumpers ready to tackle the mother of all tree stumps at the back of the garden.

This was something they underestimated in terms of size, as it was a real beast of a stump and it ended up taking almost three days to grind down, dig around and then fully remove.


They removed many other tree stumps too, one which was even under our fence, and one quite close to the house, but these came out relatively easier in comparison using the digger, and they also cleared all the old debris – broken glass and timber which had been left by the previous owner.

Screenshot 2020-05-23 at 22.52.48.png
ee066b1d-ac6d-4747-b67d-c393b673d363.JPG

Day 4  

They dug the hole for our soak away drain which was needed for our rainwater to be connected up for our house.


Then they laid a pipe for electricity from the house to the back of the garden– future proofing us if we want electricity at the other end of the garden for a studio later down the line.


Day 5

They levelled the garden into two levels, one near the house, ready for a concrete base to go in on phase two, and eventually to have patio slabs laid and the second level for the lawn and decking area. This involved levelling an old mound at the back of the garden.


They also removed all the tree stumps, excess soil and debris which was in the garden.

Thank you Hoppy.co.uk lads for working so hard.


We are delighted with the work and now it’s just got us itching to start phase two of the garden where we can start making it look pretty with concrete bases, slabs and retaining walls. But Rome wasn’t built in a day, and I am not Beyoncé, so for now this will have to wait.


House Lust Garden - phase 1 complete
Rat House garden

This post was sponsored by Hoppy. All opinions and views are 100% my own.