
HOW WE ADDED AN ARADA STOVE TO OUR HOME RENOVATION
/Ad/ pr gift. Arada stove kindly gifted us the Stove. All labour and extra materials for fittings and fixtures were paid by us.
I’ve always wanted a wood burning stove. There’s something quite romantic and quaint about them, and ideal for a chilly Britain when the weather turns.
When we first viewed our beloved ‘Rat house’ and saw that it already had two 1930’s original brick fireplaces downstairs, we knew one of them had to be restored for a wood burner to sit in its place.

The original Brick fireplace at the Rat house.
The research
Whilst researching Wood burner stoves, the one thing that was really important to me, was that it had to be eco friendly. I know theres a lot of talk about wood burners not being efficient, so it was important to me to pick one that was eco design ready and had low emissions to have the longevity.
I also decided to have it fitted in the smaller of the two reception rooms, which is also our snug room, so picking one with the right heat output is important too. As its a small-ish room, I needed one that had a 4-5kw output.
With this in mind I chose the Solution 5 Smoke Control (S3) from Arada Stoves.
This clever little Arada stove is Ecodesign ready, has high efficiency and gives off low emissions. It’s also suitable for burning wood and multi fuel. Plus it has a heat output of 4.9kW output so was the ideal spec for our snug.
The fitting
This is where we called in the experts, aka our builders who are the kings of all things structural. Because taking an existing fireplace involves some structural work where lintels are involved. (Lintels are the joists holding the chimney stack up- so quite important not to mess around with if you don’t know what you’re doing).
Our builders safely removed the existing Brick fireplace which by the way I have zero regrets about removing. Yes it was original, but it was FUGLY and I didn’t want it in our home for a second longer. And at the end of the day, you’ve gotta do what you want, for your home. Plus we were adding character back in with a stove, as thats what they do.

The removal of the brick fireplace
Once the fireplace was removed we called in an expert chimney sweeper to give the chimney a really good clean out in preparation.
Then, this is where it gets a little bit more tricky- we needed to line the chimney with a flexible chimney flue liner in order to fit a stove. Now, luckily for us our builders are skilled in this area, otherwise we would have had to call on a Wood burner expert to fit it for us.
It involves someone climbing up on the roof safely, and threading the flexible Flue liner down the chimney - until it reaches the exit in the snug. Luckily we had scaffolding up during our build, so I’d recommend doing this whilst you’re having your building work done and not adding it after. Or you’ll need a very long ladder and someone else inside to help pull the flue liner through.


This is the Plane register plate 1000mm x 400mm (To block chimney off above our stove. It allows the flexible flue pipe to run through and meet the enamelled stove pipe. This plane register plate was part of the kit from Trade Price Flues.
I bought a kit with a 15m Flexible flue from Trade Price Flues, which you can buy from here. Because of our high chimney our kit cost £414 which is the going rate for these sorts of kits.
Super Flex Chimney flue liner (To line your masonry chimney) we chose a 15m one for ours .
Plane register plate 1000mm x 400mm (To block chimney off above your appliance and your stove pipe to run through)
Stove pipe to Super Flex adapter ( To connect to your stove pipe to your Super Flex chimney liner)
1000mm (1m) matt black vitreous enamelled stove pipe (To insert into the spigot on your stove / appliance)
Pot Hanger Rain Cap (To suspend flue liner at the chimney pot)
Nose Cone ( To attach to your Super Flex Flue liner for installation)
Carbon Monoxide Alarm (To make you aware carbon monoxide is present if there is a problem)
500g Black Fire cement to join your stove pipe to the spigot of your stove / appliance)
Altho the kit came with a 1000mm (1m) matt black vitreous enamelled stove pipe (To insert into the spigot on your stove / appliance), we needed to buy a thicker twin wall insultated enammed stove pipe to meet building regs on our build, so bought this one from Amazon- 500mm Length Twin Wall Insulated Flue Pipe Inc Locking.

The much thicker twin wall insultated enammed stove pipe to meet building regs on our build. We bought this one from Amazon- 500mm Length Twin Wall Insulated Flue Pipe Inc Locking.

This is what 15m of Flexible flue from Trade Price Flues looks like ready to go inside our chimney.
The Design
I now had to decide how I wanted to incorporate he Wood burner into the snug and make a feature out of it. As our house is a 1930’s and I had taken the original brick fireplace out, I managed to find an original 1930’s wooden fireplace surround on eBay for £26, plus the £20 delivery to get it to us- so it was an absolute bargain and something that felt like fate.

I found this original 1930’s wooden surround on Ebay for £26.
For the hearth I went to my local stone masons yard and asked if they had any off cuts and they managed to cut a piece of quartz stone for me for £40. It’s definitely worth asking them if you’re looking for one too. Plus this way you can have it custom cut to any size, spec and colour.
For the wall lining the wood burner, I chose the Torran Marquina Tiles from Topps Tiles, which are a black marble effect tile. These are the 60 x 30cm rectangular size and are suitable to be used for Multi-Fuel Stove Surrounds. At £6.64 a tile, and only needing 12 tiles, these were also a bargain to complete the look.
Our builders did all the fitting of the whole thing, installing the hearth, wall tiles, flue and connecting up the Arada Stove.
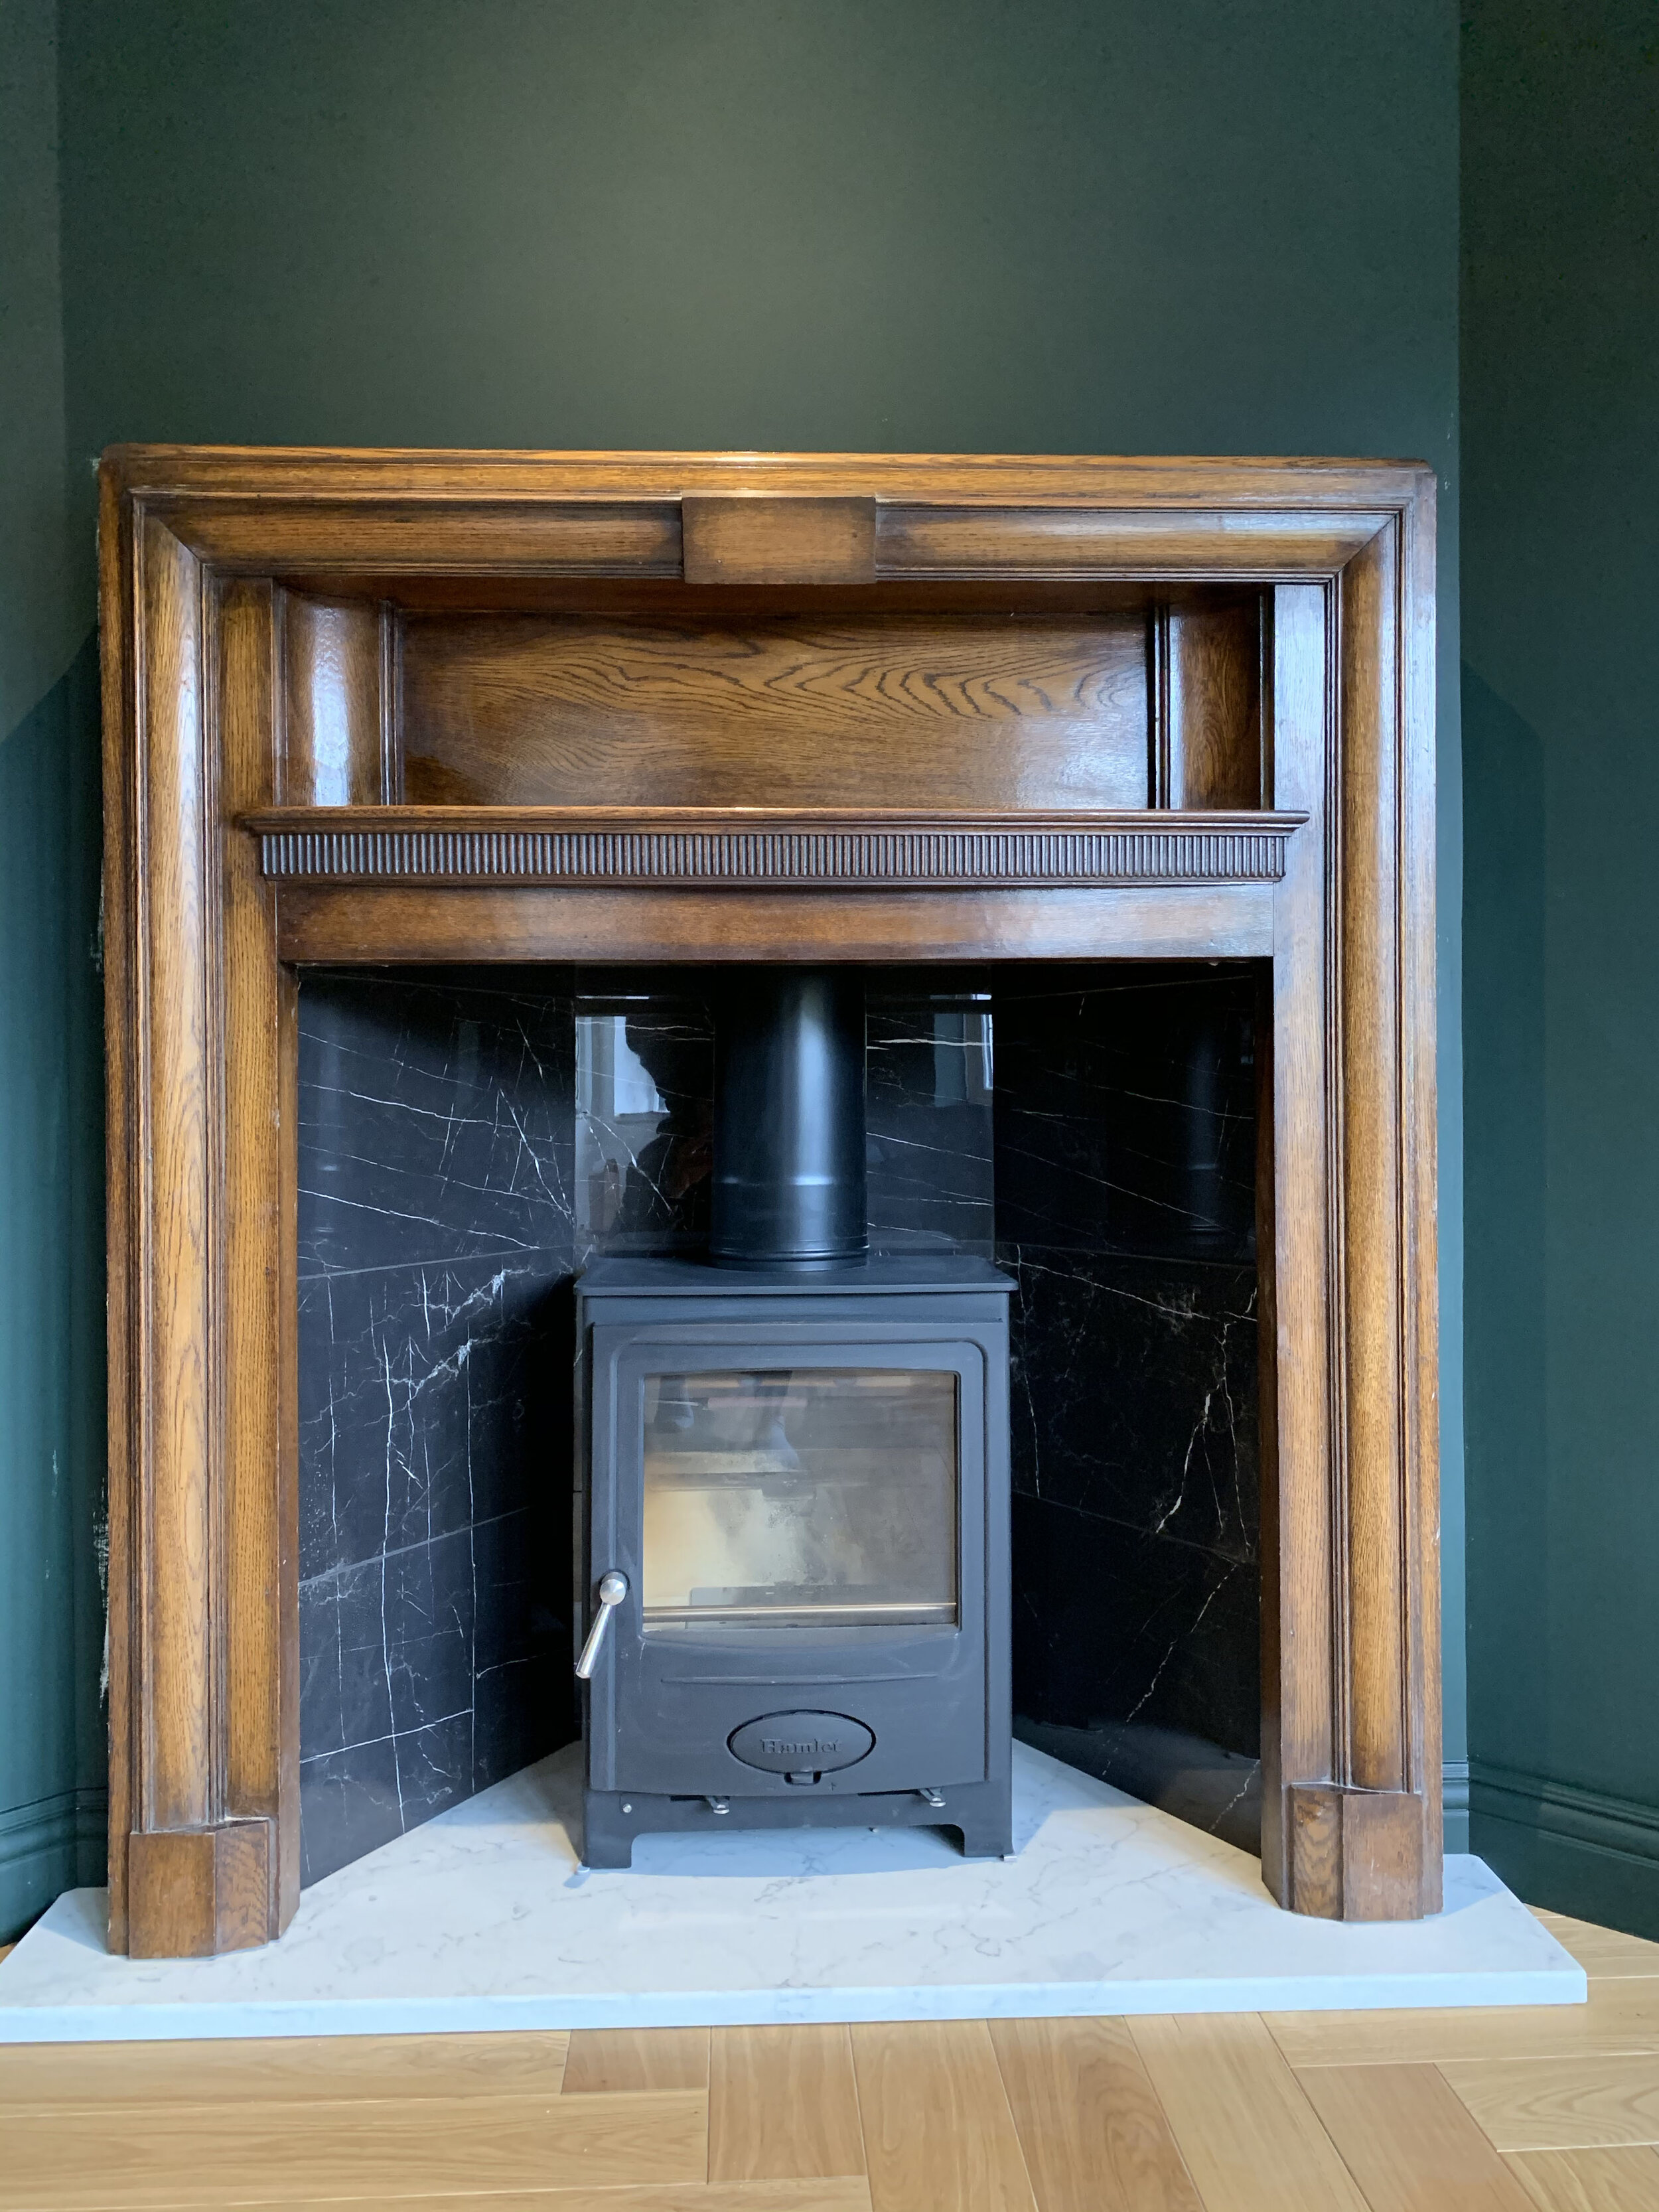
Our Solution 5 Smoke Control (S3) Arada Stove, Vintage 1930’s surround from Ebay, Torran Marquina black marble Tiles from Topps Tiles, in 60cm x 30cm size and the stone hearth was sourced from a local stone mason, Lick Paint Dark Holly Green 06 in Matt for the wall above the picture rail ( £38 for 2.5L)
We also fitted a Carbon Monoxide Alarm on the ceiling, which is essential when fitting a wood burner stove or fireplace in any home. Once it was all fitted and tested, it was all signed off by building control as it was part of our build.

Our Solution 5 Smoke Control (S3) Arada Stove, Vintage 1930’s surround from Ebay, Torran Marquina black marble Tiles from Topps Tiles, in 60cm x 30cm size and the stone hearth was sourced from a local stone mason, Wallpaper is the Jungle Faunacation from Divine Savages , Lick Paint Dark Holly Green 06 in Matt for the wall above the picture rail ( £38 for 2.5L)

Christmas time with our Solution 5 Smoke Control (S3) Arada Stove, Lick Paint Dark Holly Green 06 in Matt for the wall above the picture rail ( £38 for 2.5L)

Christmas time with our Solution 5 Smoke Control (S3) Arada Stove, Lick Paint Dark Holly Green 06 in Matt for the wall above the picture rail ( £38 for 2.5L)

Christmas time with our Solution 5 Smoke Control (S3) Arada Stove. Wallpaper from Divine Savages - Jungle Faunacation, Lick Paint Dark Holly Green 06 in Matt for the wall above the picture rail ( £38 for 2.5L)
It’s now in and ready to use and we absolutely love our Arada Solution 5 Smoke Control (S3) wood burner. I’m so happy we decided to add one to our snug. It brings warmth when we don’t want to whack the heating on, and feels magical having it fired up now it’s Christmas. It was truly the best idea, and brings character to a previously bland room which had a fugly brick fireplace and wasn’t too difficult to convert the already working fireplace into a safe space for an Arada Wood Burner.
Arada Stoves kindly gifted me the Solution 5 Smoke Control (S3) stove with no obligation to post. All thoughts and opinions are 100% my own.
If you want to read more about the design of our snug you can read it here.
